Introduction
Welcome to our guide on how to install a ground bar for a server rack.
Now, you might be wondering, why is a ground bar important for a server rack?
What is a ground bar?
In simple terms, grounding is the process of connecting electrical equipment or devices to the earths surface.
A ground bar serves as a central point for grounding various electrical components in a system.
The ground bar is designed with multiple holes or terminals to accommodate the connections of ground wires.
Ground bars are commonly used in various applications, including residential, commercial, and industrial options.
Why is a ground bar important for a server rack?
A ground bar plays a critical role in ensuring the safe and reliable operation of a server rack.
Here are the key reasons why a ground bar is important for your server rack:
1.
Equipment Protection: A server rack often houses expensive and sensitive equipment.
A ground bar helps divert excess electrical energy away from the equipment, offering protection against these electrical disturbances.
This static charge, if discharged suddenly, can damage electronic components.
Noise Reduction: Electrical noise or interference can disrupt the proper functioning of server components and degrade performance.
It creates a stable and reliable grounding system, safeguarding both the equipment and the individuals working with it.
Heres a list of what youll need:
1.
Ground bar: Youll need a ground bar that is suitable for your server rack.
Choose a high-quality ground bar made of copper or aluminum, as these materials provide excellent conductivity.
Screwdriver: A screwdriver will be needed to secure the ground bar to the server rack.
Ground wires: Youll need green or bare copper ground wires to connect the devices to the ground bar.
Wire strippers: Wire strippers will be required to remove the insulation from the ends of the ground wires.
This allows for proper connection and ensures good conductivity.
Choose wire strippers that are suitable for the gauge of the ground wires you are using.
Personal protective equipment (PPE): Safety should always be a priority when working with electrical equipment.
Here are the steps to follow when selecting the location:
1.
Consider proximity to power source: Locate the ground bar near the power source for the server rack.
This allows for shorter ground wire connections and reduces the risk of electrical interference.
Easy access to the ground bar is essential for installation, maintenance, and future modifications.
High temperatures can affect the conductivity of the ground bar and compromise its effectiveness.
Take into account the size of the ground bar and any additional hardware required for mounting.
Consider rack grounding standards: Familiarize yourself with the grounding standards and regulations relevant to your specific setup.
This will help avoid the need to relocate the ground bar later on.
Step 2: Prepare the Server Rack
1.
This ensures your safety and prevents any potential electrical hazards during the preparation and installation process.
ensure there is enough space for the ground bar and easy access for wiring connections.
A clean surface ensures a secure and optimal connection between the ground bar and the rack.
This is usually a metal bar or terminal strip to which the ground wires are connected.
Ensure that it is in good condition and suitable for grounding purposes.
If there is no existing grounding point, proceed to the next step.
Clean the surface of the rack at the chosen point to ensure a proper connection.
good idea to use a grounding stud or grounding lug that is specifically designed for server rack grounding.
Check for proper rack insulation: Inspect the server rack for any signs of damaged or deteriorated insulation.
By properly preparing the server rack, you establish a solid foundation for the installation of the ground bar.
Step 3: drop in the Ground Bar
1.
Give it a gentle tug to ensure there is no movement or looseness.
This ensures the optimal conductivity and effectiveness of the ground bar.
This can be helpful for maintenance or future modifications of the server rack.
Always refer to the manufacturers instructions for specific guidance.
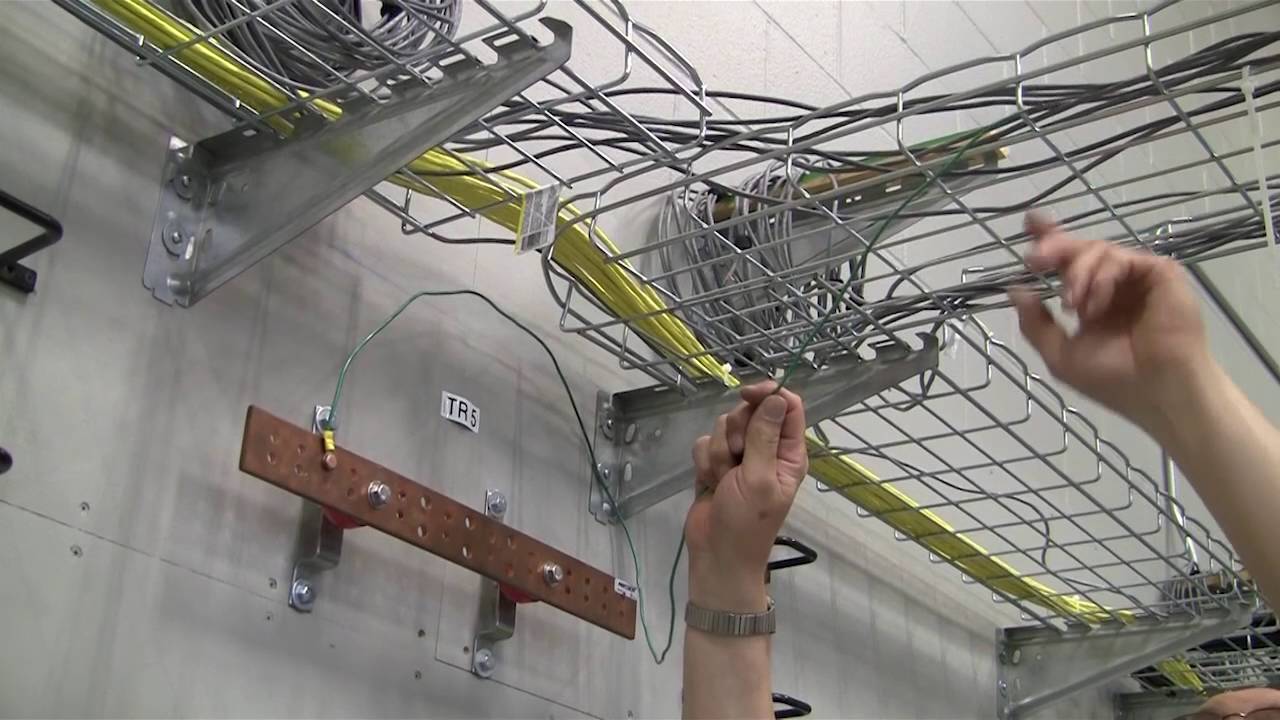
Step 4: Connect the Ground Wires
1.
Ensure that the wires reach from the devices to the ground bar with some slack for flexibility.
This exposes the bare copper conductor for a solid electrical connection.
Attach the connectors to the stripped ends of the ground wires, following the manufacturers instructions for proper installation.
Ensure that there are no loose connections or visible signs of fraying or damage on the ground wires.
This ensures that there is a proper electrical continuity and confirms that the ground wires are securely connected.
This helps to dissipate stray electrical currents and provides protection against electrical faults and hazards.
Here are the steps to follow when testing the ground bar connection:
1.
This is important for safety and to avoid any interference during the testing.
Use a voltage tester: Grab a voltage tester and ensure it is in proper working condition.
The voltage tester should be able to detect the presence of electrical current.
Test the ground bar: Set the voltage tester to the appropriate measurement range for AC voltage.
Carefully touch the metal housing of the voltage tester to the ground bar.
Be sure to avoid the terminal connections or bare wires.
Repeat the testing process for each of these points to ensure proper grounding throughout the entire rack.
Ensure that all connections are secure, properly stripped, and tightly fastened.
They can perform further diagnostics and ensure the grounding system is properly established.
In this guide, we covered the necessary steps to install a ground bar for a server rack.
They can provide expert guidance and ensure that your grounding system is correctly installed and functioning as intended.
