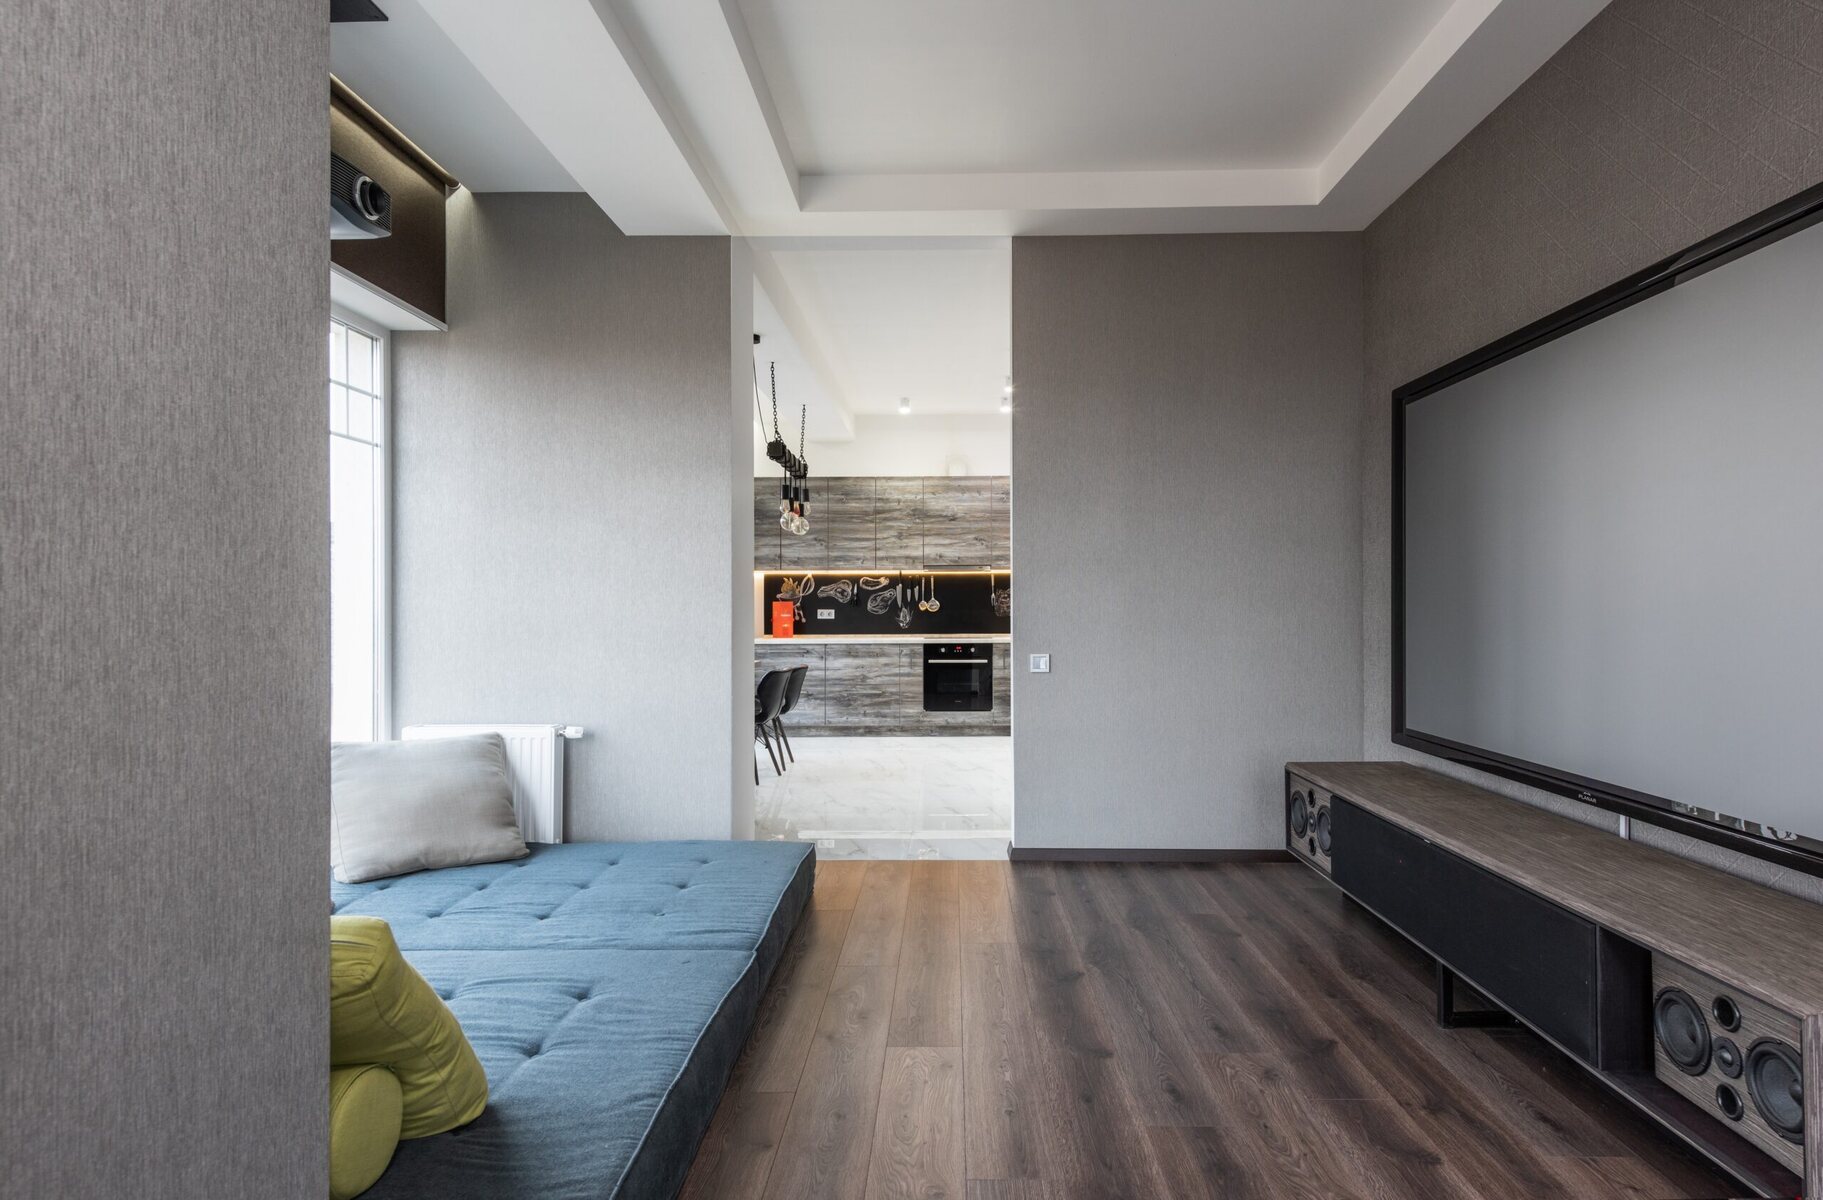
However, one challenge that often arises when setting up a projector is how to hide it effectively.
While projectors provide superior image quality, they can be bulky and visually distracting when not in use.
In this article, we will explore various creative and practical ways to hide a projector in your home.
Lets explore the possibilities!
This will determine the bang out of hiding solution you might implement.
Here are a few factors to consider:
1.
This will ensure that you achieve the desired image size and clarity.
Accessible Power Source: Ensure that the chosen location has easy access to a power outlet.
Running power cables through walls or ceilings can be complex and may require professional assistance.
Ventilation: Projectors generate heat, so it is crucial to select a location that allows for proper ventilation.
Adequate airflow will prevent overheating and ensure the longevity of your projector.
Ambient Light Control: Consider the amount of ambient light present in the chosen location.
Excessive light can reduce the clarity and contrast of the projected image.
If your space has large windows or skylights, you may need to consider light-blocking solutions.
Structural Integrity: Ensure that the installation location has a sturdy, level surface to securely mount the projector.
Avoid areas that are prone to vibrations or movement, as this can affect your viewing experience.
Lets explore some creative options!
Here are a few ideas:
1.
Ensure that the shelf is at the appropriate height and has enough space to accommodate the projector comfortably.
Storage Cabinets: Utilize storage cabinets or credenzas with doors to hide the projector when its not in use.
When you want to use it, simply kick off the cabinet doors and position the projector for viewing.
When youre ready to watch, the lift mechanism raises the projector to the desired height.
Create a customized compartment within the piece of furniture where the projector can be concealed.
This option works particularly well if you already have aprojector screen set up.
Remember to ensure proper ventilation and consider cable management when integrating the projector into furniture.
Additionally, check that the projector is easily accessible and adjustable for alignment and focus.
Heres how you’ve got the option to go about it:
1.
Ensure that it aligns with the desired viewing angle and is easily accessible.
Alternatively, you’re able to repurpose an existing cabinet and modify it to accommodate the projector.
verify to add ventilation holes to prevent overheating.
This makes it easy to hide and reveal the projector with a simple movement.
Choose a mechanism that is sturdy, smooth, and operates quietly.
Consider Cable Management: Plan for cable management within the cabinet to ensure a clean and organized setup.
Ensure that the shelf is adjustable to allow for fine-tuning of the projectors alignment and focus.
It allows you to keep the focus on the immersive viewing experience without any visual distractions.
Heres how:
1.
Choose the Location: Determine the optimal location for your projection screen.
- snag the Projection Material: Choose a high-quality projection material that suits your needs.
There are various options available, such as tensioned screens, motorized screens, or ambient light-rejecting screens.
Consider factors like gain, viewing angle, and ambient light conditions to make the right choice.
Construct the Screen Housing: Build or customize a housing unit to enclose the projection screen.
Ensure that the housing unit is sturdy and perfectly sized to fit the screen.
Motorized screens offer convenience, allowing you to control the screen with a remote or wall-mounted switch.
Manual screens are more cost-effective but require direct physical manipulation.
This creates a flush and seamless look when the screen is not in use.
Manage Wiring and Connectivity: Plan for wiring and connectivity options to ensure a clean and organized setup.
This method allows you to create a dedicated space for your projector, completely concealed from view.
Heres how you might achieve it:
1.
This will help to create a quiet and immersive environment for your home theater.
This not only enhances the aesthetics of the room but also improves the overall audio-visual experience.
Heres how it’s possible for you to utilize recessed mounts:
1.
Determine the Installation Location: Identify the ideal location for your projector.
This could be on the ceiling, above the screen, or on a wall facing the screen.
Ensure that the chosen location provides a clear line of sight and is easily accessible for maintenance and adjustments.
Choose the Recessed Mount: Select a recessed mount that suits the size and weight of your projector.
There are various options available, including ceiling recessed mounts and wall recessed mounts.
Consider factors such as extension and rotation capabilities to ensure optimal positioning.
Ensure that the ceiling or wall is structurally sound and can support the weight of the mount and projector.
Mount the Recessed Mount: roll out the recessed mount into the opening, following the manufacturers instructions.
Ensure that it is securely fastened and aligned properly.
Double-check for any wobbling or instability as this can affect the quality of the projected image.
Ensure that all connections are secure and that the projector is properly positioned for optimal viewing.
This solution is especially useful if you have limited space or want to maintain a minimalist aesthetic.
A motorized lift allows you to effortlessly hide and reveal your projector with the push of a button.
Heres how it’s possible for you to go about installing a motorized lift:
1.
Measure and Plan: Measure the dimensions and weight of your projector to ensure compatibility with the motorized lift.
Take accurate measurements of the space where the lift will be installed to ensure a proper fit.
Consider factors like clearance requirements and access to power sources.
This may involve mounting brackets, attaching cables or chains, and securing the lift mechanism.
Use the appropriate tools and hardware to ensure a secure and stable installation.
Test the Lift: Once the motorized lift is installed, test its functionality to ensure smooth operation.
Make any necessary adjustments for optimal performance.
Installing a motorized lift for your projector provides a convenient and elegant solution for hiding and revealing your unit.
Heres how you’re free to do it:
1.
Identify the Concealing Location: Select a wall or designated area where you want to hide your projector.
Ensure it aligns with the desired viewing angle and maintains easy access for adjustments and maintenance.
Consider blackout or thick fabric options if you want to minimize light leakage from the projector when its concealed.
Mount the Curtains or Drapes: Hang the curtains or drapes on the installed rods or tracks.
Ensure they are properly fitted and cover the projector hiding location completely when closed.
Coordinate Curtain Control with Projector Activation: Integrate the control of the curtains or drapes with the projector activation.
Using curtains or drapes to conceal your projector allows for easy customization and adaptability.
Conclusion
Hiding a projector in your home doesnt have to be a challenge.
Each of these solutions offers its own unique advantages and considerations.
