Introduction
Welcome to our guide on how to format an SD card on a Canon camera.
In this article, we will walk you through the necessary steps to format your SD card properly.
Over time, SD cards can become cluttered with unnecessary files, fragmented data, and potential errors.
We will also provide you with some helpful tips to ensure a smooth formatting experience.
Why Format Your SD Card?
Start by locating the SD card slot cover.
This cover may be labeled with a small SD card icon or have a symbol indicating its position.
Gently slide or flip kick off the cover to reveal the SD card slot.
Take your SD card and ensure that it is facing the correct way.
Most Canon cameras have their SD card slots designed with a label indicating the proper orientation of the card.
Apply gentle pressure until you feel the card snugly fit into place.
The menu system on Canon cameras may vary depending on the model, but the general procedure remains similar.
Press the menu button to fire up the cameras menu controls on the LCD screen.
Navigate through the menu options using the cameras navigation buttons or touchscreen, depending on your cameras capabilities.
Look for options related to the SD card or storage options.
Canon cameras typically organize menu prefs into different categories.
Check under the options or Setup category for options related to memory or storage.
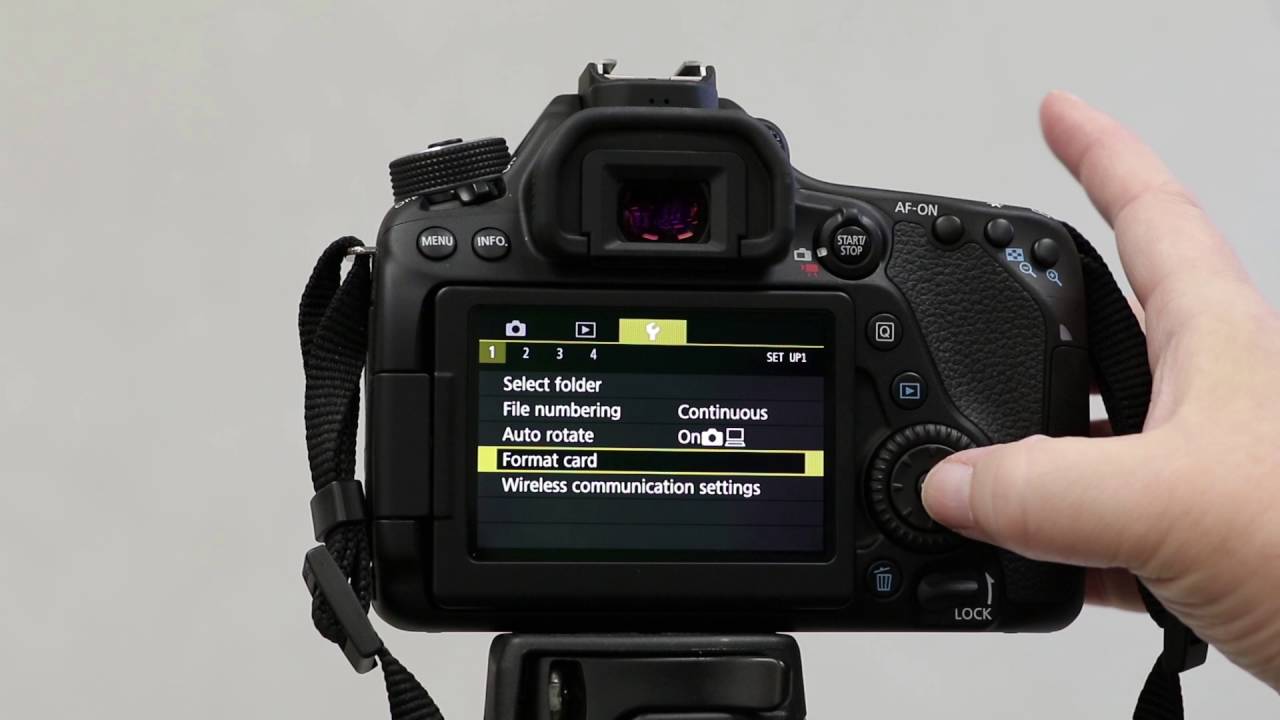
Some camera models may directly mention Format Card or similar wording.
Navigate through the menu options until you find the storage or SD card-related tweaks.
Look for an option that is labeled Format or Format Card.
This option may be located within a sub-menu or listed directly in the main menu.
Use the cameras navigation buttons or touchscreen to highlight the format option.
Once the option is highlighted, press the select or enter button to confirm your choice.
Some Canon cameras offer different formatting options, such as Quick Format or Full Format.
Choose the appropriate formatting option based on your requirements.
If you want to ensure complete data erasure, better to pick the full format option.
However, keep in mind that a full format may take longer to complete compared to a quick format.
Read the confirmation message carefully to ensure that you understand the consequences of formatting.
Use the cameras navigation buttons or touchscreen to highlight the Confirm or OK option.
Press the select or enter button to proceed with the formatting process.
At this point, your Canon camera will begin the formatting process.
You may see a progress bar or an indicator on the LCD screen that shows the formatting status.
During the formatting process, it is important not to power off your camera or remove the SD card.
Doing so may result in data corruption or incomplete formatting, rendering the SD card unusable.
Once the format is complete, your Canon camera will display a message indicating that the formatting was successful.
you’re free to now move on to the next step and wait for the format to complete.
You may also see a message indicating the estimated time remaining for the format to complete.
It is crucial to avoid interrupting the format by powering off your camera or removing the SD card.
Doing so may result in incomplete formatting or data corruption, rendering the SD card unusable.
If necessary, connect your camera to a power source to ensure a continuous power supply.
Larger SD cards and full format options may take longer to complete.
Once the format is complete, your Canon camera will display a message indicating that the formatting was successful.
This ensures that there are no data transfer issues or potential damage to the card or the camera.
First, power off your camera to prevent any potential conflicts or errors when removing the SD card.
Look for the power button on your camera and press it to shut down the equipment.
Once your camera is fully powered off, locate the SD card slot cover.
This cover may be labeled with a small SD card icon or have a symbol indicating its position.
Gently slide orflip fire up the cover to reach the SD card slot.
Using your fingers or a gentle push, release the SD card from the slot.
You may hear a soft click, indicating that the card is being released.
Handling the SD card with care is essential to prevent damage to the card or the camera.
Avoid bending the card or exposing it to extreme temperatures or moisture.
Remember to double-check that your cameras battery is fully charged before initiating the formatting process.
Finally, carefully remove the SD card from the camera and handle it with care.
These tips help maximize data protection, improve overall performance, and prolong the lifespan of your SD card.
