Introduction
Welcome to the world of digital storage and memory cards!
These small, compact storage devices are used to store photos, videos, and other files.
However, formatting an SD card, especially a 64GB one, can sometimes be a bit tricky.
By the end of this article, youll have a formatted 64GB SD card ready to use.
So, without further ado, lets dive into the process offormatting a 64GB SD card to FAT32!
This offers ample space for storing thousands of photos, hours of videos, and other types of files.
This makes it an ideal choice for users who frequently switch between different platforms.
However, there are a few limitations to keep in mind when using the FAT32 file system.
One of the main drawbacks is its maximum supported file size, which is 4GB.
Additionally, the FAT32 file system allocates storage space in cluster sizes.
Optimal cluster sizes may vary depending on the specific equipment and usage scenario.
There are several methods you’ve got the option to use to back up your data.
One option is to connect your SD card to a computer using an SD card reader.
Insert the SD card into the reader, and then connect it to your computers USB port.
your box will recognize the SD card as a removable storage equipment.
This can be a folder on your desktop or an external hard drive.
If you have a large amount of data on your SD card, this process may take some time.
Be patient and ensure that all files are successfully copied before proceeding.
Alternatively, you’ve got the option to use third-party software to back up your data.
There are several options available, each with its own advantages and limitations.
The first option is to use the built-in formatting feature of your operating system.
Mac users can utilize the Disk Utility tool to format the SD card.
press the Erase button to format the SD card.
While the built-in formatting tools can get the job done, they may not provide advanced options or flexibility.
These third-party tools offer additional features like cluster size adjustment and automated formatting processes.
Before selecting a formatting tool, it is important to research and choose a reputable and reliable one.
First, visit the official website of the formatting tool and locate the download page.
Look for the appropriate version of the tool compatible with your operating system.
Most tools provide both Windows and Mac versions.
Double-tap on the file to initiate the installation process.
After completing the installation, locate the newly installed formatting tool in your computers applications or programs folder.
Double-punch the tools icon to launch it.
Upon launching the tool, you should see a user-friendly interface that provides various options for formatting storage devices.
This will ensure you have a smooth formatting process and allow you to customize the format to your preferences.
Depending on the tool you are using, the SD card may be automatically detected or require manual selection.
The SD cards name or model number is usually displayed alongside its storage capacity.
Double-check to ensure that the correct SD card is selected before proceeding with the formatting process.
Look for an option within the tools interface that allows you to browse or choose the desired SD card.
Before selecting the SD card, ensure that it is properly connected to your gear.
Double-check the storage capacity or model number to identify the correct SD card.
Take your time to verify and double-check the SD card selection before proceeding to the next step.
The file system determines how the data is organized and stored on the SD card.
Look for options such as File System or Format As to find the appropriate controls.
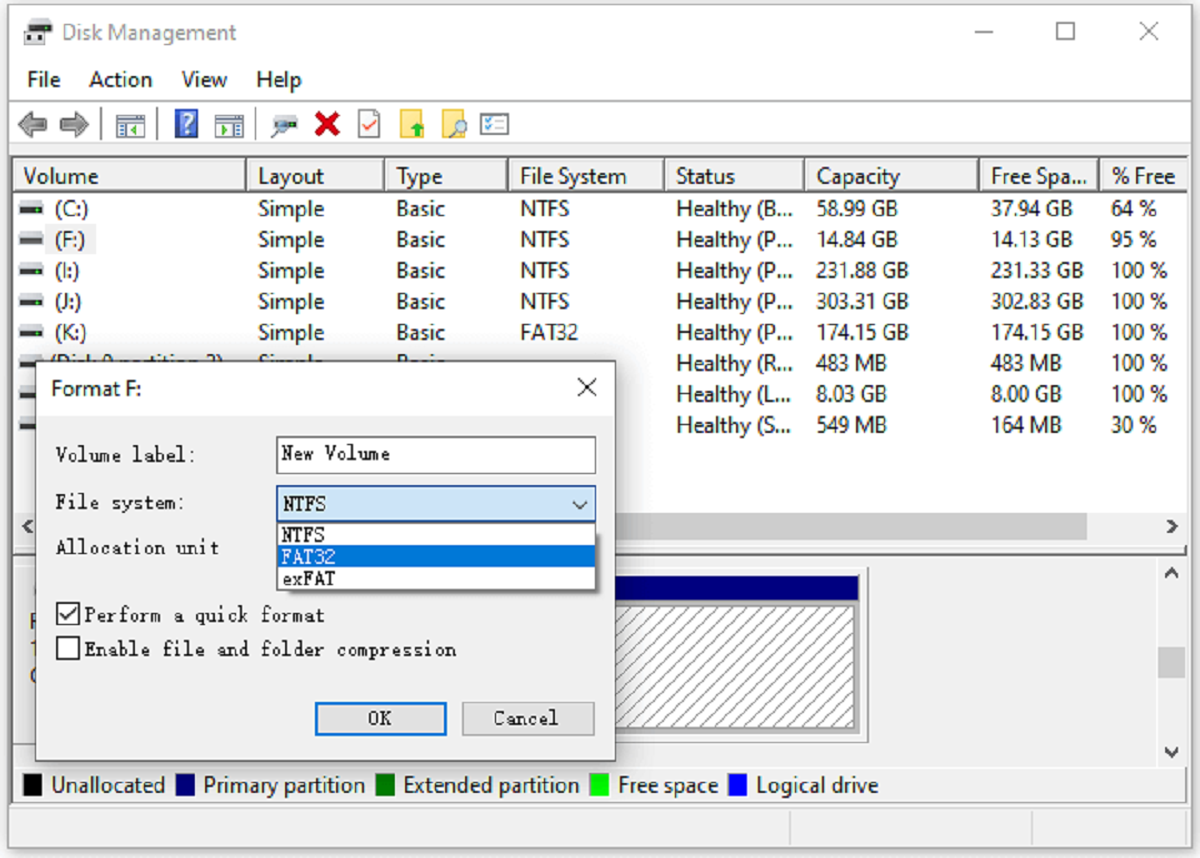
In this step, you want to ensure to choose FAT32 as the file system for your SD card.
To format the SD card to FAT32, opt for FAT32 file system from the available options.
It provides a reliable and versatile file system option for your 64GB SD card.
Take a moment to carefully review these prefs to ensure they align with your intentions.
Check the SD card information to verify that the correct 64GB SD card is selected for formatting.
Confirm that the file system is indeed set to FAT32.
This step is crucial in preventing any mistakes or accidental formatting of the wrong storage unit.
Take your time to inspect the confirmation screen and double-check all the options to avoid any potential data loss.
Its always better to be cautious and double-check your choices before formatting the SD card.
Taking the time to confirm the format ensures a smoother and error-free process.
During this stage, its important not to interrupt the formatting process.
Just ensure that your machine remains powered on and uninterrupted during the formatting process.
Be patient and give the formatting process ample time to complete.
Rushing or interrupting the process may lead to incomplete or corrupted formatting.
This indicates that the SD card has been successfully formatted to the FAT32 file system.
To verify the formatted SD card, first, safely remove it from your gear or card reader.
see to it the SD card is securely inserted to establish a proper connection.
Next, navigate to the SD card on your rig or machine and check the file system.
Look for the file system information, and it should display as FAT32.
You have successfully formatted your 64GB SD card to the FAT32 file system.
We started by understanding the 64GB SD card and the FAT32 file system, highlighting their features and limitations.
Finally, we concluded by highlighting the importance of verifying the formatted SD card to ensure its successful formatting.
Safely organize your files, capture memorable moments, and make the most of your portable storage unit.
