However, it can be frustrating to encounter white dots or specks on the screen during your projection.
Fortunately, most of these problems can be resolved with a few simple troubleshooting techniques.
What Causes White Dots on a Projector Screen?
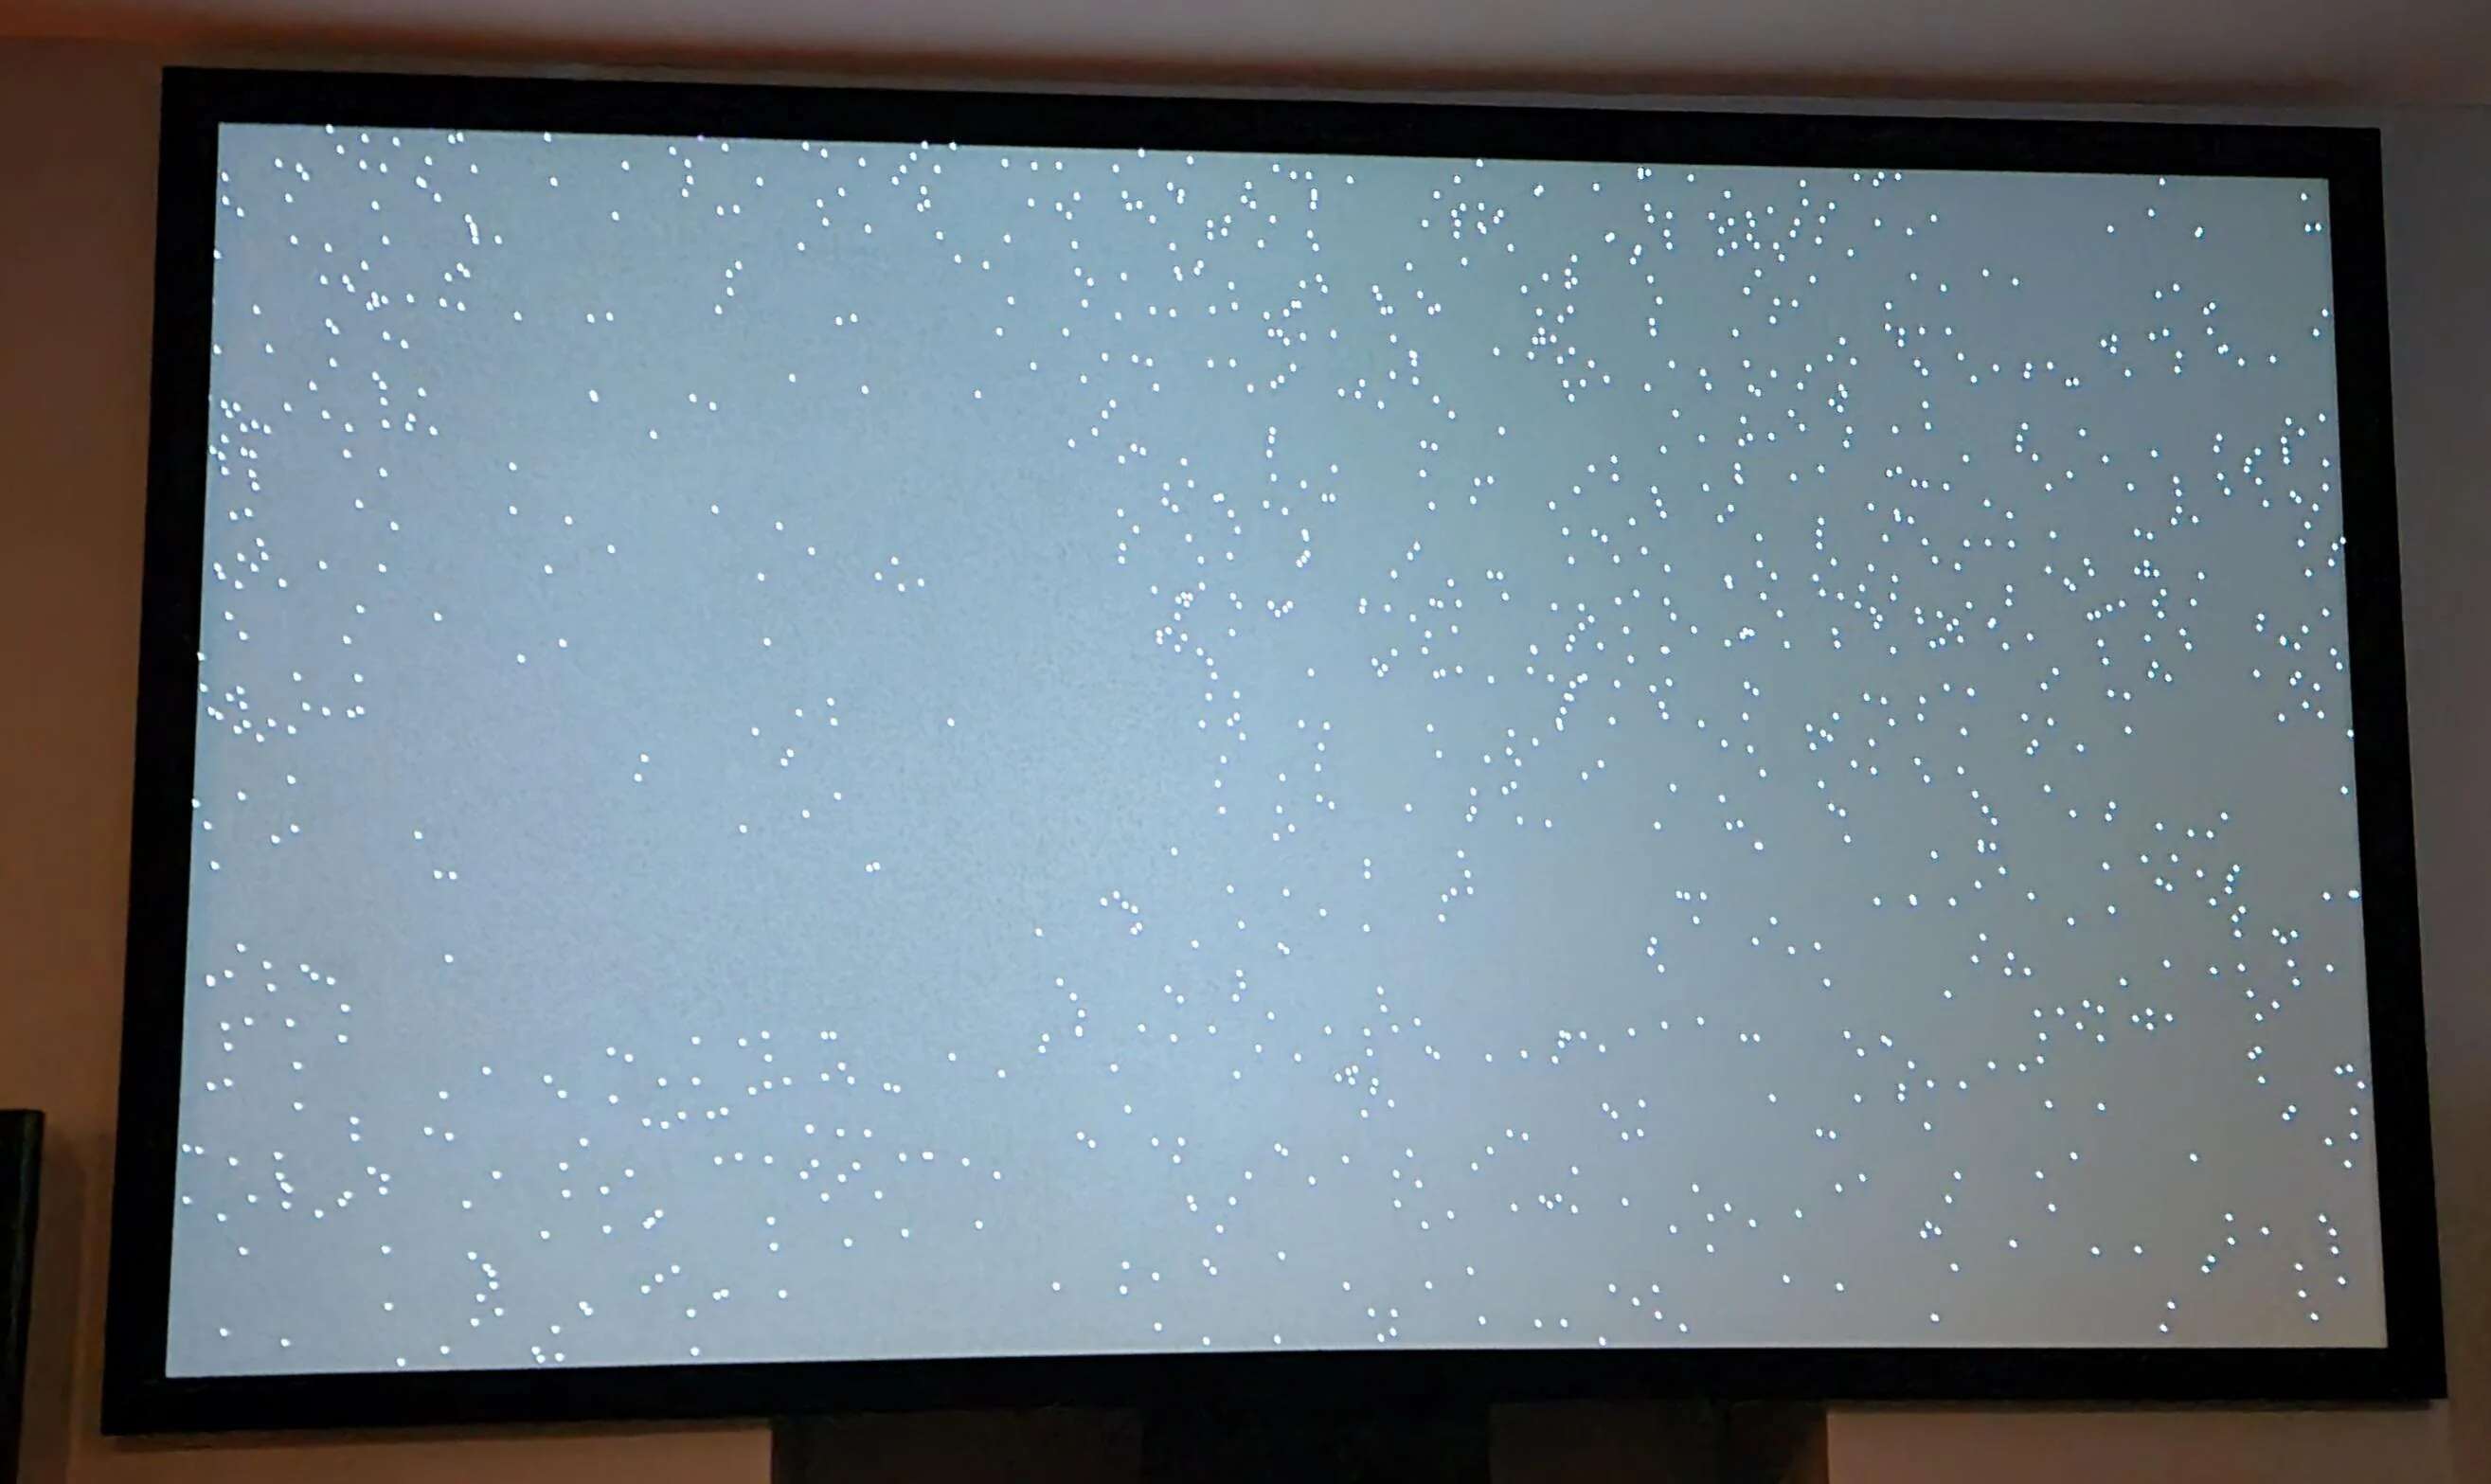
White dots on a projector screen can be attributed to various factors.
Understanding the root causes will help you identify the specific issue and address it effectively.
To clean the projector lens, start by turning off the projector and allowing it to cool down.
Then, using a microfiber cloth or lens cleaning wipes, gently wipe the lens in a circular motion.
Be cautious not to apply excessive pressure, as this can damage the lens.
Ensure that all dust particles and smudges are removed to restore optimal image quality.
In addition to the lens, it is crucial tocheck and clean the projectors filters.
Refer to the projectors manual or manufacturers instructions to locate the filters.
Remove them carefully and inspect them for any visible dust or dirt accumulation.
Clean the filters by gently blowing compressed air or using a soft brush to remove the debris.
Incorporate this maintenance task into your projector care routine for consistent and uninterrupted projection experiences.
It is important to regularly check the condition of the bulb and replace it when needed.
Start by turning off the projector and allowing it to cool down.
Locate the bulb compartment, which is typically found on the bottom or side of the projector.
Consult the projectors manual or manufacturers instructions for detailed guidance on accessing the bulb.
These can indicate that the bulb is reaching the end of its lifespan or has experienced a failure.
If there are no visible signs of damage, consider checking the bulbs usage hours.
Most projectors have a built-in lamp hour meter that displays the total operating hours of the bulb.
Adjusting these configs can help eliminate the white dots and improve the overall image quality.
Find the ideal balance that provides a clear and vibrant image without any distracting white dots.
Gamma prefs:Gamma prefs control the contrast of the projector image.
Adjusting the gamma can significantly impact the appearance of white dots.
Experiment with different gamma controls to find the one that best minimizes the white dots without compromising image quality.
Color Balance:Improper color balance can also contribute to the appearance of white dots.
Ensure that the red, green, and blue color channels are properly balanced.
Adjust the color temperature controls if available to achieve accurate and natural colors without any white dot interference.
Sharpness:Excessive sharpness levels can create artificial edges and enhance white dots in the image.
Find the right balance of sharpness to maintain a clear, detailed image without emphasizing the white dots.
enter the projectors menu options to make these adjustments.
Consult the projectors manual or manufacturers website for specific instructions on accessing and navigating the options menu.
Remember to make incremental adjustments and carefully observe the changes in image quality with each modification.
This includes HDMI, VGA, and power cables.
Ensure that all connections are tight and firmly plugged in.
Loose or improperly connected cables can cause signal instability, leading to white dots on the screen.
Faulty cables can result in poor transmission of signals, leading to intermittent white dots or other visual disturbances.
Use high-quality cables that are compatible with your equipment to ensure optimal performance.
Try repositioning the cables to minimize the proximity to other cables or electronic devices.
This can help reduce signal noise and potential white dot issues.
Testing with alternative cables or devices can help identify if the issue lies with a specific component.
This will restore all configs to their original default configurations.
reach the options menu:Turn on the projector and navigate to the options menu.
Look for an option that allows you to restore orreset the projectorto its factory prefs.
This option may be located under a System or Setup submenu.
Confirm the reset:Once you locate the factory reset option, carefully read any on-screen prompts or warnings.
However, keep in mind that this action will also reset any personalized configs you may have had.
Therefore, you may need to readjust the options to your preferred preferences after the reset.
Conclusion
Encountering white dots on a projector screen can be frustrating and significantly impact the viewing experience.
Its important to remember that troubleshooting projector issues requires patience and thoroughness.
It may take some trial and error to pinpoint the specific cause and solution for the white dot problem.
Properly handling and storing the projector can also contribute to its longevity and optimal performance.
Remember to consult the projectors manual and manufacturers instructions for specific guidance related to your gear.
Now, go ahead, implement the suggested steps, and enjoy your impeccable projection experience!
