Introduction
Welcome to our guide on how to fix screen issues on your Macbook Pro.
Your MacBook Pros screen is the primary interface for all your activities, from reading emails to watching videos.
It is essential to note that troubleshooting your screen issues will depend on the specific problem you are experiencing.
Before we begin, just ensure that you have backed up your important files and data.
This is a precautionary measure to safeguard your information in case of any unforeseen complications during the troubleshooting process.
Is it a software-related issue or a hardware malfunction?
This will help determine the appropriate troubleshooting steps to take.
Here are some effective methods to get started:
1.
Restarting the MacBook Pro:Often, screen issues can be resolved by simply restarting your MacBook Pro.
This clears temporary glitches and reloads the operating system, potentially fixing any software-related issues.
Resetting the System Management Controller (SMC):The SMC controls various hardware functions, including the display.
Resetting the SMC can help resolve screen issues brought on by power management problems or incorrect machine behavior.
Release the keys, then turn on your MacBook Pro.
Navigate to the Apple menu, select System Preferences, then choose Displays.
From there, you could modify the brightness, contrast, and color options according to your preferences.
Apple regularly releases updates that address known issues and improve system stability.
To check for updates, go to the Apple menu, select System Preferences, then choose Software Update.
If the screen works fine in Safe Mode, it indicates that a software conflict is causing the problem.
By following these troubleshooting steps, you could often identify and resolve software-related screen issues on your MacBook Pro.
Restarting clears temporary software glitches and can often fix minor issues that may be affecting the screen.
Its essential to ensure that you dont lose any unsaved data during the restart process.
Step 2:press the Apple menu located in the top-left corner of the screen.
Step 3:Select Restart from the drop-down menu.
you might also use the keyboard shortcut by pressing the Control + Command + Eject keys simultaneously.
Step 4:A confirmation window will appear, asking if youre sure you want to restart.
select Restart to proceed.
Step 5:Your MacBook Pro will now begin the restart process.
Wait for the rig to shut down and then boot back up.
Step 6:Once the restart is complete, the login screen will appear.
type your login credentials to access your account.
After restarting the MacBook Pro, verify if the screen issues have been resolved.
If the problem persists, you may need to try other troubleshooting methods mentioned in this guide.
Restarting your MacBook Pro is a simple yet effective step that can help resolve various software-related issues.
The SMC is responsible for managing various hardware functions, including the display.
Resetting the SMC can help resolve screen issues triggered by power management problems or incorrect equipment behavior.
Step 2:Ensure that your MacBook Pro is connected to a power source or has sufficient battery power.
Remember to hold all four keys for 10 seconds.
Step 4:Release all the keys, thenpress the power button to turn on your MacBook Pro.
For specific instructions, refer to Apples support documentation or the user manual for your specific model.
Persistent screen issues may indicate hardware problems that require specialized knowledge or repairs.
Your MacBook Pro provides you with various options to customize the display options according to your preferences.
Step 2:Select System Preferences from the drop-down menu.
Step 3:In the System Preferences window, tap on the Displays option.
Step 4:The Display preferences window will open, presenting you with various display-related options.
Step 5:Adjust the brightness by moving the Brightness slider.
Drag it to the left to decrease brightness or to the right to increase it.
Move the slider to adjust the contrast levels according to your preference.
choose the Color tab and follow the on-screen instructions to calibrate your MacBook Pros display colors.
Experiment with different tweaks until you find the configuration that suits your preferences and resolves the screen issues.
Explore these options and customize them as desired to improve your screens performance.
Remember to always reset your MacBook Pro after making display adjustments to ensure the prefs take effect.
Apple regularly releases software updates that address known bugs, introduce new features, and improve system stability.
Step 4:Your MacBook Pro will now check for available software updates.
If any updates are available, you will see them listed with a brief description.
Step 5:hit the Update Now button to install all available updates.
You may need to put in your administrator password to proceed.
Checking for and installing software updates can help resolve software-related issues that may be affecting your MacBook Pros screen.
Sometimes, screen issues may require specific fixes or patches provided by Apple or other software developers.
To identify and isolate software-related problems, you’re free to boot your MacBook Pro in Safe Mode.
In Safe Mode, your Mac starts up with minimal software and disables third-party extensions.
Step 2:Press the power button to turn on your MacBook Pro.
Step 3:Immediately press and hold the Shift key upon hearing the startup chime.
Release the Shift key when you see the Apple logo or a progress bar.
Step 4:Your MacBook Pro will now start up in Safe Mode.
The login screen may take longer to appear than usual.
While in Safe Mode, your MacBook Pro performs a basic system check and only loads essential software components.
This allows you to determine if the screen issues persist without interference from third-party applications or startup items.
Test the screen performance in Safe Mode.
Remove Recently Installed Software:Uninstall any recently installed applications or software updates that might be causing conflicts.
power cycle your MacBook Pro and find out if the screen issues are resolved.
Disable Login Items:Open System Preferences, press Users & Groups, and select your user account.
Navigate to the Login Items tab and remove any unnecessary or problematic startup items.
cycle your MacBook Pro and see if the screen issues persist.
Release the keys and see if the screen issues are resolved.
It may indicate a hardware-related problem that requires further diagnosis or repair.
Remember to exit Safe Mode by restarting your MacBook Pro without pressing any keys during startup.
After exiting Safe Mode, observe if the screen issues continue or have been resolved.
Step 5:Under the Color tab, youll find different display profiles.
opt for profile that corresponds to your desired display options.
The available options may vary depending on your MacBook Pro model.
Calibrate the display in a neutral lighting environment to get the best results.
It may indicate a hardware-related problem that requires further examination or repair.
Lastly, remember to periodically recalibrate your MacBook Pros display to maintain accurate color representation and optimal visual quality.
Step 5:Power on the external display and set it to the correct input source.
This differs depending on the external display model.
Step 6:Power on your MacBook Pro.
It should automatically detect the external display and configure the resolution and other controls.
In such cases, you’re free to try the following troubleshooting methods:
1.
Update Graphics Drivers:Ensure your MacBook Pro has the latest graphics drivers installed.
Check Apples support website or use the Software Update feature to ensure all drivers are up to date.
Test with a Different Cable:Sometimes, a faulty cable can cause screen issues.
This information can help further narrow down the potential causes and guide you towards the appropriate troubleshooting steps.
If any updates include graphics driver updates, they will be listed along with other available updates.
You may need to slide in your administrator password to proceed.
Installing incompatible or incorrect drivers can cause further issues instead of resolving them.
Persistent screen issues may indicate hardware problems that require specialized knowledge or repairs.
Hardware issues can range from loose connections to faulty components that require professional repair.
Here are some steps you might take to resolve hardware issues with the screen:
1.
Use a soft, lint-free cloth slightly dampened with water to gently clean the screen.
Avoid using harsh chemicals or abrasive materials that can damage the display.
If youre comfortable with it, you might carefully disconnect and reconnect the display cables.
Whenever possible, consult an authorized service provider or Apple Store for assistance with hardware-related screen issues.
They can provide guidance and may help arrange repairs or replacement if necessary.
In some cases, the cost of repairing a hardware issue can be significant.
These can not only obstruct your view but also impact the overall visual experience.
Step 2:Use a soft, lint-free cloth or microfiber cloth to gently wipe the screen.
Avoid using abrasive materials or harsh chemicals that may damage the display.
Step 3:If the cloth alone doesnt remove the smudges or fingerprints, lightly dampen it with water.
Step 4:Starting from the top of the screen, wipe in a downward motion with gentle pressure.
Step 5:Check for any remaining marks or stubborn stains.
Remember that prevention is also key to keeping your screen clean.
Its recommended to use a separate touchpad or a stylus for interacting with your MacBook Pro.
Never spray liquid cleaners directly onto the screen or any other part of your MacBook Pro.
The liquid can seep into the keyboard or other openings and cause internal damage.
Persistent screen issues may indicate hardware problems that require specialized knowledge or repairs.
Step 2:Carefully open your MacBook Pro and locate the display connection cables.
Step 3:Inspect the connections carefully to see if they are loose or improperly seated.
Gently push on the connectors to ensure they are securely in place.
Step 4:If the connectors appear loose, carefully disconnect them and then reconnect them firmly.
verify the connectors are aligned properly and fully inserted into their sockets.
Its important to exercise caution when working inside your MacBook Pros casing.
Checking for loose display connections can often resolve screen issues brought on by poor or interrupted electrical connections.
It may indicate a hardware-related problem that requires further examination or repair.
The display cable is responsible for transmitting the video signal from the logic board to the display panel.
Replacing the display cable can be a challenging task, as it requires expertise in handling delicate components.
Step 2:Carefully open your MacBook Pro and locate the display cable.
It is usually a thin, ribbon-like cable that connects the display panel to the logic board.
Documenting or taking pictures of the cables placement can be helpful during reassembly.
Take care not to yank or pull on the cable forcefully.
Ensure that the cable is properly aligned and fully inserted into its connectors.
Replacing the display cable requires delicate and precise handling to avoid further damage to your MacBook Pros internal components.
Its important to note that display cable replacement may not be a guaranteed solution for all screen issues.
In some cases, the problem may lie elsewhere, such as a faulty logic board or LCD panel.
Replacing the display cable is an advanced repair process that should only be undertaken by skilled technicians.
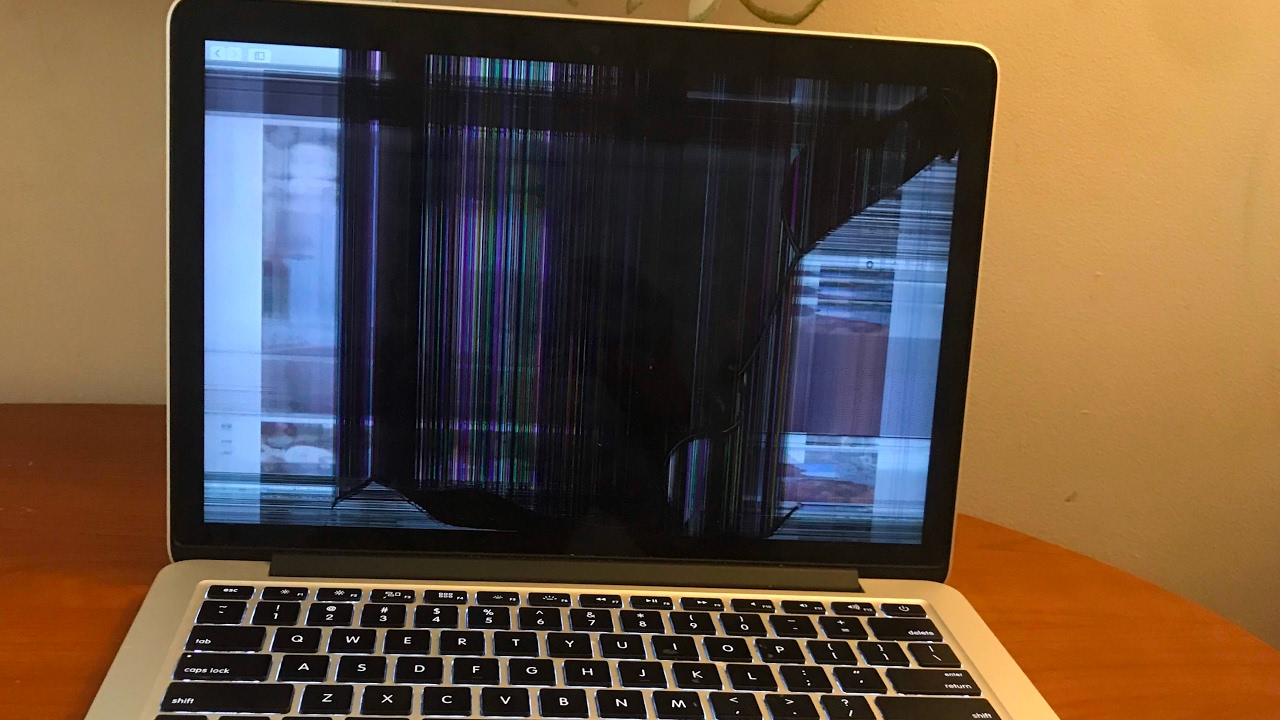
The LCD panel is the component responsible for producing the images you see on your MacBook Pros screen.
If you notice any physical damage, its highly likely that the LCD panel needs replacement.
Step 3:Connect an external display to your MacBook Pro and observe if the screen issues persist.
If the external display functions correctly, it further indicates a problem with the internal LCD panel.
Step 2:Carefully open your MacBook Pro and locate the LCD panel.
It will be connected to the logic board via the display cable.
Step 4:Gently take out the faulty LCD panel and set it aside.
Step 6:Reassemble your MacBook Pro and ensure that all connections and components are properly in place.
Replacing the LCD panel requires expertise in handling delicate components and precision in the installation process.
Its crucial to seek assistance from an authorized service provider or Apple Store to ensure a proper replacement.
They can provide an accurate assessment and guide you through the proper course of action.
These steps can resolve common screen problems because of power management, incorrect display configs, or outdated software.
If the issues persist, we explored more advanced troubleshooting techniques.
For more persistent issues, we addressed hardware-related problems.
Checking for loose display connections can alleviate screen issues sparked by poor electrical connections.
Replacing the display cable can solve issues originating from a faulty or damaged cable.
And if all else fails, diagnosing and replacing a faulty LCD panel may be necessary.
Attempting complex repairs without proper knowledge and experience can lead to further damage or void warranties.
