Introduction
Having a reliable and strong WiFi connection has become essential in our modern lives.
This is where extending WiFi with an Ethernet cable comes into play.
We will discuss the benefits of this method and provide you with all the information you oughta get started.
So, lets dive in and learn how to extend your WiFi internet with an Ethernet cable.
Why Extend WiFi With Ethernet Cable?
When it comes to improving the WiFi coverage in your home or office, there are various options available.
So, why should you choose to extend WiFi with an Ethernet cable?
2.Expanded Coverage:WiFi signals have limited range and can struggle to penetrate through walls and floors.
4.Flexibility in Placement:WiFi extenderscan be strategically placed in optimal locations to maximize coverage.
It utilizes the existing wiring infrastructure of your home or office, eliminating the need for purchasing extra equipment.
2.Enhanced Speed and Performance:Ethernet cablesprovide faster and more reliable connections compared to WiFi.
Ethernet cables are affordable and readily available, making it a budget-friendly option for improving WiFi coverage.
7.Improved Security:Ethernet connections offer a more secure and private connection compared to wireless connections.
Its a practical solution to enhance your WiFi web link and ensure a smooth and reliable internet experience.
These items will ensure a smooth and successful setup.
see to it you have a functional router that supports Ethernet connections.
Youll need a modem that is compatible with your internet plan and can provide a stable internet connection.
3.Ethernet Cable:Youll need an Ethernet cable to establish a wired connection between your router and WiFi extender.
Youll need to power both devices for the setup to work.
double-check your rig is connected to the same WiFi online grid as your router.
These credentials are usually provided by your ISP or can be found on the back of your router.
Now that youre prepared, you might proceed to the step-by-step guide and start improving your WiFi coverage.
ensure the router is connected to the modem and that you have a stable internet connection.
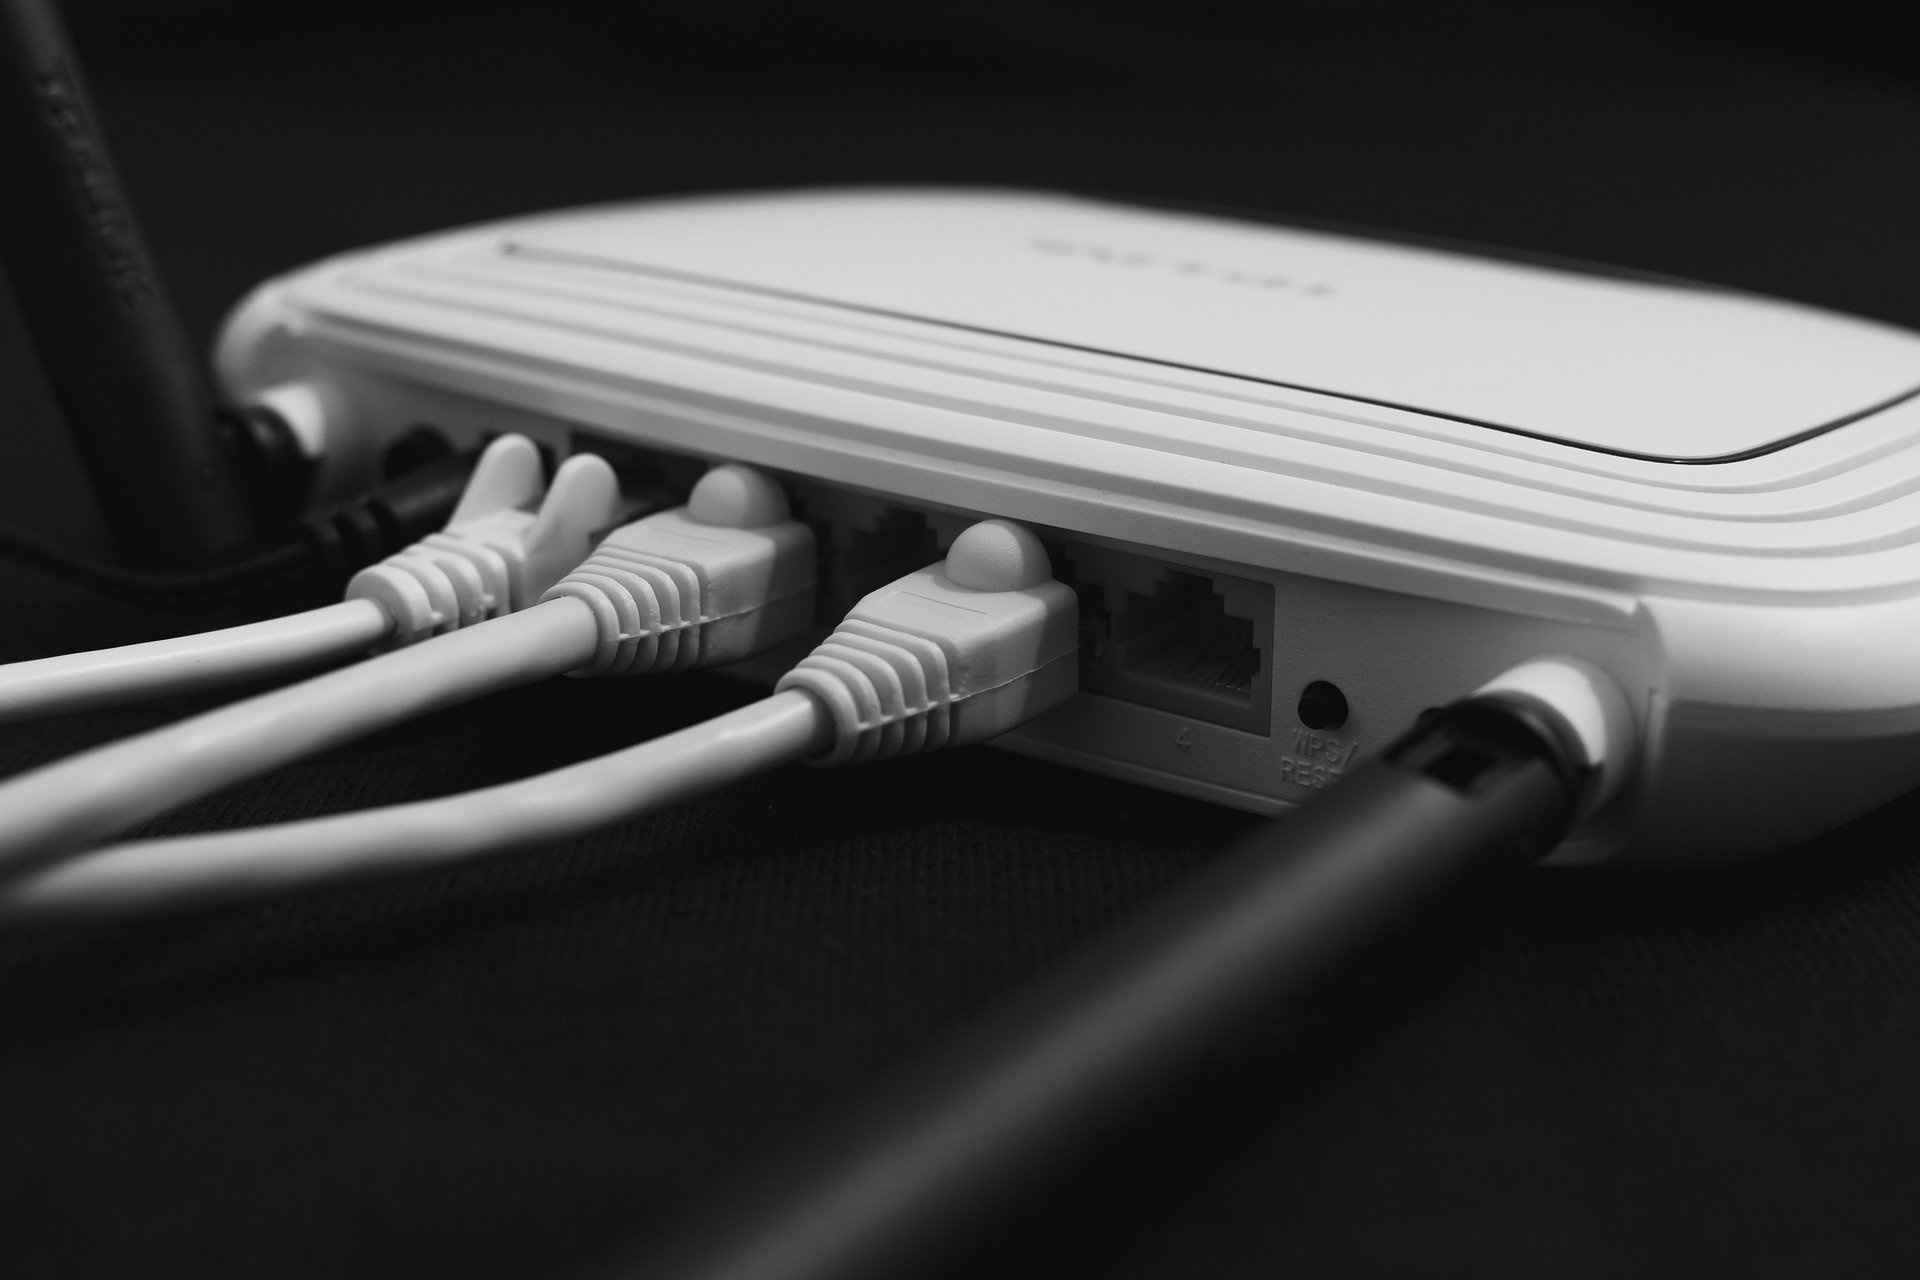
Connect one end of the Ethernet cable to an available LAN port on your router.
Keep in mind that the WiFi extender should be placed within a reasonable distance from your router.
Ensure a secure and snug connection.
The power LED indicator should light up, indicating that the extender is receiving power.
Use the WiFi signal indicator on your unit to confirm the strength of the extended WiFi internet.
By following these step-by-step instructions, you might successfully extend your WiFi online grid with an Ethernet cable.
Enjoy the benefits of an improved WiFi signal and expanded coverage throughout your space.
Verify that the modems connection lights are solid or blinking, indicating an active connection to the internet.
3.Internet Speed:Check your internet speed by performing a speed test with an online tool or app.
4.Update Router Firmware:Check for any available firmware updates for your router.
Keeping your routers firmware up to date ensures optimal performance and security.
Use a combination of uppercase and lowercase letters, numbers, and special characters for a more secure password.
7.power cycle your Router and Modem:Sometimes, simply restarting your router and modem can resolve connectivity issues.
Power off both devices, wait for a few seconds, and then power them back on.
Allow them a few minutes to fully restart and establish a stable connection.
This will help ensure a smoother and more successful setup process.
The most common categories are Cat5e, Cat6, and Cat6a.
For most home and office setups, a Cat5e or Cat6 cable will suffice.
Cat6a cables are typically used for more demanding applications and longer cable runs.
2.Cable Length:Consider the distance between your router and the WiFi extender when choosing the cable length.
Its important to measure the approximate distance and add some extra length for flexibility.
3.Cable Quality:Invest in a high-quality Ethernet cable to ensure optimal performance and longevity.
Look for cables with gold-plated connectors, shielding to reduce interference, and durable outer sheaths.
This will help maintain a stable and reliable connection over time.
This will allow for flexibility when repositioning devices or extending your online grid further in the future.
Choose a color that matches your preference or blends well with your surroundings.
Ensure a secure and snug connection to establish an effective wired connection between the devices.
Choosing the appropriate Ethernet cable ensures a reliable and high-speed connection between your router and WiFi extender.
Identify areas with weak WiFi coverage or dead zones where the signal drops significantly.
These are the areas where youll want to place your WiFi extender.
These obstacles can weaken the signal and impact the effectiveness of the extender.
4.Consider Height:In some cases, placing the WiFi extender at a higher elevation may improve coverage.
Experiment with different heights to find the optimum placement that provides the best signal strength throughout your space.
This helps distribute the WiFi signal more evenly and ensures better coverage throughout the space.
6.Power Outlet Availability:Ensure that there is a nearby power outlet available for the WiFi extender.
These ports are typically labeled with numbers or indicators.
Identify an available LAN port that is not currently in use.
see to it the connector is fully inserted and secure.
3.Secure the Connection:Ensure that the Ethernet cable is securely connected to the LAN port.
A loose connection can result in an intermittent or unstable connection.
Gently tug on the cable to confirm that it is firmly attached.
These LEDs indicate the status of the Ethernet connection.
The LED next to the connected LAN port should light up, confirming a successful connection.
It is usually found on the back or bottom of the unit.
Identify the correct port to connect the other end of the Ethernet cable.
Ensure a secure and snug connection.
A loose connection can result in an unreliable or non-functional wired connection.
4.Power on the WiFi Extender:Plug the WiFi extender into a nearby power outlet.
The power LED indicator should light up, indicating that the extender is receiving power.
5.Check the Link LEDs:Look for the link LED indicators on the WiFi extender.
These LEDs confirm that the wired connection between the extender and the router is successful.
Test the internet connectivity to confirm that the wired connection is functioning properly.
This connection allows for the transmission of data and ensures a reliable and stable extended WiFi web link.
This IP address can be found in the user manual or on the extender itself.
2.Login to the Extenders Interface:You will be prompted to enter the login credentials for the WiFi extender.
This information is usually provided in the user manual or can be found on the extenders label.
Enter the username and password to pull up the extenders controls.
Select your existing WiFi connection from the list and enter the connection password.
This will allow the WiFi extender to connect to your routers web connection.
Consult the user manual for specific instructions on configuring your extender.
This will activate the extended WiFi connection and make the configuration effective.
Enter the password and ensure a successful connection.
These could be rooms, corners, or outdoor spaces that were problematic before extending the WiFi web connection.
It is usually represented by bars, with more bars indicating a stronger signal.
Note the signal strength in the previously weak areas.
Pay attention to the stability and speed of the internet connection in these areas.
Compare the results to check for improvements in download and upload speeds.
5.Perform Multiple Tests:To ensure accurate results, perform multiple tests at different times of the day.
WiFi signal strength and performance can vary depending on various factors, including web link congestion and interference.
Experiment with different locations or orientations to optimize signal strength and coverage.
These advantages make it a compelling option for optimizing your WiFi data pipe.
Remember to choose the right Ethernet cable for your setup, ensuring compatibility and reliability.
This will help maximize the reach and effectiveness of your extended WiFi web connection.
Once the Ethernet cable is connected to your router and WiFi extender, proceed with the configuration process.
