Introduction
Welcome to our guide on how to enable TPM 2.0 on a Gigabyte motherboard.
This ensures that your data and system are protected from unauthorized access.
Having a Gigabyte motherboard gives you the opportunity to harness the benefits of TPM 2.0.
However, the process of enabling TPM 2.0 may vary depending on your motherboard model and BIOS version.
This guide will provide a step-by-step approach to help you through the process.
Whether you are a beginner or an experienced user, we have you covered!
We will then dive into accessing the BIOS configs and enabling TPM 2.0.
Finally, we will guide you on how to verify that TPM 2.0 has been successfully activated.
Lets explore why TPM 2.0 is important and how it can benefit you.
Secure Boot:One of the key advantages of TPM 2.0 is its ability to secure the boot process.
This prevents malicious software or firmware from compromising the integrity of your system and ensures a trustworthy start-up experience.
gear Encryption:TPM 2.0 enables hardware-based encryption, allowing you to safeguard your data with ease.
With TPM 2.0, you could unlock your Windows machine quickly and securely without relying solely on traditional passwords.
This eliminates the risk of password breaches or unauthorized access to your account.
This not only safeguards your system, but it also ensures the integrity of your data and applications.
Enterprise Security Compliance:Many organizations require TPM 2.0 as part of their security compliance standards.
This is particularly important for businesses dealing with sensitive customer data or confidential information.
you’re able to proceed with the next steps to enable TPM 2.0.
Its an important step in preparing your Gigabyte motherboard for the implementation of TPM 2.0 and maximizing its benefits.
The BIOS is a firmware interface that allows you to configure various hardware tweaks of your setup.
Therefore, always refer to your motherboards manual or the Gigabyte website for specific instructions on accessing the BIOS.
By accessing the BIOS configs successfully, youre one step closer to enabling TPM 2.0 on your Gigabyte motherboard.
Its worth mentioning that some Gigabyte motherboards may require additional steps to enable TPM 2.0.
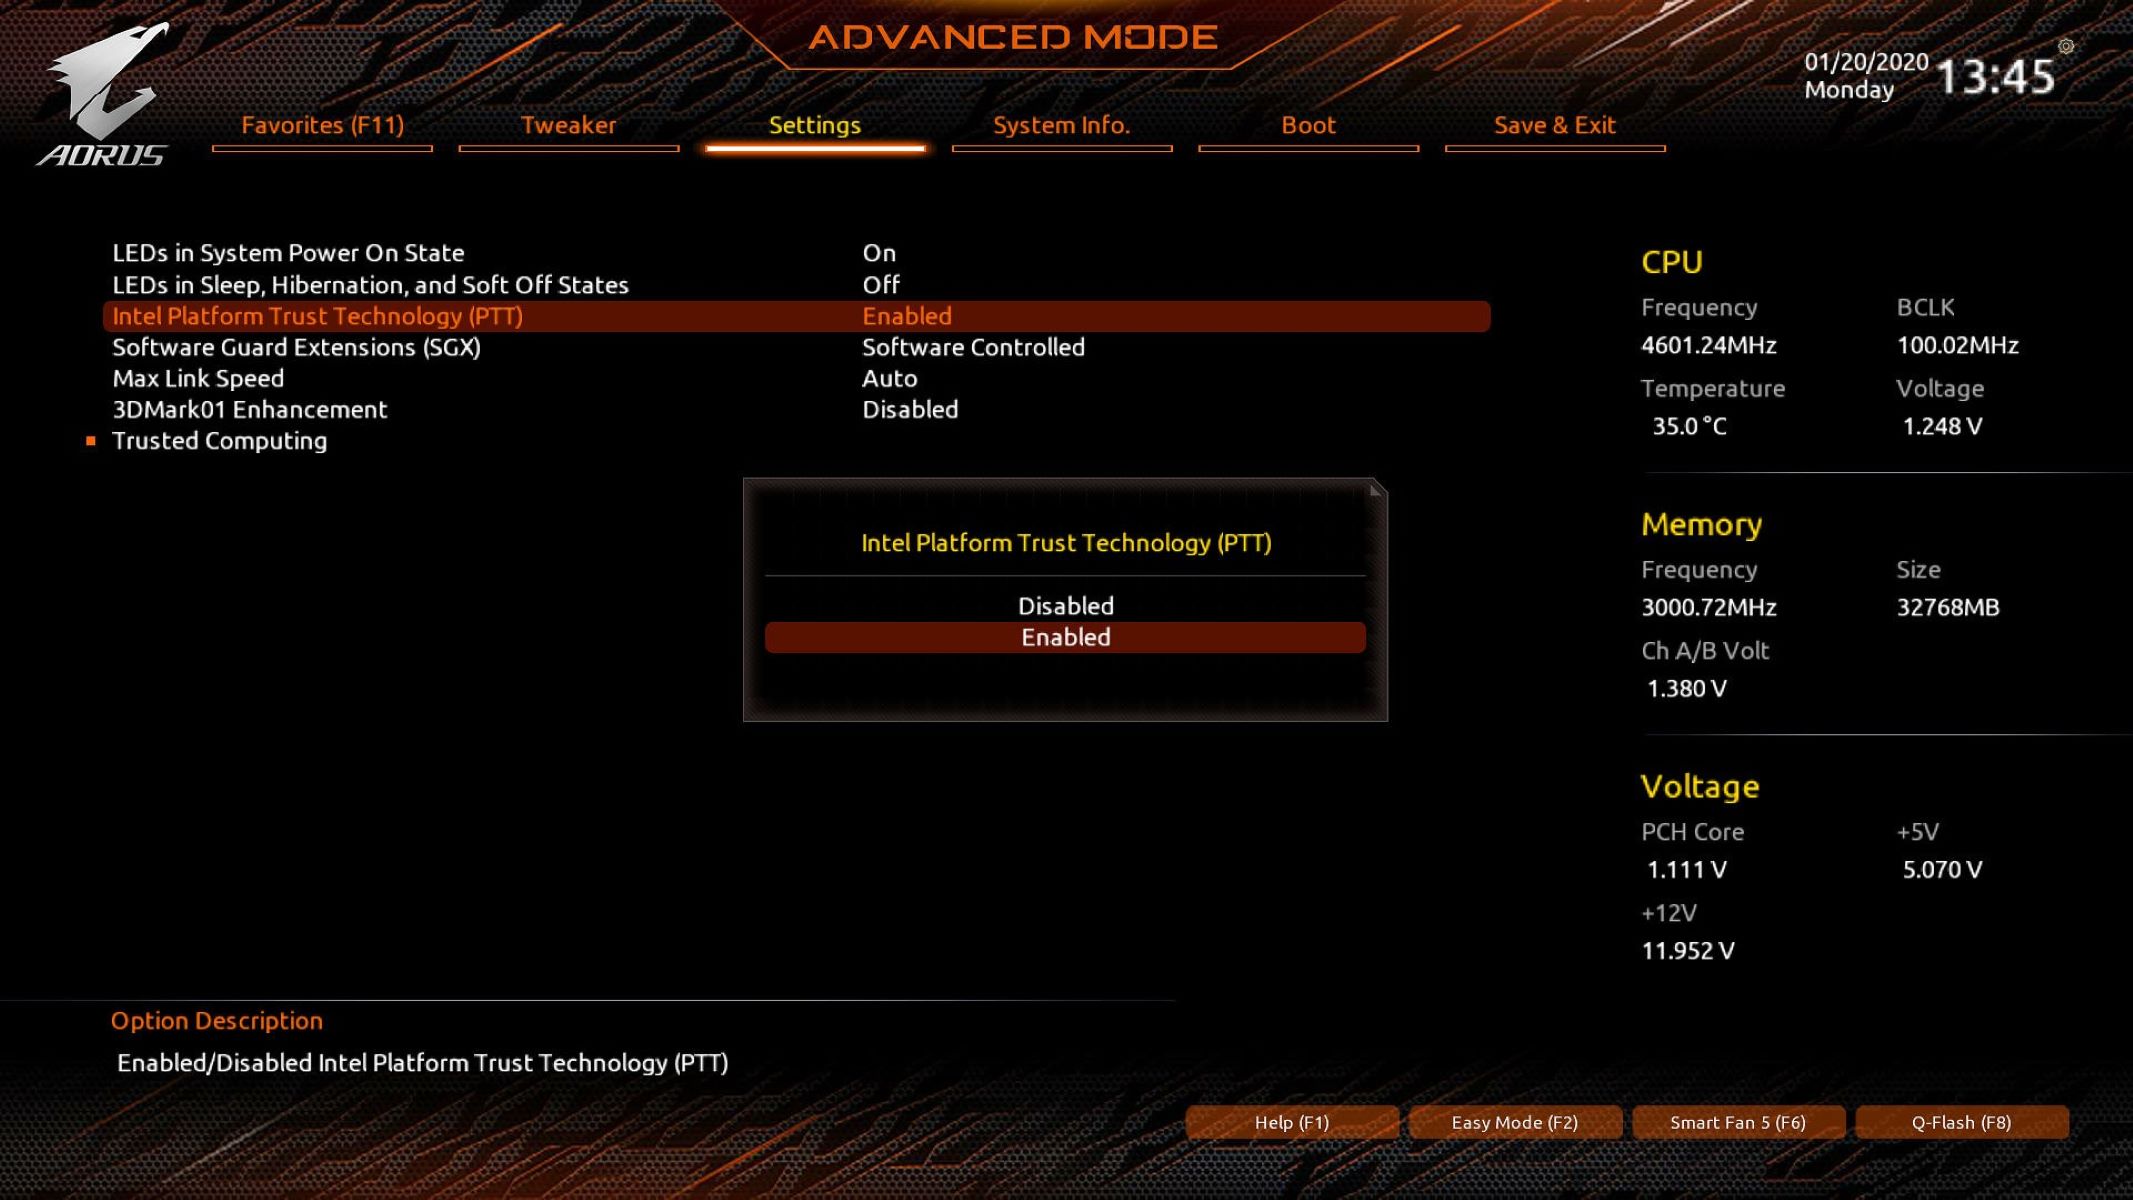
Enabling TPM 2.0 in the BIOS is a crucial step in harnessing the security benefits it offers.
This step ensures that your system recognizes the enabled TPM and applies the necessary configurations.
During the restart, your system will recognize the enabled TPM 2.0 and adjust the necessary configurations accordingly.
This ensures that the TPM is ready for use and provides the enhanced security features it offers.
This can be helpful in troubleshooting or reverting any changes if needed in the future.
Conclusion
Congratulations!
You have successfully enabled TPM 2.0 on your Gigabyte motherboard.
They will be able to provide you with specific guidance and help address any concerns you may have.
Thank you for following this guide on how to enable TPM 2.0 on a Gigabyte motherboard.
Enjoy the enhanced protection and peace of mind that TPM 2.0 provides!
