Introduction
Welcome to this tutorial on how to enable Face ID on your iPhone!
It offers a convenient and efficient way to keep your iPhone secure while adding a touch of futuristic functionality.
Gone are the days of using a passcode or fingerprint to unlock your iPhone.
Now that we have the basics covered, lets get started with enabling Face ID on your iPhone.
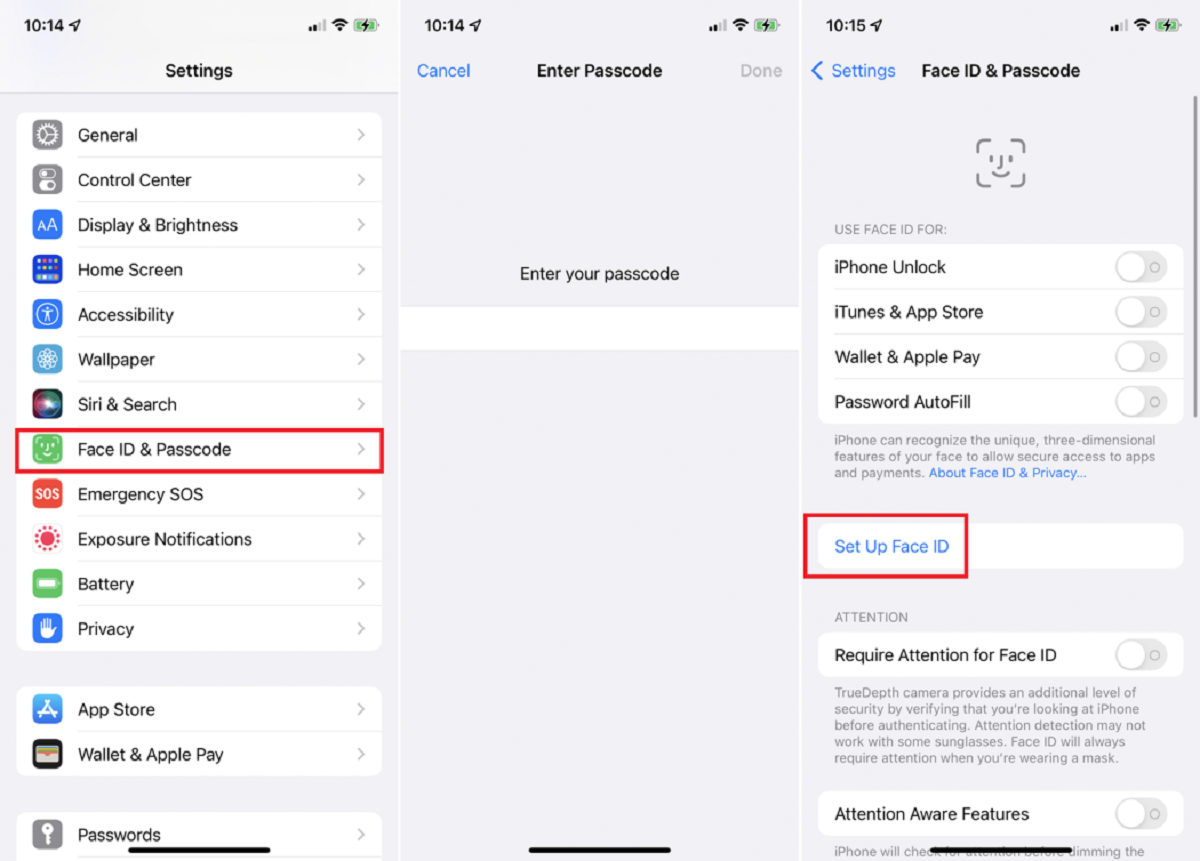
The parameters app is where it’s possible for you to customize various options and preferences for your gear.
This is where youll be able toset up and configure Face ID on your iPhone.
This is where youll be able to begin the setup process for Face ID.
This will ensure accurate face recognition and improve the overall Face ID performance.
With these steps, you have successfully set up Face ID on your iPhone.
The next step will involve registering your face to complete the Face ID setup.
Avoid extreme shadows or direct sunlight, as this can affect the accuracy of Face ID recognition.
By diligently following these steps, you have successfully registered your face with Face ID.
Now its time to finalize theFace ID setup on your iPhone.
It also allows you to customize various options to tailor the Face ID experience to your liking.
It simplifies the unlocking process and adds an extra layer of convenience to your daily interactions with your iPhone.
You have successfully completed the process of enabling and testing Face ID on your iPhone.
Enjoy the convenience and enhanced security that comes with this advanced facial recognition technology.
Conclusion
Congratulations!
Youve reached the end of this tutorial on how to enable Face ID on your iPhone.
Remember to test Face ID to ensure its accuracy and responsiveness under various lighting conditions and facial angles.
This will help you become familiar with the feature and address any potential issues that may arise.
Its a cutting-edge technology that exemplifies the innovation and elegance of Apple devices.
Embrace the future of facial recognition and enjoy the seamless and secure access that Face ID provides.
