Introduction
Welcome to the world of Google Photos!
In this article, we will walk you through the process of editing your photos in Google Photos.
But first, lets address a few key points.
Google Photos is a cloud-based service that allows you to back up, organize, and edit your photos.
If you havent done so already, follow these simple steps to upload your photos:
1.
Sign in to your Google Account:Open your preferred web net surf tool and go to photos.google.com.
Sign in with your Google Account credentials.
If you dont have an account, you might easily create one by clicking on the Create account option.
hit it to pull up the upload options.
Select your preferred method of uploading:Google Photos offers multiple ways to upload your photos.
Keep in mind that Google Photos offers unlimited storage for high-quality photos.
However, photos uploaded in the original quality may count towards your storage quota.
Always check your preferred storage tweaks and make adjustments if needed.
Step 2: Accessing the Editing Features
1.
Sign in to your Google account if you havent already.
punch the photo you wish to edit to open it in full view.
select it to enter the editing mode.
Explore the editing tools:Take your time to explore each editing tool and understand its function.
The tools allow you to adjust elements such as brightness, contrast, saturation, and sharpness.
Drag the sliders or use the icons to increase or decrease the desired effect.
Experiment with different prefs until you achieve the desired result.
This allows you to see the impact of your edits and make further adjustments if necessary.
Step 3: Editing Basics
1.
Adjust brightness and contrast:Use the brightness and contrast sliders to control the overall exposure of your photo.
Increase brightness to make it lighter or decrease it for a darker effect.
Play with the contrast slider to add more depth and definition to your image.
Enhance colors:The saturation slider allows you to intensify or desaturate the colors in your photo.
Increase saturation for vibrant and bold colors or decrease it for a more subtle and muted look.
Increase the slider to smoothen out the noise and improve the overall quality of the image.
Likewise, the redo button allows you to reapply any edits that you have undone.
Step 4: Adjusting Lighting and Color
1.
Exposure:Use the exposure slider to control the overall brightness of your photo.
Increase the exposure to make the image brighter or decrease it to darken the scene.
Contrast:The contrast slider helps you adjust the difference between light and dark areas of the photo.
Increase contrast for a more dramatic and dynamic look or decrease it for a softer and more muted appearance.
Warmth:The warmth slider allows you to adjust the color temperature of your photo.
Increase the warmth for a golden or yellowish tone, or decrease it for a cooler or bluish tone.
Saturation:Adjusting the saturation slider enables you to control the intensity of colors in your photo.
Increase saturation for vibrant and bold colors or decrease it for a more muted and desaturated look.
Increase the vibrance to add depth and richness to the image.
Tint:Use the tint slider to adjust the color balance of your photo.
Move it towards green to add a cool tone, or towards magenta to introduce a warmer tone.
Explore the different filter options and preview their effects before selecting the one that best suits your desired style.
Use this slider to control the strength or subtlety of the particular adjustment you have made.
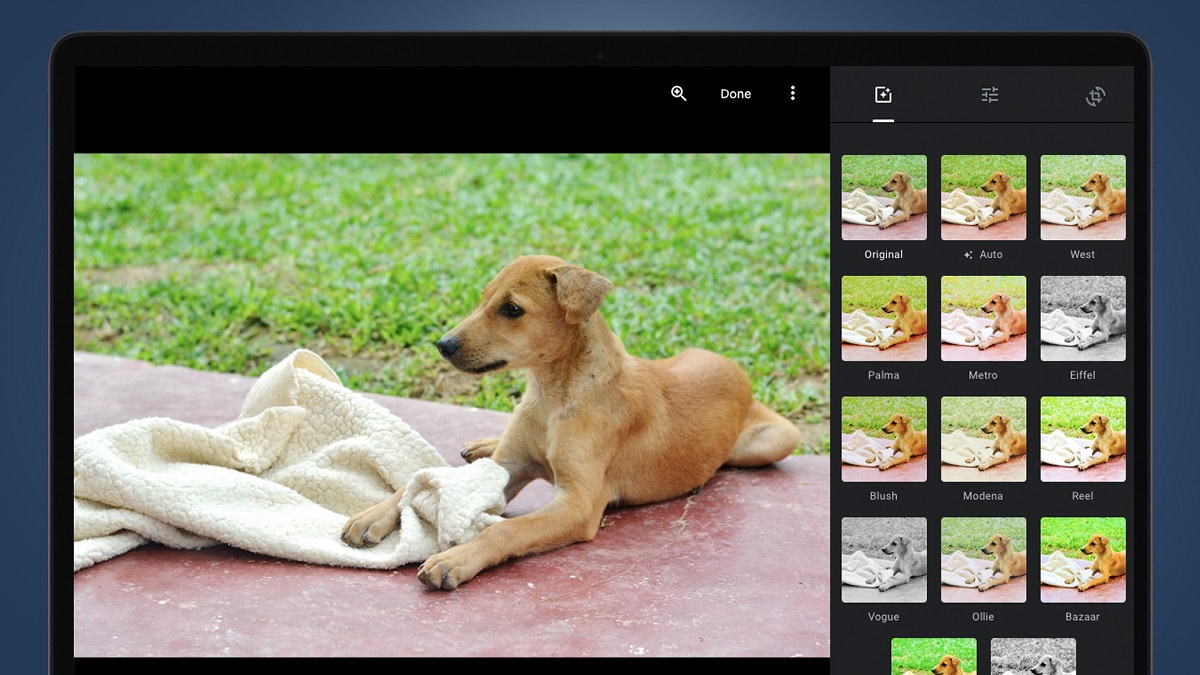
Step 5: Enhancing Your Photos with Filters
- bring up the photo in the editing mode by clicking on the pencil icon or the word Edit.
hit this icon to get into the different filter options available.
Explore the filter presets:Google Photos offers a variety of filter presets to suit different styles and preferences.
This allows you to see the impact of the filter and make adjustments if needed.
This enables you to control the strength of the filter, allowing for a more subtle or dramatic enhancement.
Experiment with different combinations by applying one filter and then adding another on top of it.
hit this icon to reach the cropping and rotation options.
Drag them to grab the desired portion of the image you want to keep.
Straighten your photo:To correct tilted or uneven horizons, use the straighten tool.
Each click will rotate the photo 90 degrees clockwise.
Alternatively, you might manually adjust the rotation by using the degree slider.
This feature is especially useful for correcting mirror image reflections or creating unique visual effects.
This allows you to ensure that the cropped and rotated image meets your desired composition and orientation.
select this icon to enter the collection of special effects.
Simply choose an effect and adjust its intensity, then select another effect and adjust accordingly.
This way, it’s possible for you to create your own unique combinations and aesthetic.
This allows you to see the impact of the applied effects and make adjustments if needed.
punch this icon to dive into the retouching tool.
This allows you to have better control and precision while removing the object.
Erase the unwanted object:Using the retouching brush, simply swipe or paint over the unwanted object.
Repeat the process until the unwanted object is completely removed.
tap on this icon to pull up the editing tools and options.
These adjustments may include options to tweak the brightness, contrast, saturation, and sharpness of the video.
Explore the range of available filters and preview their effects on your media.
Add music or audio:To enhance your videos, you could also add background music or audio.
Google Photos provides options to add music from your own library or select from a range of built-in soundtracks.
Adjust the volume levels to achieve the desired blend of audio and video.
These effects can add a creative touch or evoke a specific atmosphere in your visual media.
The edited version will replace the original, while the original is still preserved in your library.
Editing live photos and videos in Google Photos allows you to breathe new life into your dynamic visual media.
fire up the photo in full view by clicking on it.
Choose the desired file format and quality, and wait for the download process to complete.
Share the edited photo:Google Photos offers several options for sharing your edited photo.
Albums allow you to group and categorize your photos, making them easier to find and share.
Google Photos provides options to share privately with specific individuals or share publicly with a wider audience.
These features allow you to share your edited photos in a more engaging and interactive format.
you could order prints, create photo books, or even design personalized gifts featuring your edited photos.
Congratulations on unleashing your creativity and transforming your photos into stunning visual creations!
Conclusion
Congratulations on completing all the steps to edit your photos in Google Photos!
You have unlocked the power to transform your ordinary photos into extraordinary visuals.
Experiment with different edits, but always trust your creative instincts to achieve the desired outcome.
Now its time to take your newfound skills and unleash your creativity.
Dive into the world of photo editing in Google Photos and discover the endless possibilities of creating stunning visuals.
So, grab your camera, upload your photos, and let your creativity soar.
