Introduction
Welcome to the guide on how to do a fresh install of Windows 10.
A fresh install of Windows 10 involves wiping your hard drive and reinstalling the operating system from scratch.
This guide will take you through the step-by-step process of performing a fresh install of Windows 10.
Therefore, it is crucial to backup any important data before proceeding with the installation.
So, lets get started with the first step: backing up your data.
Heres how to do it:
1.
Choose the backup method:Next, decide on the backup method that suits your needs.
You have a few options:
3.
Start the backup process:Once youve chosen your preferred backup method, start the backup process.
Take some time to navigate through the backed-up files and ensure that everything is intact and accessible.
This will allow you to boot your box from the installation media and initiate the installation process.
Heres how to create a Windows 10 installation media:
- ensure to go for the correct version and edition of Windows 10 that you want to install.
fire off the tool and follow the on-screen instructions.
Be patient and allow the tool to complete the process without interruption.
Next, we will guide you on how to reach the BIOS controls and boot from the installation media.
The BIOS controls allow you to configure the hardware and choose the boot rig.
Heres how to enter the BIOS options:
1.
Start or kickstart your setup:If your setup is already turned on, restart it.
If its off, power it on by pressing the power button.
check that you have the Windows 10 installation media connected to your system.
This can be a USB drive or a DVD.
Enter the BIOS:As the computer boots up, a manufacturer logo will typically appear.
This key is often displayed on the screen, but it can vary depending on the manufacturer.
Common keys include F2, Del, F12, or Esc.
Press the designated key repeatedly until the BIOS parameters screen appears.
Use the arrow keys on your keyboard to move between sections and options.
Look for a section called Boot or Boot Options.
Use the arrow keys to highlight the gear that corresponds to the Windows 10 installation media.
It can be a USB unit or the DVD drive.
Change the boot order by moving the selected equipment to the top of the list.
This ensures that your setup will boot from the installation media first.
pick the option to secure your changes and exit the BIOS.
your system will restart automatically.
You should see a message that prompts you to Press any key to boot from CD or DVD.
This message typically flashes on the screen for a few seconds.
Be ready to press any key on your keyboard to proceed.
This will initiate the booting process from the Windows 10 installation media.
verify not to press the key repeatedly to avoid any errors.
This may take a moment, so be patient.
The setup screen will display the Windows logo and a loading indicator while the necessary files are loaded.
Choose the appropriate options for your preferences and click Next to continue.
In the next section, we will guide you through the installation process and customizing your controls.
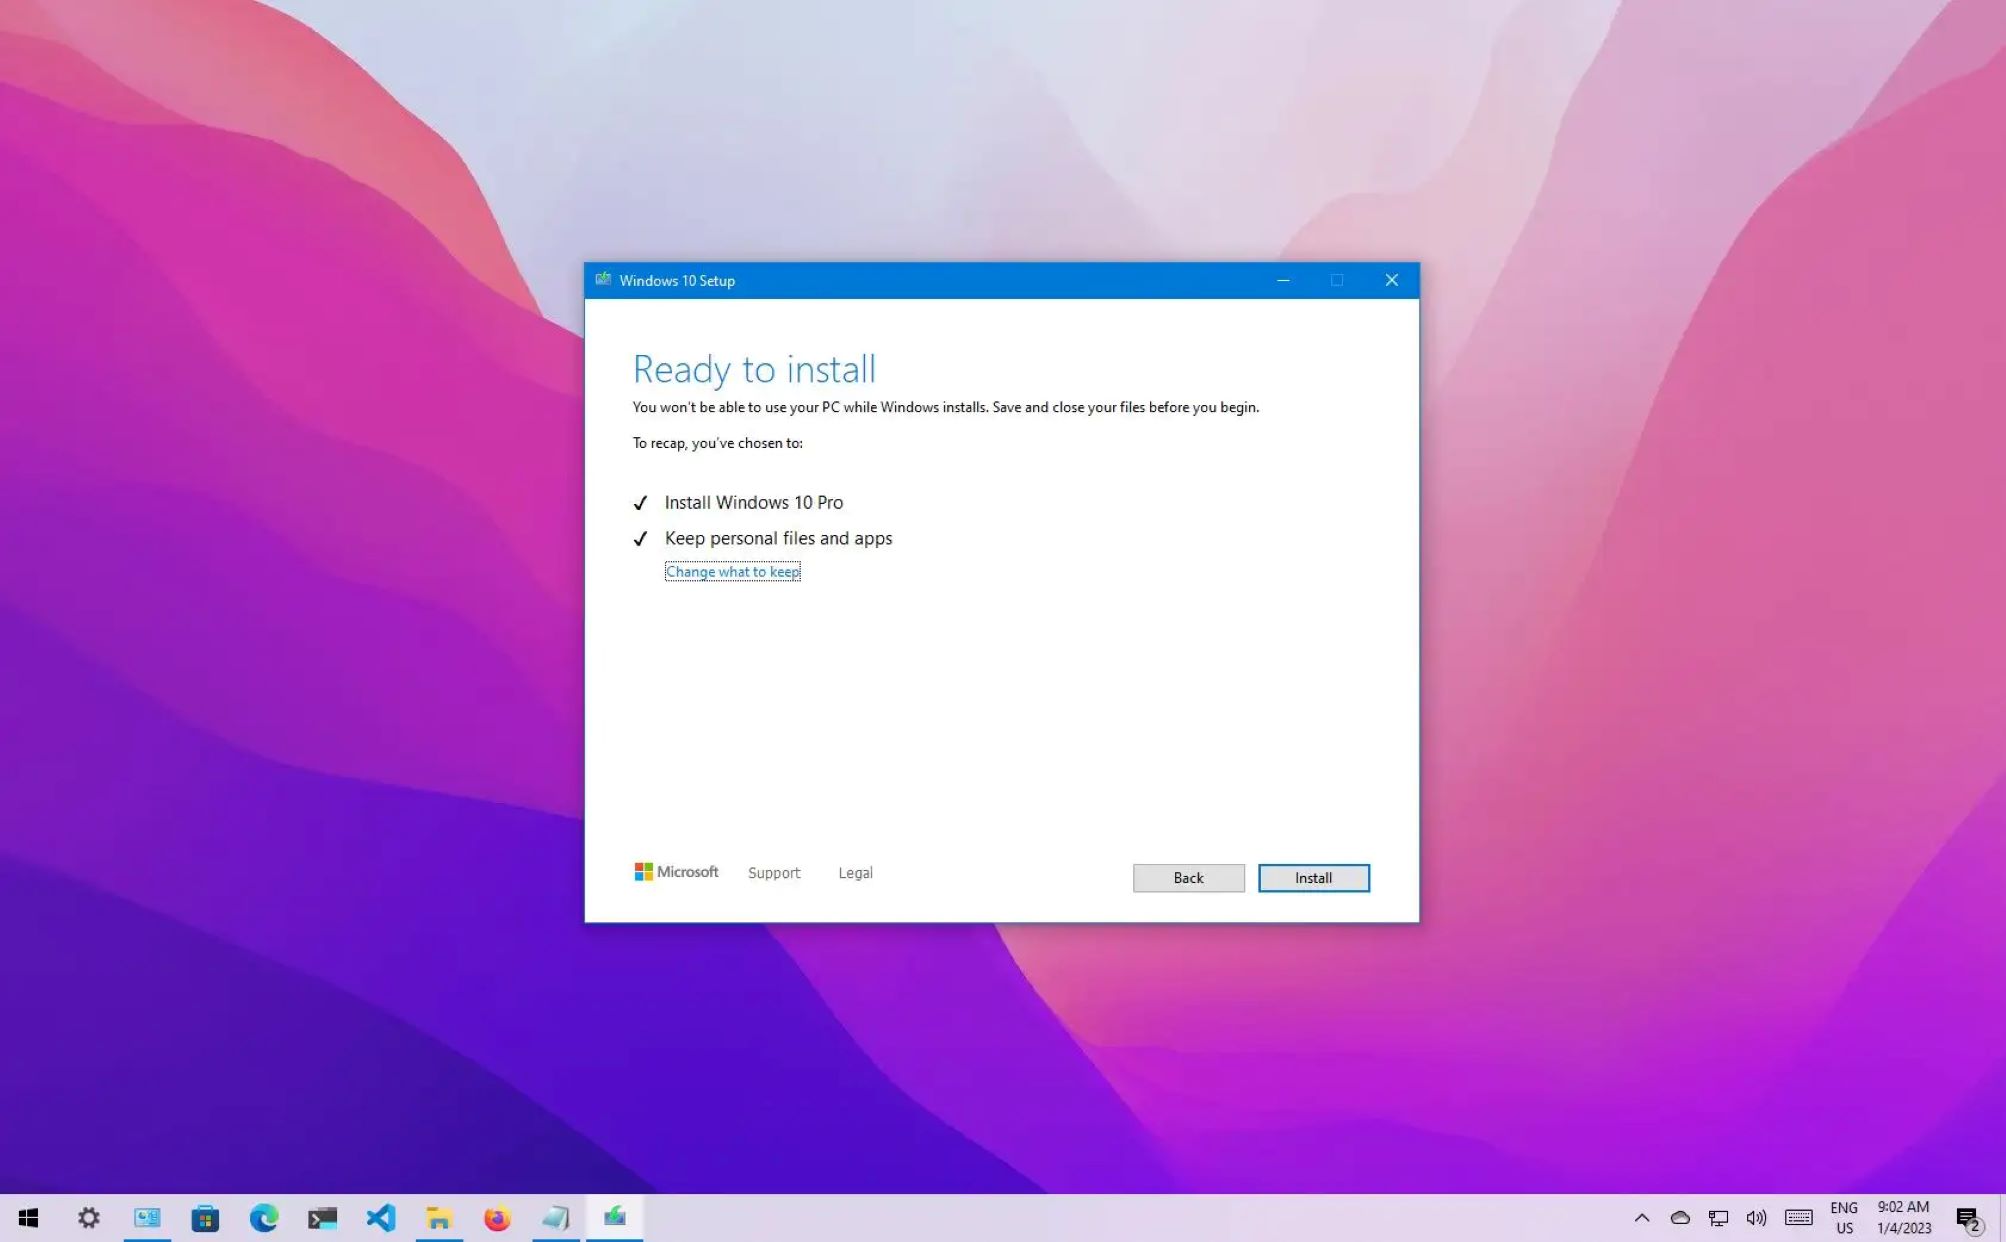
Install Windows 10
1.
If you are upgrading from a previous version of Windows, choose the Upgrade option.
This is typically the primary hard drive (usually labeled as Disk 0).
grab the drive and grab the Next button to continue.
Windows 10 will automatically copy files, install updates, and configure configs during this process.
It may take some time, so be patient and avoid interrupting the installation.
input your credentials or create a new account if necessary.
After signing in, Windows 10 will finalize the setup process.
Take some time to explore the tweaks and personalize Windows 10 according to your preferences.
Take some time to explore each category to find the parameters you want to customize.
Some important categories to consider are:
3.
Customize your preferences:Within each category, you will find specific parameters to customize.
This will allow you to adjust specific configurations and access additional features.
This will allow you to see how your modifications affect the look and feel of Windows 10.
Once you are satisfied with your changes, press the appropriate buttons or switches to apply them.
Install Essential Drivers
1.
Identify your hardware components:Before installing drivers, its helpful to identify the hardware components in your setup.
This includes the graphics card, sound card, web link adapter, and any other peripherals.
Look for the driver that matches your operating system version and download it to your box.
Once downloaded, initiate the driver installer and follow the on-screen prompts to set up the driver.
This will help prevent any conflicts or issues that may arise from outdated or incompatible drivers.
Windows will then search for any available driver updates and install them on your box.
Regularly checking for and updating your drivers can help enhance the performance and stability of your system.
Install Necessary Software and Applications
1.
Download from official sources:Visit the official websites or trusted sources for each software tool on your list.
Beware of unofficial sources that may contain malware or compromised versions of the software.
This may include options related to language, display, notifications, and customizations specific to each program.
Repeat for other software:Repeat the above steps for each software or program on your list.
Install them one by one to ensure a smooth installation process and to minimize conflicts between programs.
Enable automatic updates whenever possible to ensure that your software remains current and secure.
Take your time to install each program correctly and configure them to suit your preferences and needs.
Microsoft regularly releases updates that include bug fixes, security patches, and new features.
Heres how to refresh your Windows 10 system:
1.
Open Windows Update:hit the Start menu, select prefs, and then choose Update & Security.
This will fire up the Windows Update parameters page.
Check for updates:On the Windows Update tweaks page, hit the Check for updates button.
Windows will search for available updates, including security patches, cumulative updates, and feature updates.
Depending on the size and number of updates, the process may take some time.
Ensure that your setup is connected to a stable internet connection during the update.
Its important to cycle your system as soon as possible to complete the update process.
Some updates may require multiple restarts to fully install.
Adjust these tweaks according to your preferences and requirements.
Automatic updates will download and install updates in the background, keeping your system secure and up to date.
By regularly updating Windows 10, you benefit from improved security, stability, and access to new features.
It is essential to stay proactive about updating your system to maintain optimal performance and protect against potential vulnerabilities.
Heres how you could restore your files and get back to where you left off:
1.
Ensure that the rig is recognized and accessible in Windows 10.
Copy your files to the appropriate locations:Navigate to the location where you backed up your files.
This might be in a specific folder or on the root of the backup unit.
Copy the files and folders to their original locations on your system.
Check the documentation or tweaks of each software to see if this feature is available.
If available, follow the instructions to restore your previous prefs.
By following these steps, you might restore your files and data after a fresh install of Windows 10.
Conclusion
Congratulations!
You have successfully completed a fresh install of Windows 10.
Thank you for following this guide, and we hope it has been helpful for you.
Heres to a seamless and enjoyable experience with your newly installed Windows 10 system!
