While this can be incredibly helpful, there are instances where you may need to delete this autofill data.
In this guide, we’ll walk you through the step-by-step process of deleting autofill data in Safari.
Understanding how todelete Safariautofill data is particularly important for those who value privacy and security.
Once you’ve located the Safari icon, simply choose it to launch the web app.
Next, navigate to the menu bar at the top of the screen and press “Safari.”
A drop-down menu will appear, and within this menu, you’ll find the “Preferences” option.
hit “Preferences” to bring up the Safari preferences window.
Keyboard Shortcut: Alternatively, Mac users can utilize akeyboardshortcut to access Safari preferences.
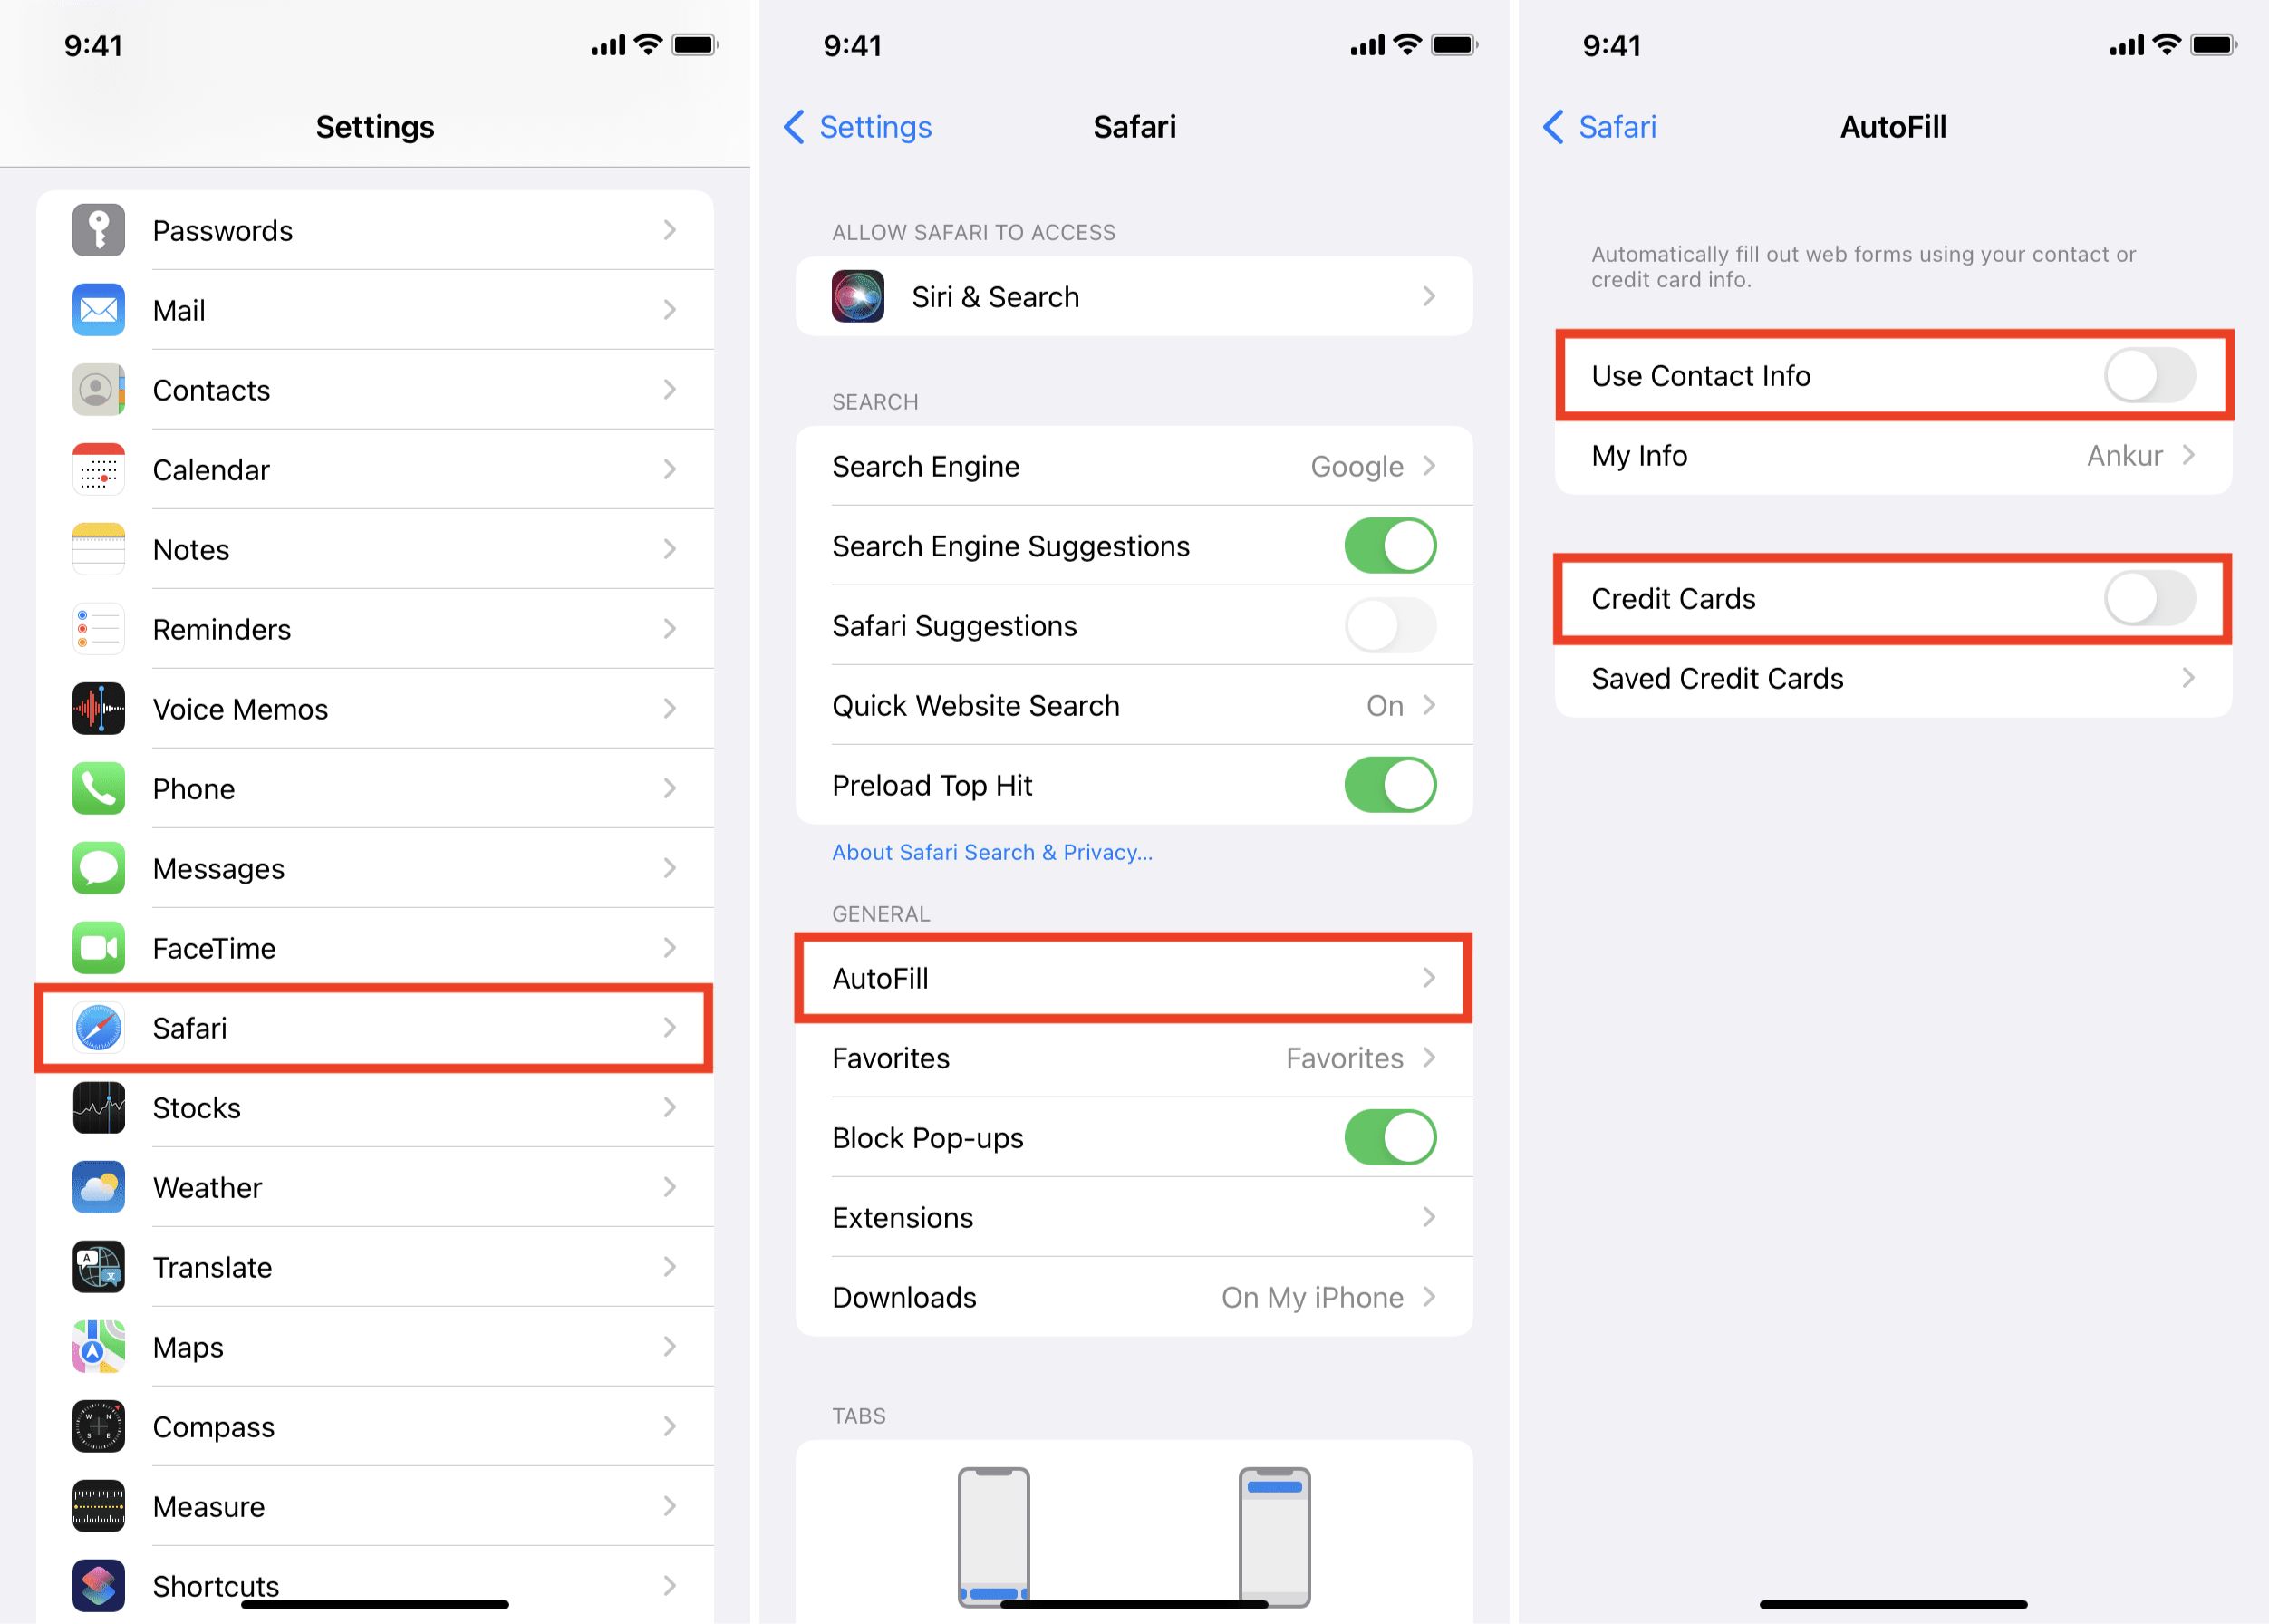
Scroll down and locate the “Safari” option within the list of installed apps.
This will reveal a menu with various options, including “controls for This Website.”
Each category can be individually managed, allowing users to tailor their autofill data to suit their specific requirements.
Furthermore, Safari’s autofill management capabilities extend to the ability to add new information to the autofill database.
Review the Entries: Once the category is selected, review the list of autofill entries within that category.
Identify the specific entries that you want to delete, ensuring that you are targeting the correct information.
Alternatively, right-tap on the entry and choose the “Delete” option from the context menu.
This action will remove the selected autofill entry from the database.
Confirm the deletion to permanently remove the entry from the autofill database.
