Disk Utility is a powerful utility that allows you to manage and manipulate storage devices on your Mac.
Additionally, ensure that both the source and destination external hard drives are properly connected to your Mac.
Once everything is set, lets get started with the step-by-step instructions.
Connect the USB or Thunderbolt cable from each drive to an available port on your Mac.
Once both drives are connected, you should see them appear on your desktop as external disks.
If they dont appear, you’re able to check for them in the Finders sidebar.
This will ensure that connected external drives are always displayed on your desktop or in the sidebar.
Alternatively, you’re able to also check for the connected external drives in the Disk Utility.
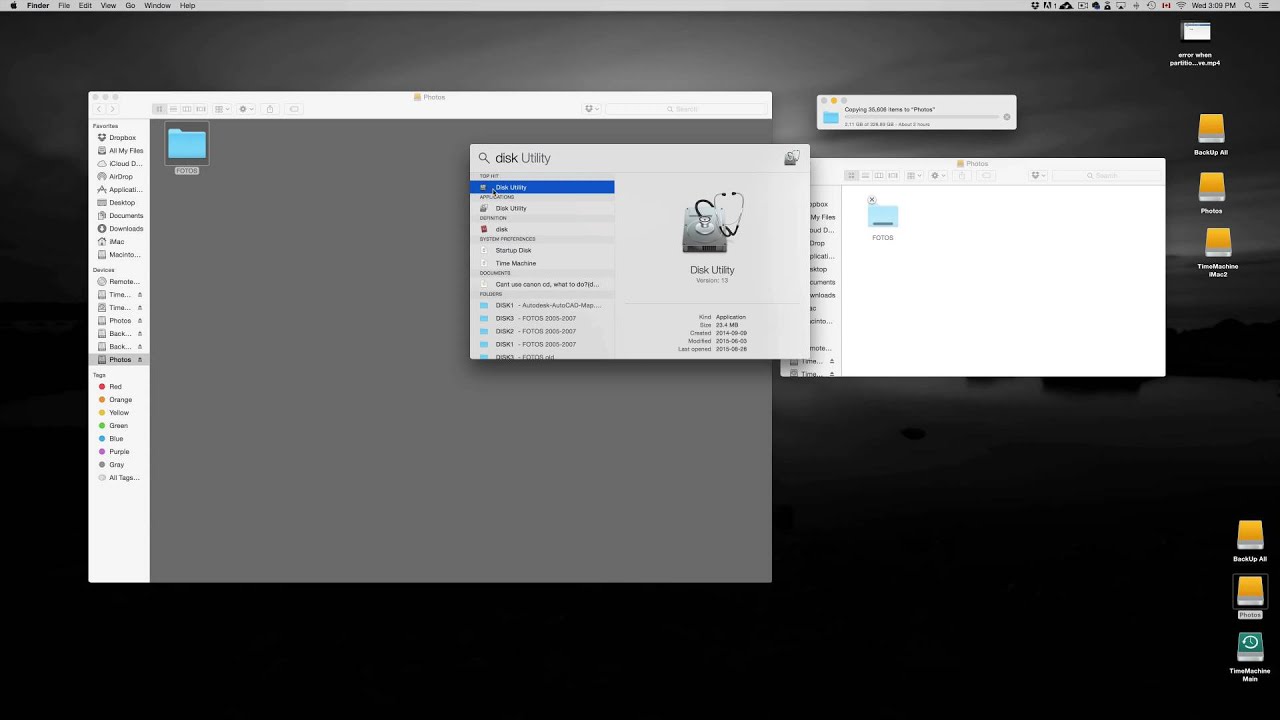
press the Disk Utility app to open it.
Disk Utility is a built-in tool on your Mac that allows you to manage and format storage devices.
To open Disk Utility, you have a couple of options.
From the search results, hit the Disk Utility app to open it.
This includes your internal hard drive as well as any connected external hard drives.
So, check that you have a backup of any important data on the destination drive before moving forward.
With Disk Utility open and your external hard drives connected, youre ready to proceed to the next step.
The source drive is the one containing the data you want to copy.
Take a moment to identify the source drive from the list.
It should be listed with the name or label you assigned to it when you originally formatted the drive.
To snag the source external hard drive, simply choose its name in the Disk Utility sidebar.
Before moving on to the next step, double-check that you have correctly selected the source drive.
In the toolbar at the top of the Disk Utility window, you will find a set of buttons.
Look for the button labeled Restore and tap on it.
This will pop fire up Restore dialog box.
The Restore dialog box allows you to choose the source and destination for the copying process.
Double-check to ensure it is correct.
Next, it’s crucial that you specify the destination for the copied data.
To do this, tap on the Click here to choose a source button next to the Restore field.
A dropdown menu will appear, displaying all the connected storage devices.
Be sure to choose the correct destination drive as the data on it will be overwritten.
If everything looks correct and you are satisfied with the choices, you could proceed to the next step.
This is where the data from the source drive will be copied.
Verify that it is correct.
A dropdown menu will appear, showing all the connected storage devices.
Before proceeding to the next step, double-check that you have accurately selected the destination external hard drive.
This step is crucial to ensure that the data is copied to the correct location.
tap on this button to begin the copying process.
This includes all files, folders, and even the file system structure.
Depending on the size of the data being copied, this process may take some time.
During the copying process, you might monitor the progress in the Disk Utility window.
It will display a progress bar, indicating how much of the data has been copied.
You may also see an estimate of the time remaining until the process is complete.
This will help ensure that the copying process completes smoothly and efficiently.
This can potentially lead to data corruption or incomplete copying of files.
Its best to let the process run its course without any disturbances.
Disk Utility will display a progress bar to indicate the status of the copying process.
It may also provide an estimate of the time remaining until the process is complete.
Keep an eye on these indicators to have an idea of the progress being made.
Its important to exercise patience and allow the process to complete without any interruptions.
Failure to do so can result in data integrity issues on the drive.
This step ensures the integrity and completeness of the copied data.
Double-checking your choices at each step will help prevent any accidental data loss or overwriting of important files.
Remember to always have a backup of your data before initiating the copying process to avoid irreversible data loss.
