Introduction
Welcome to this guide on how to connect a wireless microphone to your smart TV.
Checking the compatibility will help you determine the best method to connect your wireless microphone to your smart TV.
So, lets get started with the first step: checking the compatibility of your smart TV.
Look for information about audio input options or wireless connectivity.
If your TV supports Bluetooth functionality, it will typically be mentioned in the features or connectivity section.
To confirm this, look for terms such as Bluetooth-enabled or Bluetooth audio support.
Another way to check compatibility is by accessing the prefs menu on your smart TV.
Navigate to the audio parameters and look for options related to Bluetooth connections or external audio input.
If you see these options, its a good indication that your TV supports wireless microphone connectivity.
There are a few different options available, each with its own advantages and considerations.
1.Bluetooth Microphone: Bluetooth microphones are a popular choice for connecting to smart TVs.
Bluetooth microphones are usually compact and portable, making them convenient for use with a smart TV.
These microphones connect directly to the USB port of your TV, providing a simple and straightforward setup process.
Wireless Receiver and Microphone Set: Another option is to use a wireless receiver and microphone set.
When choosing the punch in of wireless microphone, consider your specific needs and preferences.
If you value convenience and portability, a Bluetooth microphone or USB microphone may be the best choice.
Reading product reviews and researching different brands and models can help you make an informed decision.
USB Connection: For a USB microphone, the connection process is usually straightforward.
Plug the USB microphone into the USB port on your smart TV.
The TV should automatically recognize the microphone and set it as the default audio input source.
This method provides a direct and hassle-free connection that is often plug-and-play.
Most wireless receivers come with an audio output, usually in the form of RCA or 3.5mm audio ports.
verify to opt for correct audio input source on your TV configs.
Next, follow the specific instructions provided with your wireless microphone set to pair the microphone with the receiver.
Once paired, your smart TV will receive audio input from the wireless microphone via the connected receiver.
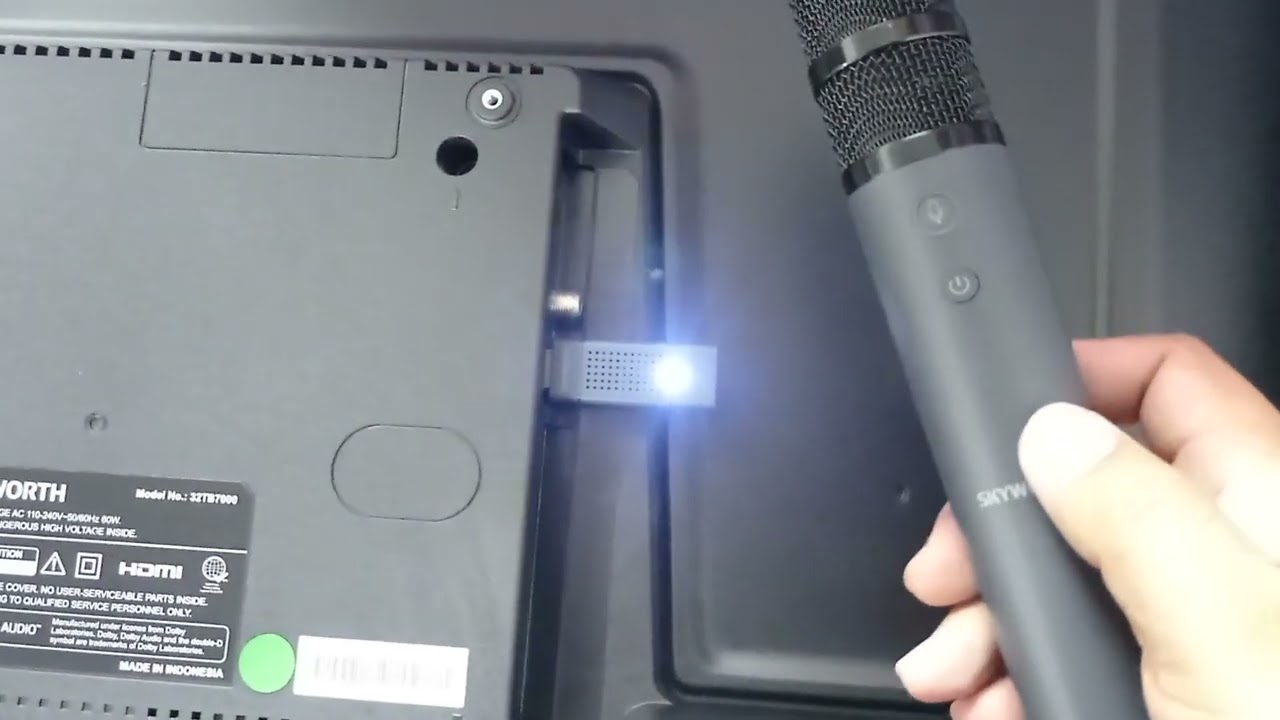
Step 4: Connect the wireless microphone to your smart TV using Bluetooth
1.
Turn on your Bluetooth microphone and put it into pairing mode.
On your smart TV, navigate to the controls menu and find the Bluetooth controls.
The exact location of the Bluetooth prefs may vary depending on your TVs brand and model.
Look for options such as Bluetooth devices, Connected devices, or Devices.
snag the appropriate option to dive into the Bluetooth controls.
In the Bluetooth parameters of your smart TV, enable Bluetooth if it is not already turned on.
Then, grab the option to scan for available devices.
Your TV will search for nearby Bluetooth devices, including the microphone.
After successfully pairing your microphone with your smart TV, the TV should confirm the connection.
At this point, you should be able to use the wireless microphone for audio input on your TV.
Adjust the microphone volume configs on both the microphone itself and the TV to achieve the desired audio levels.
Refer to the user manuals or documentation provided with your devices for more detailed instructions.
Step 5: Connect the wireless microphone to your smart TV using a wireless receiver
1.
Start by connecting the wireless receiver to your smart TV using an audio cable.
Common options include RCA cables or a 3.5mm audio cable.
Once the receiver is connected to your TV, turn on both the receiver and your smart TV.
jump into the prefs menu on your TV and navigate to the audio prefs.
Look for options such as Audio input, External audio, or similar terms.
snag the input source that corresponds to the connected receiver.
The LED indicators on both devices will usually provide feedback on the pairing process.
Adjust the volume configs on the microphone and the TV to achieve the desired audio levels.
Look for options related to audio prefs, sound prefs, or microphone prefs.
Start by adjusting the microphone volume.
Increase or decrease the volume level to achieve a comfortable and balanced audio output.
Next, you may have options to adjust the microphone gain or sensitivity.
This setting determines how sensitive the microphone is to sound.
Higher sensitivity can pick up softer sounds, while lower sensitivity may help reduce background noise.
Experiment with different tweaks to find the optimal level that suits your environment and desired audio clarity.
If available, explore any additional features such as echo effects.
Remember to save any changes you make to the microphone configs before exiting the configs menu.
This ensures that the adjustments are applied and retained for future use.
Step 7: Test the microphone and adjust the volume levels
1.
Speak or sing into the wireless microphone while monitoring the audio output through your smart TVs speakers.
Start with a normal speaking or singing voice to gauge the microphones sensitivity and audio clarity.
Pay attention to any excessive background noise or unwanted feedback.
Gradually increase the volume of the microphone and observe how it blends with the audio from your smart TV.
Ensure that the microphones volume isnt overpowering or causing distortion in the overall audio output.
Adjust the microphone volume to achieve a harmonious balance between your singing and the instrumental track.
Keep in mind that different programs or content may have varying audio levels.
Continuously listen and assess the microphones audio output while making necessary adjustments to the volume levels.
Take breaks in between adjustments to avoid fatigue and maintain a fresh perspective on the sound quality.
Start by checking the compatibility of your smart TV to ensure it supports wireless microphones.
Understanding the different connectivity options is crucial before proceeding to connect your wireless microphone to your smart TV.
Fine-tune parameters such as volume, gain, and other audio effects to achieve the desired sound output.
Remember, each smart TV and wireless microphone may have slight variations in terms of prefs and functionality.
Always refer to the user manuals and specific instructions provided with your devices for accurate guidance.
