Introduction
Welcome to the world of drone flying!
The controller plays a crucial role in maneuvering the drone and controlling its flight.
Therefore, we recommend referring to the user manual specific to your model for any additional instructions or variations.
Once you master this process, youll be ready to explore the skies and capture stunning aerial footage.
Locate the power button on your Sky Rider drone.
This indicates that the drone is powering on.
Additionally, check the battery level of the drone before taking off.
Most Sky Rider drones have LED indicators that display the battery status.
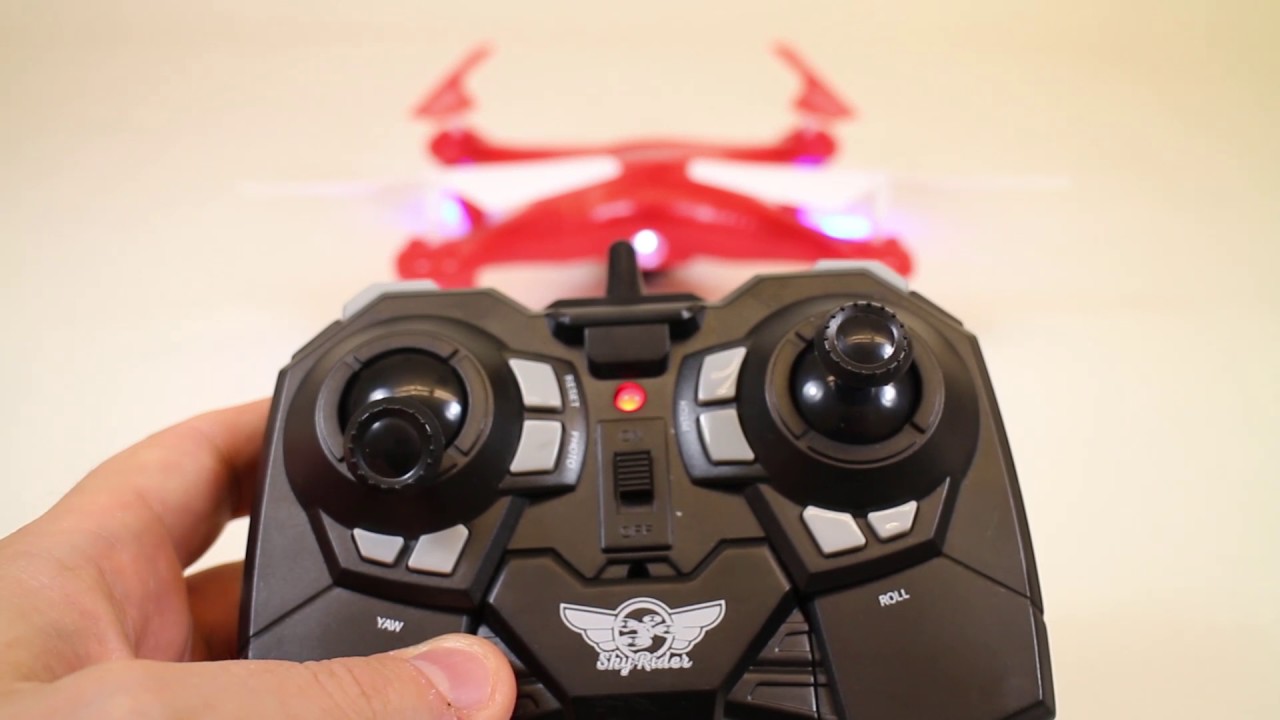
The controller is the rig that allows you to have full control over the drones movements and features.
Properly connecting the controller to the drone is essential for a successful and enjoyable flying experience.
Locate the power button on your Sky Rider controller.
It is usually located on the front or top of the controller.
Press and hold the power button until the controllers display lights up or the indicator lights start blinking.
This indicates that the controller is powering on and ready to establish a connection with the drone.
While the controller is booting up, verify that it is within the recommended range of the drones signal.
Start by checking if the drone and controller are on the same frequency.
Next, locate the pairing button or switch on the Sky Rider drone.
Consult the user manual for your specific model to identify the exact location of the pairing button.
Press and hold the pairing button until the drones indicator lights start blinking rapidly.
Now, its time to pair the controller with the drone.
Look for a pairing button or option on the controller.
Again, the location may vary depending on the model, so refer to the user manual for guidance.
Press and hold the pairing button on the controller until its indicator lights start blinking rapidly.
Within a few seconds, the drone and controller should recognize each other and establish a connection.
The indicator lights on both devices will stop blinking and become solid, indicating a successful pairing.
Additionally, ensure that there are no other devices nearby that may interfere with the connection.
Start by checking the drones response to the controllers commands.
Move the joysticks on the controller and observe how the drone reacts.
Ensure that the drone follows your commands accurately and smoothly.
Some Sky Rider drones come equipped with features like altitude hold, flip modes, or headless mode.
Test these features to ensure they are functioning correctly and adding to your overall flying experience.
While testing the drones response, also pay attention to the controllers signal strength.
Walk around with the controller and observe any interruptions or signal drops.
Maintaining a stable connection is crucial for safe and enjoyable flying.
During the testing phase, its also a good idea to familiarize yourself with the controllers interface and options.
Its always better to resolve any problems before taking the drone for a full flight.
Once you are satisfied with the drones performance and the connection between the drone and the controller, congratulations!
You have successfully connected your Sky Rider drone to the controller.
Have fun exploring the skies and capturing breathtaking footage!
Remember to power on the drone and controller separately, ensuring they are within range of each other.
Pairing the devices is the next step, allowing them to communicate wirelessly.
Each model may have slight differences in the steps and features.
Remember to fly responsibly and in compliance with local regulations to ensure the safety of yourself and others.
So, get out there, have fun, and let your Sky Rider drone soar to new heights!
