Its also widely available and compatible with most modern computers and projectors.
This will ensure that you have everything you oughta successfully establish the connection.
Projector: Ensure that you have the projector you intend to use.
verify if your projector has an HDMI input port.
If it doesnt, you may need an adapter or use a different connection method.
HDMI Cable: Youll need an HDMI cable to connect your box to the projector.
HDMI cables come in different lengths, so choose one that suits your needs.
Its recommended to use a high-quality HDMI cable to ensure a reliable signal transmission.
Power Cables: double-check you have the power cables for both your setup and the projector.
This will ensure they have sufficient power during the connection process.
These can includeHDMI to VGA adaptersor USB to HDMI converters.
Check the specifications of your devices and consult the user manuals for compatibility.
Gathering all the necessary equipment will save you time and frustration during the connection process.
Most modern computers and projectors come equipped with HDMI ports, but its always good to double-check.
HDMI Version: Verify the HDMI version of both your system and projector.
HDMI versions can differ, with newer versions offering improved features and capabilities.
Ideally, both devices should have the same or compatible HDMI versions for optimal performance.
Resolution Compatibility: Ensure that your box and projector support the same or compatible display resolutions.
This will ensure that you’re able to display content without any distortion or compatibility issues.
Refer to the user manuals or specifications of your gear and projector to determine their resolution capabilities.
Operating System Compatibility: look to see if your computers operating system is compatible with the projector.
Most projectors are compatible with popular operating systems like Windows, macOS, and Linux.
However, its always a good idea to confirm compatibility to avoid any potential issues.
Graphics configs: double-check that your computers graphics configs are configured appropriately for external display.
You may need to adjust the display parameters to extend or duplicate your desktop onto the projector screen.
Refer to your computers user manual or operating system documentation for instructions on adjusting the graphics parameters.
Taking the time to check compatibility between your setup and projector will ensure a smooth and successful connection process.
Heres how to do it:
1.
Save and close any open files or applications on your machine.
Its crucial to properly shut down your gear to prevent data loss or system errors.
Once your box has powered off, locate the power button on the projector.
Press and hold the power button until the projector shuts down.
Some projectors may have a separate power switch on the back or side.
Step 4: Connect the HDMI Cable to the Computer
1.
Locate the HDMI port on your machine.
Its typically rectangular and labeled HDMI.
If youre using a desktop computer, the HDMI port is usually located on the back of the CPU.
For laptops, the HDMI port may be on the side or back, depending on the model.
Take one end of the HDMI cable and insert it into the HDMI port on your gear.
Ensure a secure connection by gently pushing the cable until its fully inserted.
verify you have the necessary adapter or cable beforehand.
Connecting the HDMI cable to your box is a crucial step in establishing a connection with the projector.
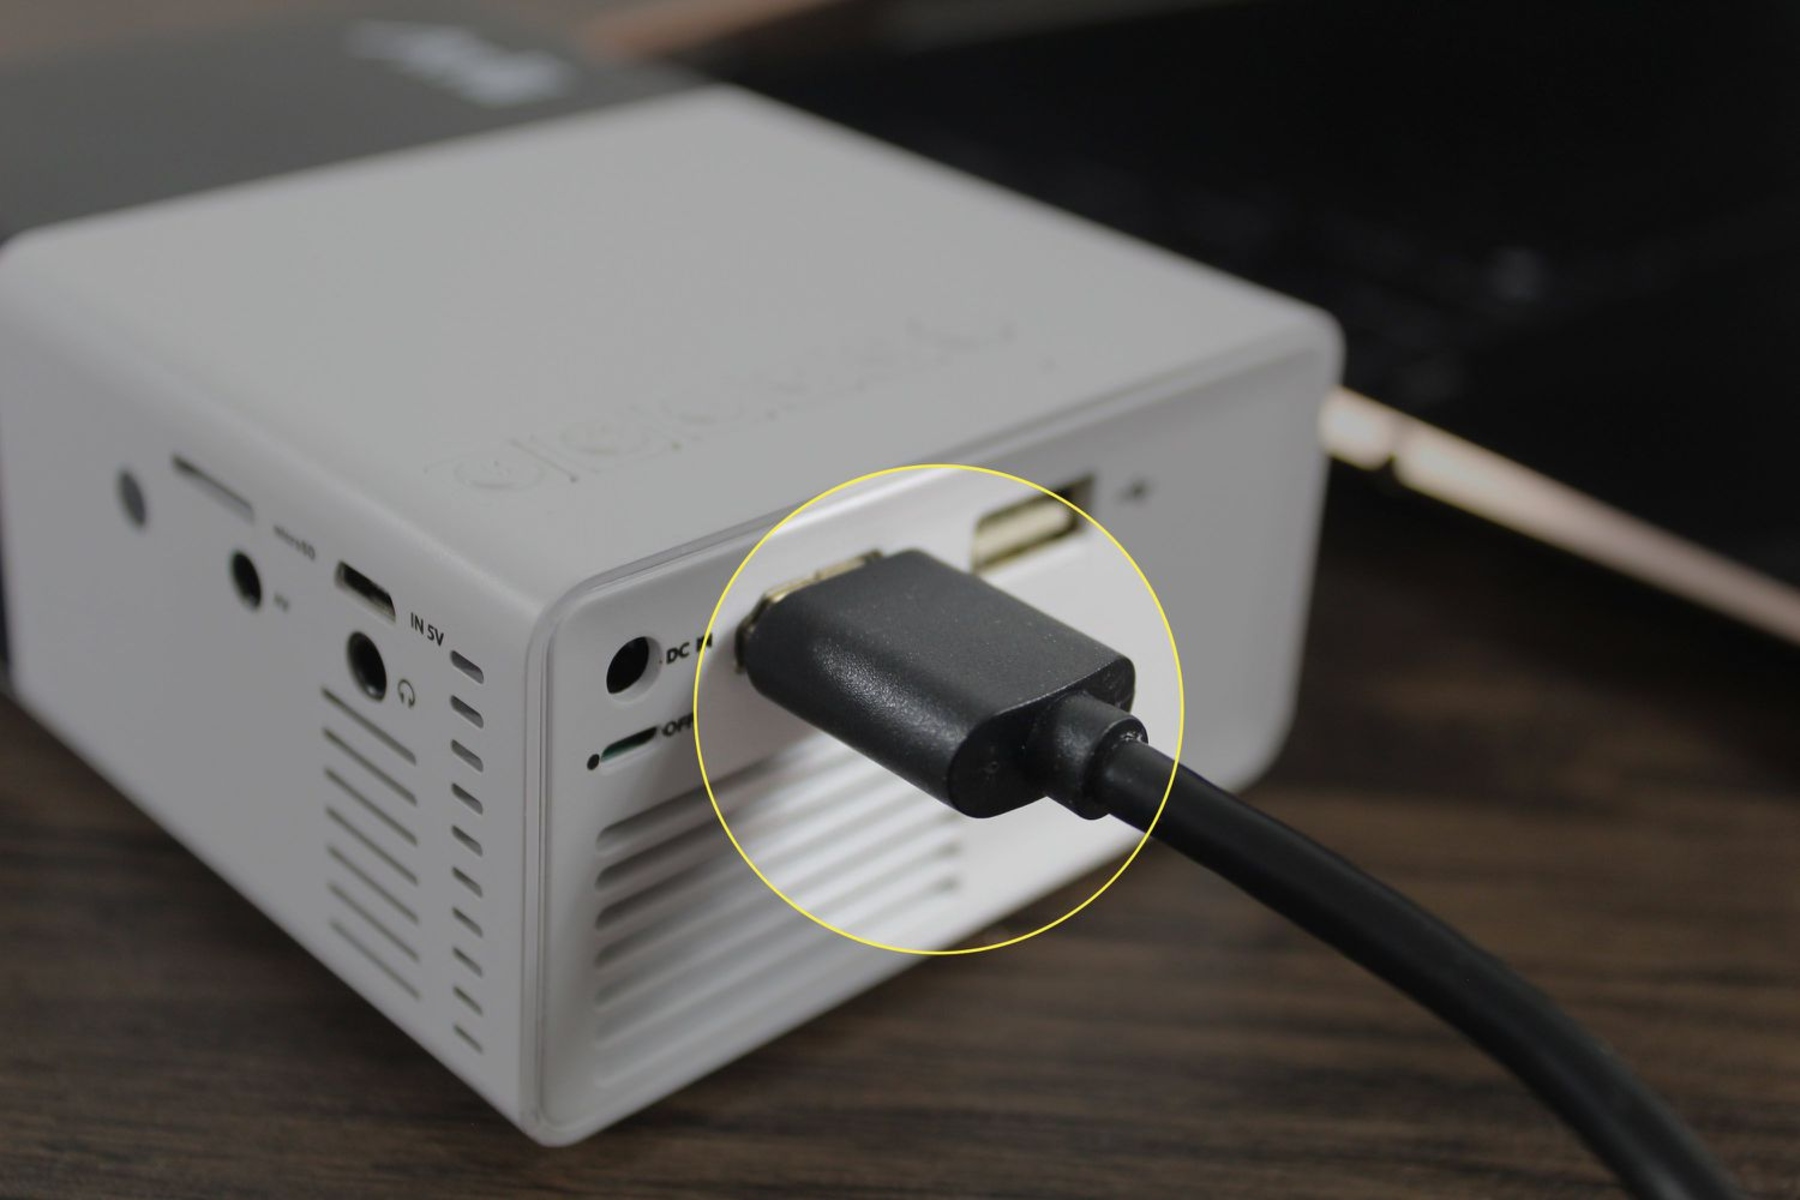
Step 5: Connect the Other End of the HDMI Cable to the Projector
1.
Locate the HDMI input port on your projector.
It is usually located on the back or side of the projector and labeled HDMI.
Check your projectors user manual for the exact location if you are unsure.
Take the other end of the HDMI cable and insert it into the HDMI input port on the projector.
Ensure that the cable is securely connected by gently pushing it in until it is fully inserted.
The next step is to turn on the computer and projector.
Note: Some projectors may have multiple HDMI input ports.
Proceed to the next step, where well learn how to turn on the projector and computer properly.
Step 6: Turn on the Projector and Computer
1.
Start by locating the power button or switch on the projector.
Press the power button or flip the switch to turn on the projector.
Some projectors may take a few moments to power on, so be patient.
Allow the projector to complete its startup process before proceeding to the next step.
Now, turn on your gear by pressing the power button.
As your setup boots up, the projector should detect the HDMI connection and display your computers screen.
Step 7: grab the HDMI Input Source on the Projector
1.
Navigate through the menu or prefs options until you find the Input or Source selection.
This allows you to choose the input source for the projector display.
- pick the HDMI input source from the available options.
Once youve selected the HDMI input source, the projector should switch to displaying the content from your rig.
You may see your computers login screen or desktop on the projector display.
If the problem persists, refer to the user manual for troubleshooting steps specific to your projector model.
In the next step, well discuss adjusting the display controls on your machine for optimal viewing.
Heres how:
1.
Right-hit your computers desktop and select Display controls or Screen resolution.
Choose the option that suits your needs:
3.
Adjust the screen resolution to match thenative resolution of the projector.
The native resolution is usually the optimal resolution for displaying content without distortion.
Refer to the projectors specifications or user manual to find the recommended resolution.
Once youve made the necessary adjustments, click Apply or OK to save the options.
Its worth noting that some operating systems may have different terminology or slightly different steps for adjusting display prefs.
Refer to the documentation or support resources specific to your operating system if needed.
In the next step, well test the connection to ensure everything is working as expected.
Step 9: Test the Connection
1.
On your rig, open a program or file that you want to display on the projector screen.
It can be a presentation, a video, or any other content you wish to showcase.
If needed, use the projectors remote control or the control panel to switch to the correct input.
Take a moment to ensure that the display looks clear, properly scaled, and aligned with your expectations.
You may also refer to the user manuals or support resources for troubleshooting steps specific to your devices.
You have successfully connected your setup to the projector using an HDMI cable.
Enjoy your expanded display and the benefits of a larger screen!
Checking the compatibility between your gear and projector was essential to ensure a successful connection.
Adjusting the display tweaks on the computer allowed for optimal viewing on the projector screen.
Additionally, we checked the extended display or duplication functionality to ensure optimal performance.
Just remember to turn off both devices when youre finished to preserve their lifespan.
Thank you for following along with this step-by-step guide.
Enjoy your enhanced visual experience!
