However, to get to access these features, you gotta connect yourFire tabletto a Wi-Fi data pipe.
Before we begin, ensure you have your Wi-Fi web link name and password handy.
Youll need this information to connect your Fire tablet to your Wi-Fi web link.
Now, lets get started and learn how to connect yourAmazon Fire tabletto a Wi-Fi data pipe.
Locate the power button on the devices side or top and press it to turn it on.
You may need to hold the button for a few seconds until the screen lights up.
Once the machine is turned on, the Amazon logo or the lock screen will appear.
So, ensure that the unit has enough battery power for the connection process.
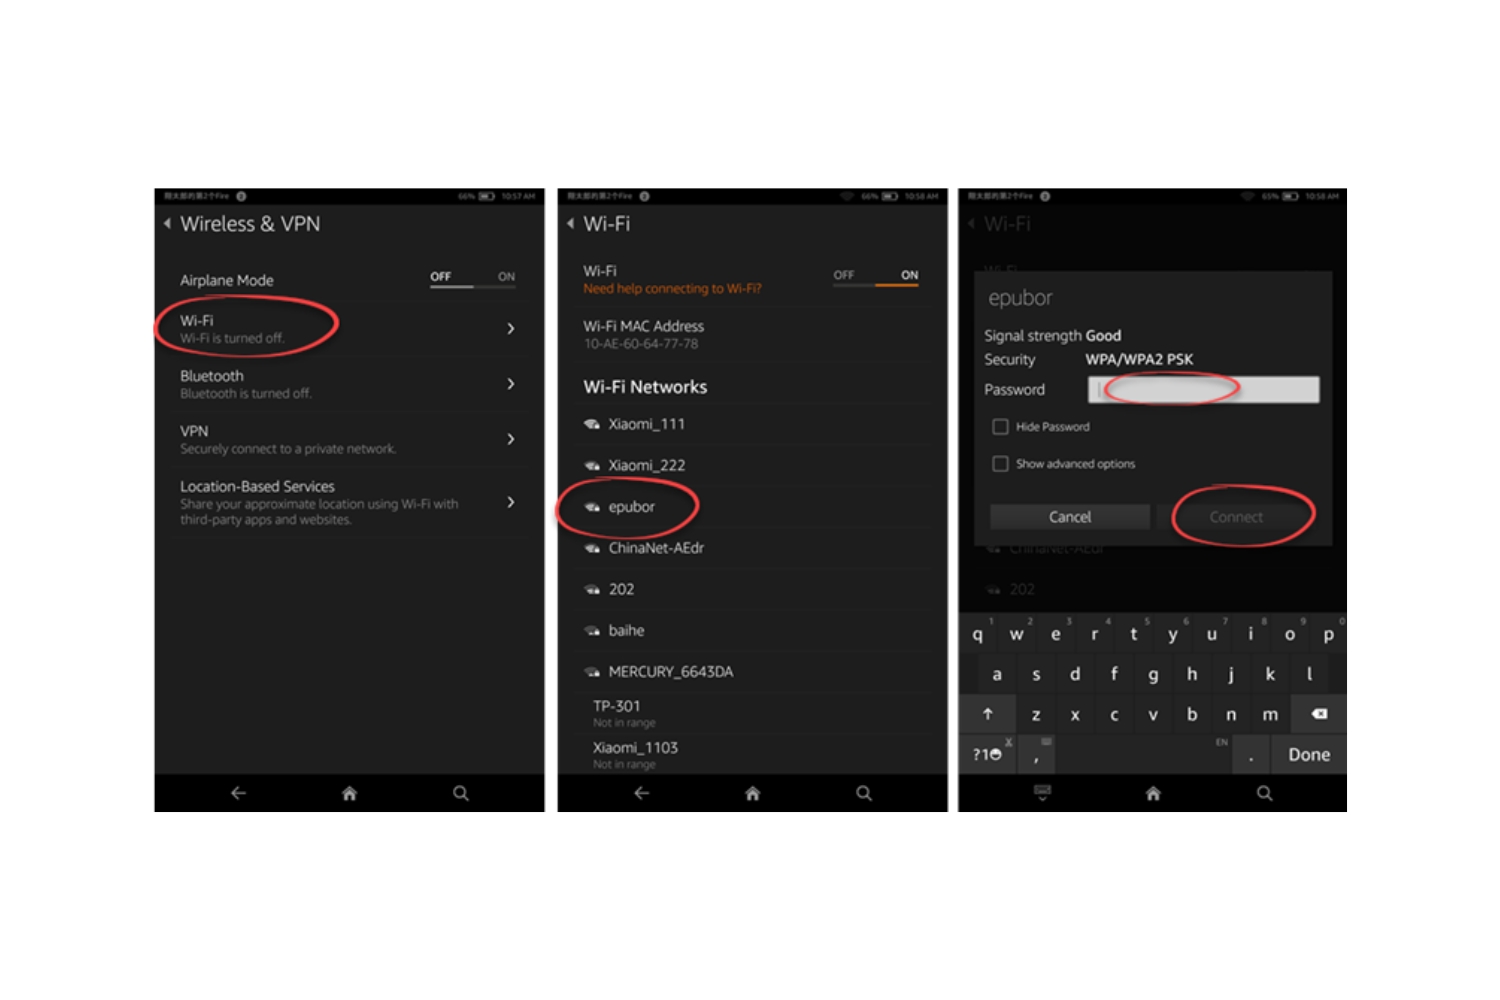
Youll also see a toggle switch that allows you to turn the Wi-Fi on or off.
confirm the toggle switch is turned on, indicating that Wi-Fi is enabled on your machine.
The networks will be listed with their names, signal strength, and security status.
If there are many Wi-Fi networks available, you may need to scroll down to see the complete list.
you could also check for more networks by moving your rig closer to the source or router.
double-check to grab the web link you have permission to access.
The password is case-sensitive, so double-check that you are entering it correctly.
You have successfully connected your Amazon Fire tablet to a Wi-Fi web connection.
Now you’re able to enjoy all the benefits of a wireless internet connection on your gear.
We started by turning on the equipment and accessing the Wi-Fi controls.
Then, we scanned for available Wi-Fi networks and selected the desired web connection.
After that, we entered the Wi-Fi data pipe password and connected to the data pipe.
Lastly, we provided some troubleshooting tips to help you overcome common connectivity issues.
Remember to have your Wi-Fi web link name and password handy before you begin the connection process.
Enjoy your newly connected Fire tablet and all the amazing content it has to offer!
