Soundbars are a popular choice for improving the audio quality of flat-screen TVs.
They offer better sound output and a more immersive experience compared to the built-in speakers of most TVs.
An optical cable provides a digital audio connection that ensures high-quality sound transmission between the TV and the soundbar.
This port is where you will connect one end of the optical cable to establish the audio connection.
The location of the optical audio port may vary depending on the model of your Roku TV.
However, it is typically found on the back or side of the TV.
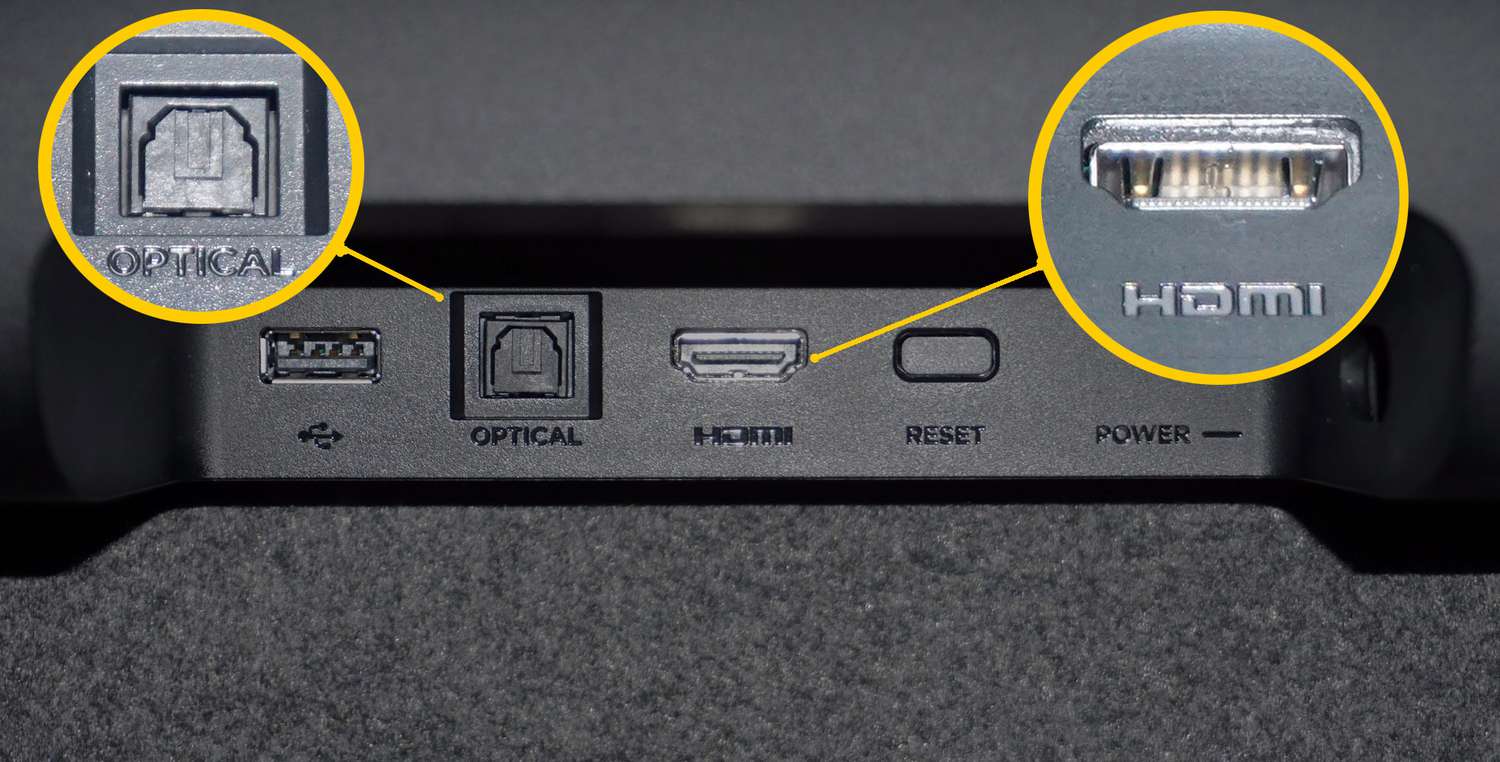
Look for a small square-shaped port labeled as Optical, Digital Audio Out, or something similar.
when you’ve got located the optical audio port, ensure to take note of its position.
This will help you when connecting the optical cable later on.
Its important to mention that not all Roku TV models have an optical audio port.
Next, we will move on to connecting the optical cable to the Roku TV.
check that you connect the optical cable to the correct input labeled specifically for optical audio.
This will ensure that the soundbar recognizes and uses the optical connection for audio playback.
Lets proceed to Step 5.
This ensures that you’re free to fully enjoy the enhanced audio experience provided by the soundbar.
Now, lets move on to Step 6: testing the soundbar connection to ensure everything is working correctly.
You have successfully connected the soundbar to your Roku TV using an optical cable.
Before we conclude, lets explore some troubleshooting tips to help address any issues you may encounter.
Remember, patience and attention to detail are key in resolving any technical difficulties you may encounter.
Conclusion
Congratulations!
You have successfully connected your soundbar to your Roku TV using an optical cable.
The optical connection ensures high-quality digital audio transmission between the Roku TV and the soundbar.
We started by locating the optical audio port on the Roku TV and preparing the soundbar for the connection.
Then, we connected the optical cable, first to the TV and then to the soundbar.
Afterward, we configured the audio configs on the Roku TV to direct the sound through the optical connection.
Now, sit back, relax, and immerse yourself in the elevated audio experience provided by your soundbar.
They will be able to provide you with further guidance tailored to your devices.
Thank you for choosing our guide to connect your soundbar to your Roku TV.
We hope you have found this information helpful and that you enjoy your enhanced audio experience to the fullest!
