Introduction
Welcome to our step-by-step guide on how to connect a PC case to a laptop.
In todays tech-savvy world, many users are looking for ways to enhance their computing experience.
Heres a list of items youll need:
1.
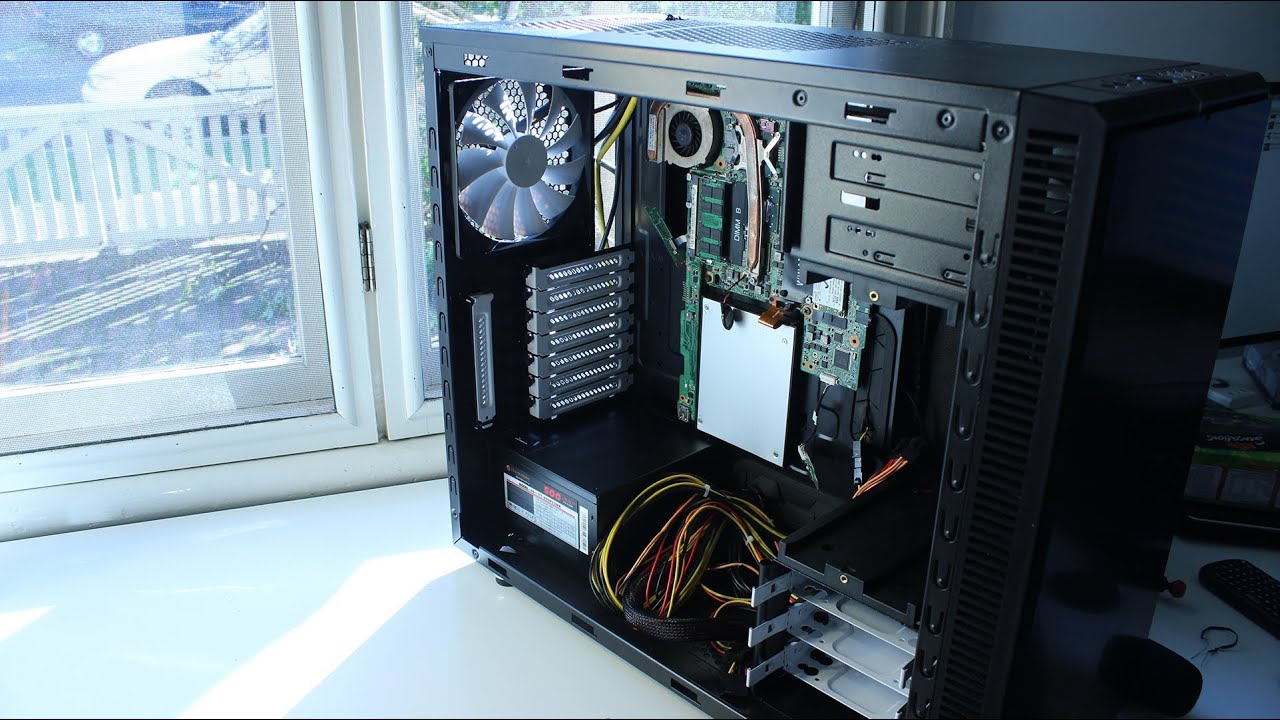
PC case:
Select a PC case that is compatible with your laptop.
Consider factors such as size, design, and cooling options.
check that the case has enough space to accommodate the components you want to install.
Laptop:
Youll need a laptop with the necessary ports and capabilities to connect to the PC case.
Ensure that your laptop supports external hardware connections and has the necessary connectivity options.
Screwdriver:
A screwdriver is essential for opening and securing the PC case and laptop.
confirm you have the right bang out and size to fit the screws used in your equipment.
Ensure you have the appropriate SATA cables for your specific hardware.
Now, lets move on to the next step: preparing the PC case.
Step 2: Prepare the PC case
1.
Empty the case:
Start by removing any existing components or cables from the PC case.
double-check the case is completely empty before proceeding.
This will provide you with a clean slate to work with.
Cleaning the case will help ensure that the components function properly and stay cool during operation.
Install additional hardware:
4.
Connect the SATA cables:
Identify the SATA ports on the motherboard and connect the SATA cables to them.
Pay attention to the correct alignment and ensure a secure connection.
double-check everything is tightly secured to prevent any movement or damage during operation.
By following these steps, you will have properly prepared your PC case for the connection to your laptop.
Now, lets move on to the next step: opening the laptop.
c’mon note that the specific steps may vary depending on the make and model of your laptop.
Heres a general guide:
1.
This is crucial to avoid any electrical damage and ensure your safety.
Consult your laptops manual or search online for instructions specific to your laptop model.
Carefully set aside the screws in a safe place to avoid losing them.
you’re free to do this by touching a grounded object or wearing an anti-static wrist strap.
5. fire up the laptop:
Gently lift the access panel and set it aside.
Be cautious and avoid putting too much pressure on the laptops internal components.
Take a moment to familiarize yourself with the internal layout.
The specific location and throw in of port may vary depending on your laptop model.
Heres how you might identify it:
1.
This will give you a general idea of where to look.
Common connection ports include USB, Thunderbolt, or eSATA ports.
Look for symbols resembling monitor connectors, arrows, or labels like eGPU or external GPU.
These can be helpful clues in identifying the connection port.
Community discussions and product documentation can provide valuable insight into the location and pop in of port.
A computer technician or laptop specialist can help you locate the appropriate port and provide further guidance.
Step 5: Connect the PC case to the laptop
1. check that the connection is secure and properly aligned.
Ensure a secure and snug connection.
Avoid applying excessive force, but verify the cables are seated properly.
This will allow the system to recognize the connected PC case and initiate the necessary configurations.
Now, lets move on to the final step: powering on and configuring the setup.
Step 6: Power on and configure the setup
1.
You may also need to connect the PC cases power supply unit (PSU) to a power source.
Boot up your laptop:
Ensure your laptop is powered on and fully booted up.
Allow the operating system to start and recognize the newly connected PC case.
This may involve installing necessary drivers, partitioning storage devices, or adjusting power controls.
Install your preferred software, organize files, and personalize parameters to suit your needs.
Enjoy the enhanced capabilities and improved performance provided by this setup!
This will create a clean and organized space for the connection.
Identifying the connection port is crucial for a successful connection.
Enjoy the added storage space, improved cooling options, and the ability to customize your hardware configuration.
