However, even the most reputable PSUs can experience issues with their power rails over time.
So, lets dive in and learn how to check PSU rails effectively and with confidence!
What Is a PSU Rail?
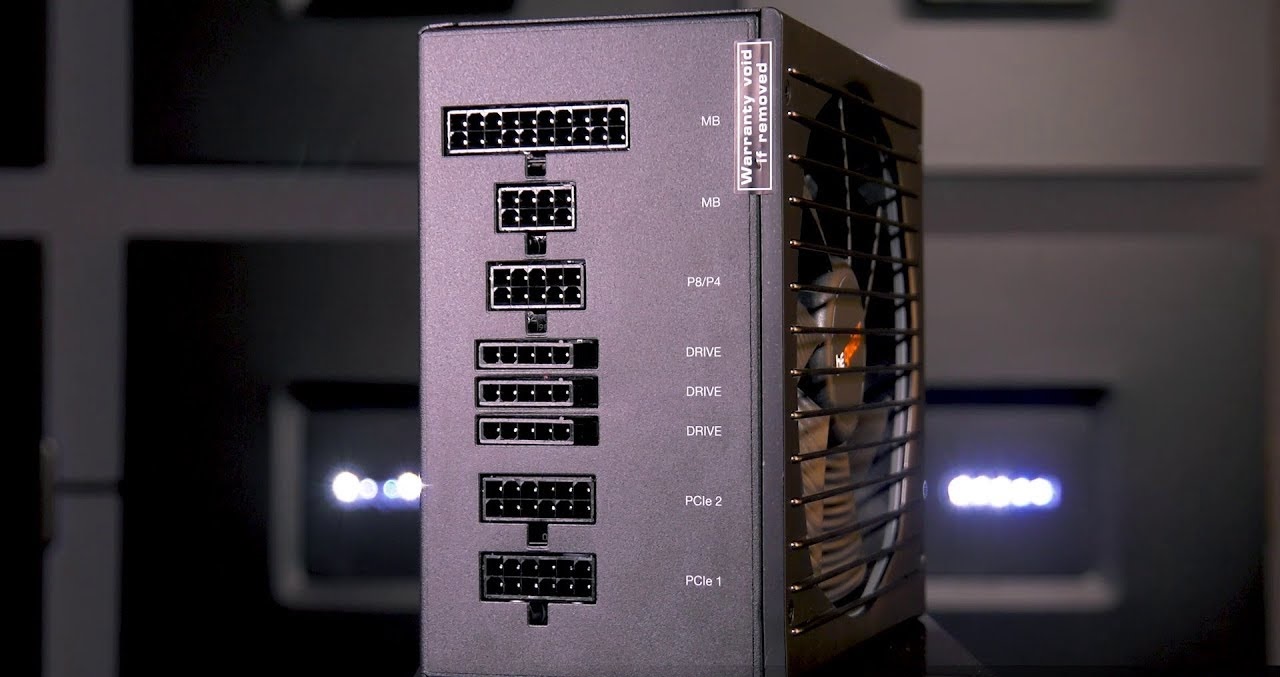
Modern power supplies typically consist of multiple rails, each providing a different voltage level.
The most common rails include the +12V, +5V, and +3.3V rails.
Monitoring PSU rails also plays a vital role in diagnosing hardware problems.
If you are experiencing system instability or intermittent crashes, an unstable PSU rail could be the culprit.
By checking the voltage output, you could identify any abnormalities and take appropriate action to rectify the issue.
Why Checking PSU Rails is Important
Checking PSU rails is of utmost importance for several reasons.
These tools will enable you to measure the voltage output of each rail accurately.
This step ensures your safety and prevents any potential damage to your hardware during the process.
Step 2: Open your rig Case
Opening your rig case requires caution and attention to detail.
verify to handle the side panel and any connected cables with care to avoid any accidental damage.
Step 3: Locate the PSU
It is important to exercise caution while locating the PSU.
Handle the cables and components gently to avoid any accidental disconnections or damage.
This step is crucial in assessing the health and stability of your power supply unit (PSU).
By following these steps, you will be able to check the voltage output of each PSU rail effectively.
Conclusion
Checking PSU rails is a crucial task for maintaining a stable and reliable computer system.
If you are uncertain or uncomfortable with any steps of the process, consult a professional technician.
