Introduction
Welcome to our step-by-step guide on how to change the SSD on your MacBook Pro.
Before we start, its important to note that this guide is specifically forMacBook Promodels with a removable SSD.
If youre unsure about your devices compatibility, check the Apple support website or consult with a technician.
Changing the SSD on your MacBook Pro can bring significant improvements to your overall user experience.
Ensure that you have these tools on hand before you begin the process.
Its worth noting that changing the SSD on your MacBook Pro may void your warranty.
double-check to follow each step carefully to ensure a successful SSD replacement.
Ensure that you have a clean and well-lit workspace to work comfortably and avoid any unnecessary mishaps.
Remember to exercise caution while working with small screws and delicate components to avoid any accidental damage.
So, lets move on to the first step: backing up your data.
This ensures that no valuable files or information are lost during the SSD replacement.
Its important to handle your MacBook Pro with care while disconnecting cables.
This will provide you with access to the internal components, including the SSD.
Its crucial to exercise caution while handling the battery connector and to ensure that you have a stable grip.
Avoid pulling or twisting the cable excessively to prevent any damage to the connectors or cables.
By disconnecting the battery, you eliminate any potential electrical hazards and ensure a safer working environment.
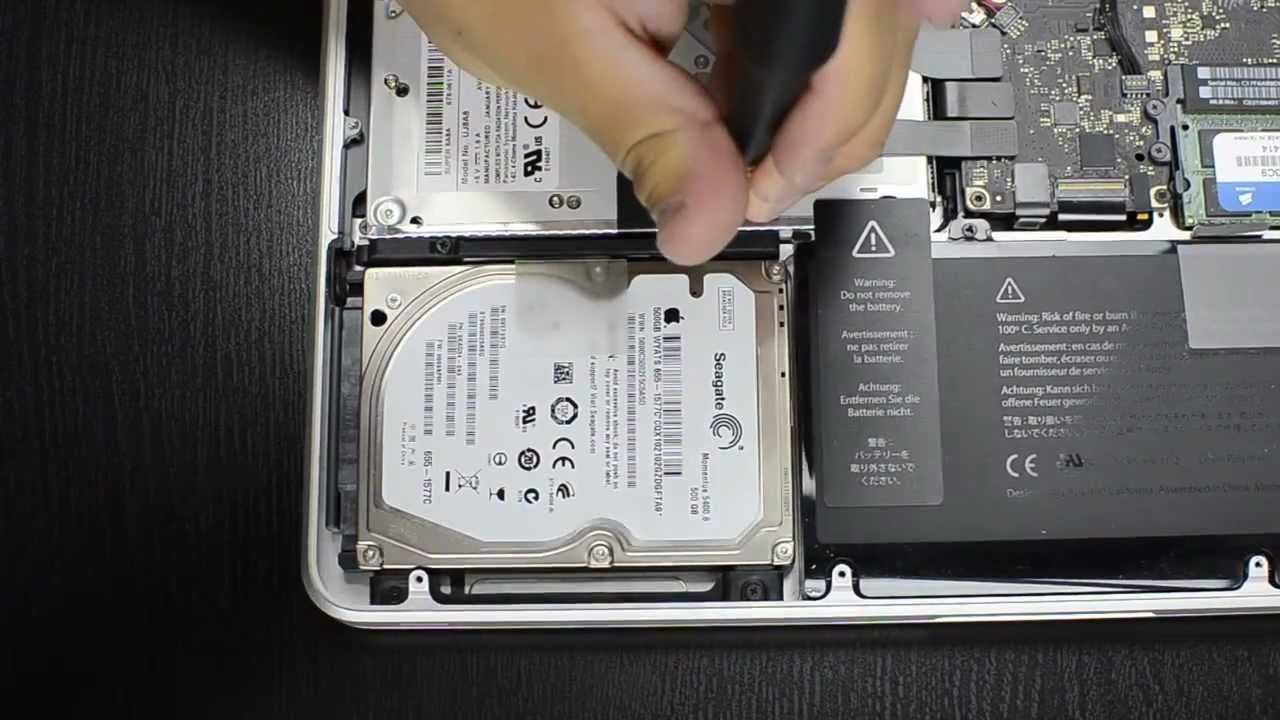
During the process, its crucial to handle the SSD with care, as it is a delicate component.
when you’ve got successfully removed the old SSD, set it aside in a safe place.
Remember to keep it protected from static electricity, dust, and other potential hazards.
Ensure that the new SSD is securely and correctly installed before proceeding to the next step.
You have successfully installed the new SSD in your MacBook Pro.
The next step is to reassemble your MacBook Pro by putting the bottom case back in place.
Reassembling your MacBook Pro will ensure that all components are properly secured and protected.
Ensure that the screws are snug and the bottom case is securely fastened without any gaps.
Inspect the unit for any loose cables or components that may have been missed during the reassembly process.
You have successfully reassembled your MacBook Pro.
The final step is to turn on your MacBook Pro and restore your data onto the new SSD.
Enjoy the improved storage capacity or enhanced performance provided by your new SSD!
Conclusion
Congratulations!
You have successfully learned how to change the SSD on your MacBook Pro.
Now, you’re free to enjoy the benefits of increased storage capacity or improved performance.
This will protect your MacBook Pro from damage and help ensure a successful SSD replacement.
Its always better to seek guidance rather than risking potential damage to your gadget.
