By default, Xampp comes with a specific version of PHP.
Luckily, Xampp allows you to easily switch between different PHP versions to accommodate your needs.
In this article, well guide you through the step-by-step process of changing the PHP version in Xampp.
c’mon note that the steps mentioned in this guide are specific to Xampp on Windows.
Lets jump into the step-by-step process to change the PHP version in Xampp.
This will ensure that there are no conflicts or interruptions during the modification process.
This prevents any conflicts or issues that may arise during the modification process.
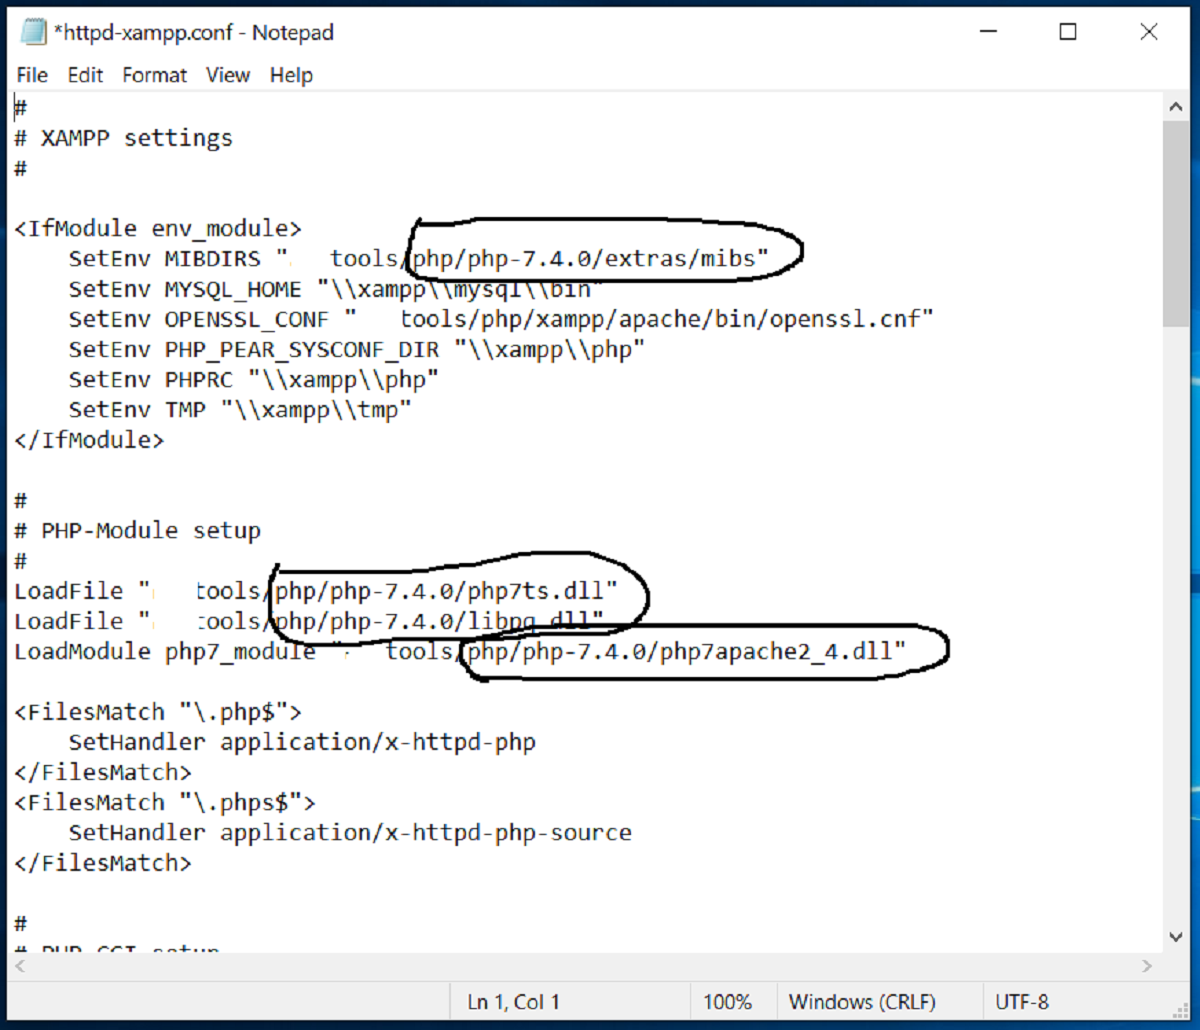
It contains important files such as php.ini and the PHP binaries.
This also ensures that there are no conflicts when we implement the desired PHP version in Xampp.
Ensure that you have downloaded the correct PHP version that matches your project requirements or personal preferences.
This ensures that Xampp recognizes and utilizes the correct PHP version for running web applications.
check that to save the changes to the php.ini file before moving on to the next step.
Now, lets proceed to the final step of starting Xampp services and verifying the PHP version.
Ensure that the displayed PHP version matches the desired version you installed in Step 6.
If the PHP version displayed is the new version, congratulations!
You have successfully changed the PHP version in Xampp.
Throughout this guide, we have outlined the step-by-step process of changing the PHP version in Xampp.
Remember to always keep backups of important files and databases before making any modifications.
Meeting these requirements ensures a smooth transition during the PHP version change process.
Remember to always make backups of important files and databases before making any modifications.
We hope this guide has been helpful in empowering you to change the PHP version in Xampp effectively.
