Introduction
Welcome to our guide on how to change the PC case fan speed.
The fans in your PC case play a vital role in regulating the temperature and ensuring optimal performance.
By default, the fan speed tweaks on your rig may not always be configured to suit your needs.
These prefs control various aspects of your computers hardware, including the fan speed.
So, confirm youre familiar with accessing these tweaks on your specific motherboard model.
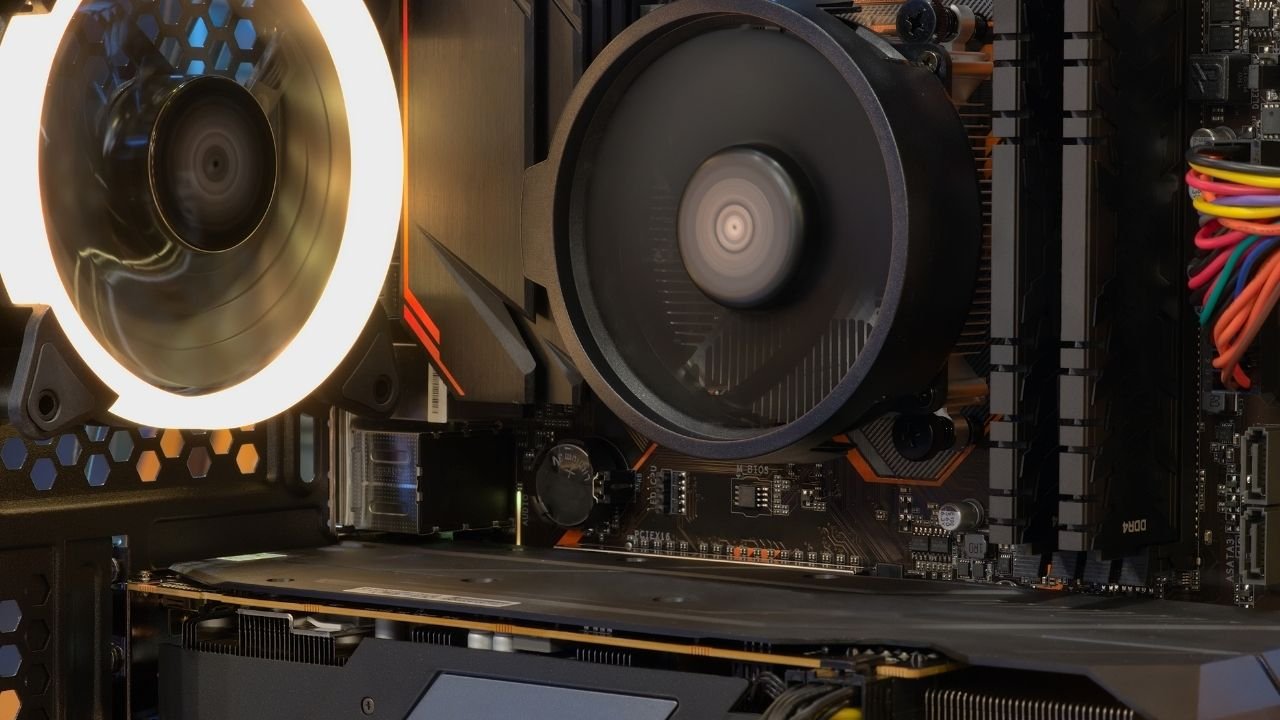
These connectors provide the power and control for your case fans.
The fan connectors are usually located near the CPU socket on the motherboard.
They are typically labeled as SYS_FAN or CHA_FAN followed by a number, indicating the fan slot.
Most motherboards have multiple fan headers, allowing you to connect multiple case fans.
To identify the fan connectors, take a close look at your motherboards user manual.
The manual will provide a detailed diagram of the motherboard layout, including the location of the fan connectors.
If you dont have the manual handy, you’re free to also visually inspect the motherboard.
These are the fan headers where youll connect your case fans.
If your motherboard supports PWM control, it offers the most precise control over fan speeds.
To reach the BIOS or UEFI prefs, youll need to reboot your gear.
Its important to note that the navigation and menu layout may vary between different motherboard manufacturers and models.
Its a good practice to take note of the original options or document any changes you make.
Explore the various sections and look for options related to fan control or fan speed.
In this section, you may find options such as Fan Speed Control or CPU Fan Speed.
This provides optimized cooling performance while minimizing noise levels.
Remember that not all motherboards offer extensive fan control options, especially on budget or older models.
Depending on your motherboard and BIOS/UEFI version, you may have several options to control the fan speed.
This allows you to fine-tune the cooling performance and noise levels based on your specific needs.
This is a convenient option if you prefer a plug-and-play approach without diving into individual fan speed configs.
For more advanced users, some motherboards provide temperature-based fan speed control.
This allows you to set specific temperature thresholds and corresponding fan speed values.
As the temperature increases, the fan speed will ramp up accordingly to keep the system cool.
When adjusting the fan speed, its important to strike a balance between cooling performance and noise levels.
Higher fan speeds can provide better cooling but may result in increased noise.
Experiment with different prefs to find the sweet spot for your needs.
Its worth noting that the BIOS or UEFI prefs may not provide real-time fan speed information.
To monitor the actual fan speed, you could use third-party software or utilities that provide hardware monitoring capabilities.
Once youre satisfied with your adjustments, youre almost done.
This ensures that your modified parameters will be applied each time your setup starts up.
Look for an option like Save Changes and Exit, Exit and Save options, or something similar.
This is your last chance to review and make any desired modifications.
Once youve selected the option to save changes and exit, you may be asked to confirm your decision.
This is a safety measure to prevent accidentally saving unintended modifications.
After saving, your box will restart, and the modified fan parameters will take effect.
Testing will help you determine if the adjusted fan speed provides the desired cooling efficiency without excessive noise.
Monitor the CPU and system temperatures using monitoring software or utilities.
Additionally, pay attention to the noise levels produced by the fans.
If you notice that the temperatures are within acceptable ranges and the noise levels are reasonable, congratulations!
Your adjustments have been successful, and youve achieved the desired balance between cooling performance and noise levels.
Re-enter the BIOS or UEFI and fine-tune the values to achieve the optimal cooling performance for your system.
Take note of any specific temperature thresholds that trigger a change in fan speed.
This can help you pinpoint potential issues or areas where further adjustments may be needed.
Experiment with different configs until you find the optimal configuration for your system.
It may take some time and testing to achieve the desired results.
Additionally, keep in mind that adjusting the fan speed is not a one-time task.
Enjoy a cooler and quieter computing experience!
Its important to experiment with these configs to find the optimal configuration for your specific needs.
Monitoring temperatures and noise levels will guide you in making any necessary adjustments to achieve the desired balance.
Lastly, its crucial to understand that adjusting the fan speed is an ongoing process.
Take the time to fine-tune your fan prefs to achieve the perfect balance for your systems needs.
Remember, while adjusting the fan speed, always exercise caution and read the manufacturers guidelines.
