Introduction
In todays digital age, speed and efficiency are paramount.
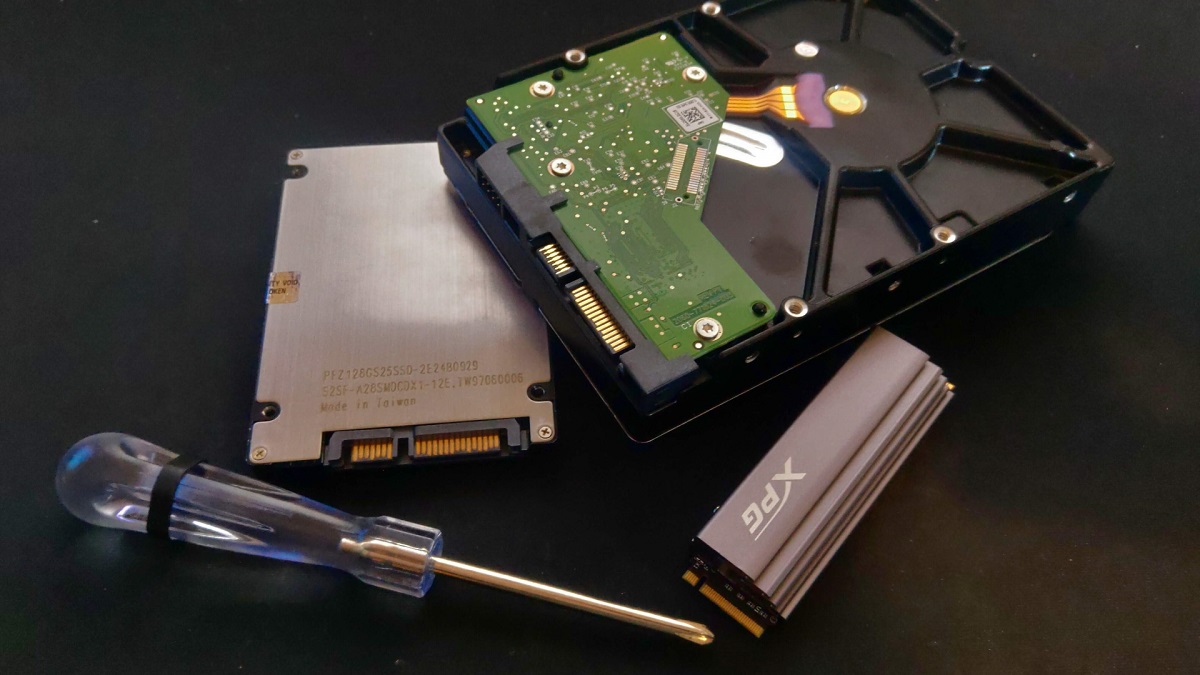
Unlike traditional hard drives, SSDs do not have any moving parts.
In addition to the noticeable speed improvements, SSDs also offer other advantages.
They are more durable and resistant to physical shocks, which is particularly beneficial for laptop users.
SSDs are also more energy-efficient, leading to longer battery life.
If youre experiencing other hardware or software problems, its recommended to troubleshoot those separately.
Lets explore some of the key advantages of making this change.
1.Speed and Performance:One of the most significant advantages of an SSD is its lightning-fast speed.
Traditional hard drives rely on spinning disks to read and write data, which can result in slower performance.
On the other hand, SSDs use flash memory, allowing for much faster data access and transfer speeds.
Youll notice a marked difference in overall system responsiveness and reduced loading times.
This translates to fewer data loss incidents and a longer lifespan for your storage rig.
3.Energy Efficiency:SSDs are not only faster, but they are also more energy-efficient than traditional hard drives.
Because SSDs dont require power to spin disks or move read/write heads, they consume less power.
This can result in longer battery life for laptops and lower energy bills for desktop users.
Upgrading to an SSD is not only beneficial for your computers performance but also for the environment.
This makes them an excellent choice for laptops or portable devices that are frequently subjected to movement and vibrations.
Additionally, SSDs produce virtually no noise during operation since there are no moving parts.
Youll enjoy a quieter computing experience without the distracting hum of spinning hard drive disks.
5.Compatible SSD:Of course, youll need the SSD itself.
Before making a purchase, ensure that it is compatible with your rig.
6.Data Backup:Its crucial to back up all your important data before attempting any hardware changes.
go for the backup method that suits your needs and has sufficient storage capacity to accommodate your data.
2.Identify Essential Data:Take some time to identify and prioritize the data that is important to you.
4.Verify Backup Completeness:After transferring your files, its essential to verify the completeness of your backup.
5.Maintain Regular Backups:Backing up your data is not a one-time task; its an ongoing process.
2.Form Factor:Consider the form factor that matches your computers specifications.
The most common form factor options for SSDs are 2.5-inch and M.2.
Check your computers documentation or manufacturers website to identify the form factor that is compatible with your system.
Ensure that the SSD you select matches the corresponding form factor.
3.Interface:Determine the interface your rig supports.
The two main interface options for SSDs are SATA and NVMe (PCIe).
If your gear supports NVMe, consider choosing an SSD with NVMe interface for faster performance.
4.Budget:Consider your budget when purchasing an SSD.
Determine your budget and look for an SSD that provides a balance between price and performance.
5.Brand and Reliability:Consider reputable brands known for their reliability and quality.
Research customer reviews and ratings to gauge the reliability ofdifferent SSD models before making your purchase.
Once youve chosen the SSD that meets your requirements, you could proceed with the purchase.
Look for reputable online retailers or visit local computer stores to find the best deals.
double-check to compare prices and specifications across different sources to ensure youre getting the best value for your money.
This will give you an idea of the minimum size you should probably accommodate your existing data.
2.Future Storage Needs:Anticipate your future storage requirements.
3.Budget:Consider your budget when choosing the size of your SSD.
Larger capacity SSDs tend to be more expensive than smaller ones.
4.Manageability:Think about how you organize and manage your data.
In the next step, well discuss how to prepare your setup system for installing the new SSD.
This information will help you identify the appropriate tools, screws, and connectors necessary for the installation.
This precautionary measure helps to discharge any static electricity before working with your computers internal components.
4.Locate the Hard Drive Compartment:Identify the location of the hard drive compartment in your rig.
Refer to the manual for specific instructions on accessing the hard drive compartment.
5.Identify the Hard Drive Connection:Identify the key in of connection used by your current hard drive.
Ensure that your new SSD has a compatible SATA connector to ensure proper installation and functionality.
If not, you may need to purchase additional mounting hardware to secure the SSD properly.
Alternatively, you could use adhesive pads or brackets to securely affix the SSD in the available space.
This step is crucial to avoid any potential compatibility issues or limitations that may arise.
Popular options include EaseUS Todo Backup, Acronis True Image, or Clonezilla.
Download and implement the software on your box.
2.Connect the New SSD:Connect the new SSD to your machine using the appropriate connection interface.
If you are using a laptop, you may need a USB-to-SATA adapter to connect the SSD externally.
double-check to double-check the drive letters or names to avoid any data loss or overwrite on the wrong drive.
Review and configure any parameters as desired.
However, for most users, the default configs should suffice.
The software will start copying the data from your existing hard drive and transferring it to the SSD.
Take a moment to verify that the cloning was successful and check for any error messages or warnings.
Some cloning software also provides a verification option to ensure the integrity of the cloned data.
This step ensures that your rig recognizes the new SSD as the primary storage machine during the boot-up process.
By following these steps, you canclone your existing hard drive to the new SSDseamlessly.
2.Identify the Hard Drive Bay:Locate the hard drive bay in your machine case.
In laptops, the hard drive bay is usually located on the bottom or underside of the chassis.
Unscrew the panel and carefully slide out the old hard drive from the respective bay.
Ensure that the connectors and interface of the SSD are easily accessible for connection.
5.Connect the SSD:Carefully connect the SSD to the appropriate interface in your gear.
If youre replacing a laptop hard drive, be mindful of the orientation and connection method.
double-check the SSD is physically secure and properly aligned within the hard drive bay.
7.Double-Check Connections:Take a moment to ensure that all connections are secure.
8.Reassemble your machine:Once the SSD is properly connected and secured, reassemble your machine.
If you removed any panels or access doors during the previous steps, double-check to reattach them securely.
Ensure that all cables are securely connected to the appropriate ports on the computer and peripherals.
Ensure a snug and secure connection to avoid any power interruptions.
Ensure proper alignment and a secure connection between the battery and the laptop.
5.Double-Check Connections:Take a moment to verify that all cables and connectors are securely attached.
Double-check the connections for the monitor, keyboard, mouse, and any other peripherals to ensure proper functionality.
Verify that the SSD is detected and properly recognized in the BIOS controls.
Allow the computer a few moments to initialize and start the boot-up process.
2.Observe the Boot-Up Sequence:Watch the screen as your system boots up.
You may see the manufacturers logo or a glimpse of system information.
Pay attention to any messages or prompts that appear during the boot process.
Once logged in, proceed to the desktop or home screen.
4.pop kick open the Storage options:Navigate to the storage options or file explorer in your operating system.
Look for the SSDs name, its capacity, and any assigned drive letters.
This confirms that the operating system has detected and successfully installed the SSD.
6.Check Drive Capacity:Verify that the SSDs capacity matches the expected size.
Open some files and programs to ensure they are accessible without any issues.
This step confirms that the data cloning process was successful.
8.Assess Performance:Finally, assess the performance of your machine with the newly installed SSD.
Notice the speed improvements in tasks such as booting up, launching applications, and accessing files.
You should experience significantly faster response times and overall system performance.
Enjoy the enhanced speed and performance that the SSD brings to your machine!
Double-check that the data has been successfully transferred to the new SSD and is accessible.
This method ensures that no data can be recovered from the drive.
Electronics contain hazardous materials, and improper disposal can harm the environment.
Check local regulations or contact your nearest recycling center to inquire about electronic waste disposal options in your area.
5.Recycling Programs:Some electronics manufacturers offer recycling programs for their products, including hard drives.
Be responsible and take the necessary measures to dispose of electronic waste properly.
Conclusion
Congratulations on successfully changing your hard drive to a solid-state drive (SSD)!
Heres a quick recap of the steps you followed:
1.
You purchased an SSD based on your storage needs, budget, and compatibility.
You physically replaced the old hard drive with the new SSD, ensuring proper connection and secure mounting.
You reassembled your system, ensuring all cables and peripheral devices were properly connected.
Enjoy the benefits of faster boot times, improved tool loading speeds, and enhanced overall responsiveness.
Thank you for following this guide, and happy computing with your new SSD!
