Introduction
Welcome to the world of 3D printing!
Understanding the process and following the correct steps will ensure a smooth transition and uninterrupted printing.
In this guide, we will walk you through the steps for changing filament on a 3D printer.
By following these steps, youll be back to printing in no time!
Therefore, always refer to your printers user manual for any manufacturer-specific instructions.
However, the general process outlined in this guide will apply to most 3D printers on the market today.
So, without further ado, lets dive into the wonderful world of filament changing on a 3D printer!
First and foremost, double-check you have the new filament ready to go.
Identify the jot down, color, and diameter of the new filament you will be using.
Its crucial to choose the right filament for your project to achieve the desired results.
Having the new filament readily available will save you time and frustration later on.
Next, its important to clean the 3D printers build plate and nozzle.
Use a soft cloth or sponge and a mild cleaning solution to remove any leftover debris or filament remnants.
This will prevent any unwanted particles from contaminating the new filament and ensure proper adhesion during printing.
Check for any loose screws or components that may interfere with the filament change process.
If you notice anything out of place, tighten or adjust it accordingly to ensure everything is secure.
In addition, its essential to heat up the printer before attempting to remove the old filament.
This will soften the filament and make it easier to remove from the nozzle.
Refer to your printers user manual to determine the appropriate temperature to use for filament removal.
Lastly, gather all the necessary tools for the filament change.
Having these tools readily available will make the process much smoother and prevent any unnecessary delays.
By following these preparations, youll be well-equipped and ready to tackle the filament change process with confidence.
Now that youre fully prepared, its time to dive into removing the old filament from your 3D printer!
Start by locating the extruder on your printer.
The extruder is the part that feeds the filament into the printers hot end.
when you’ve got access to the extruder, carefully examine the filament path.
Look for any signs of filament residue or obstructions.
If you notice any debris, use a pair of tweezers or pliers to gently remove it.
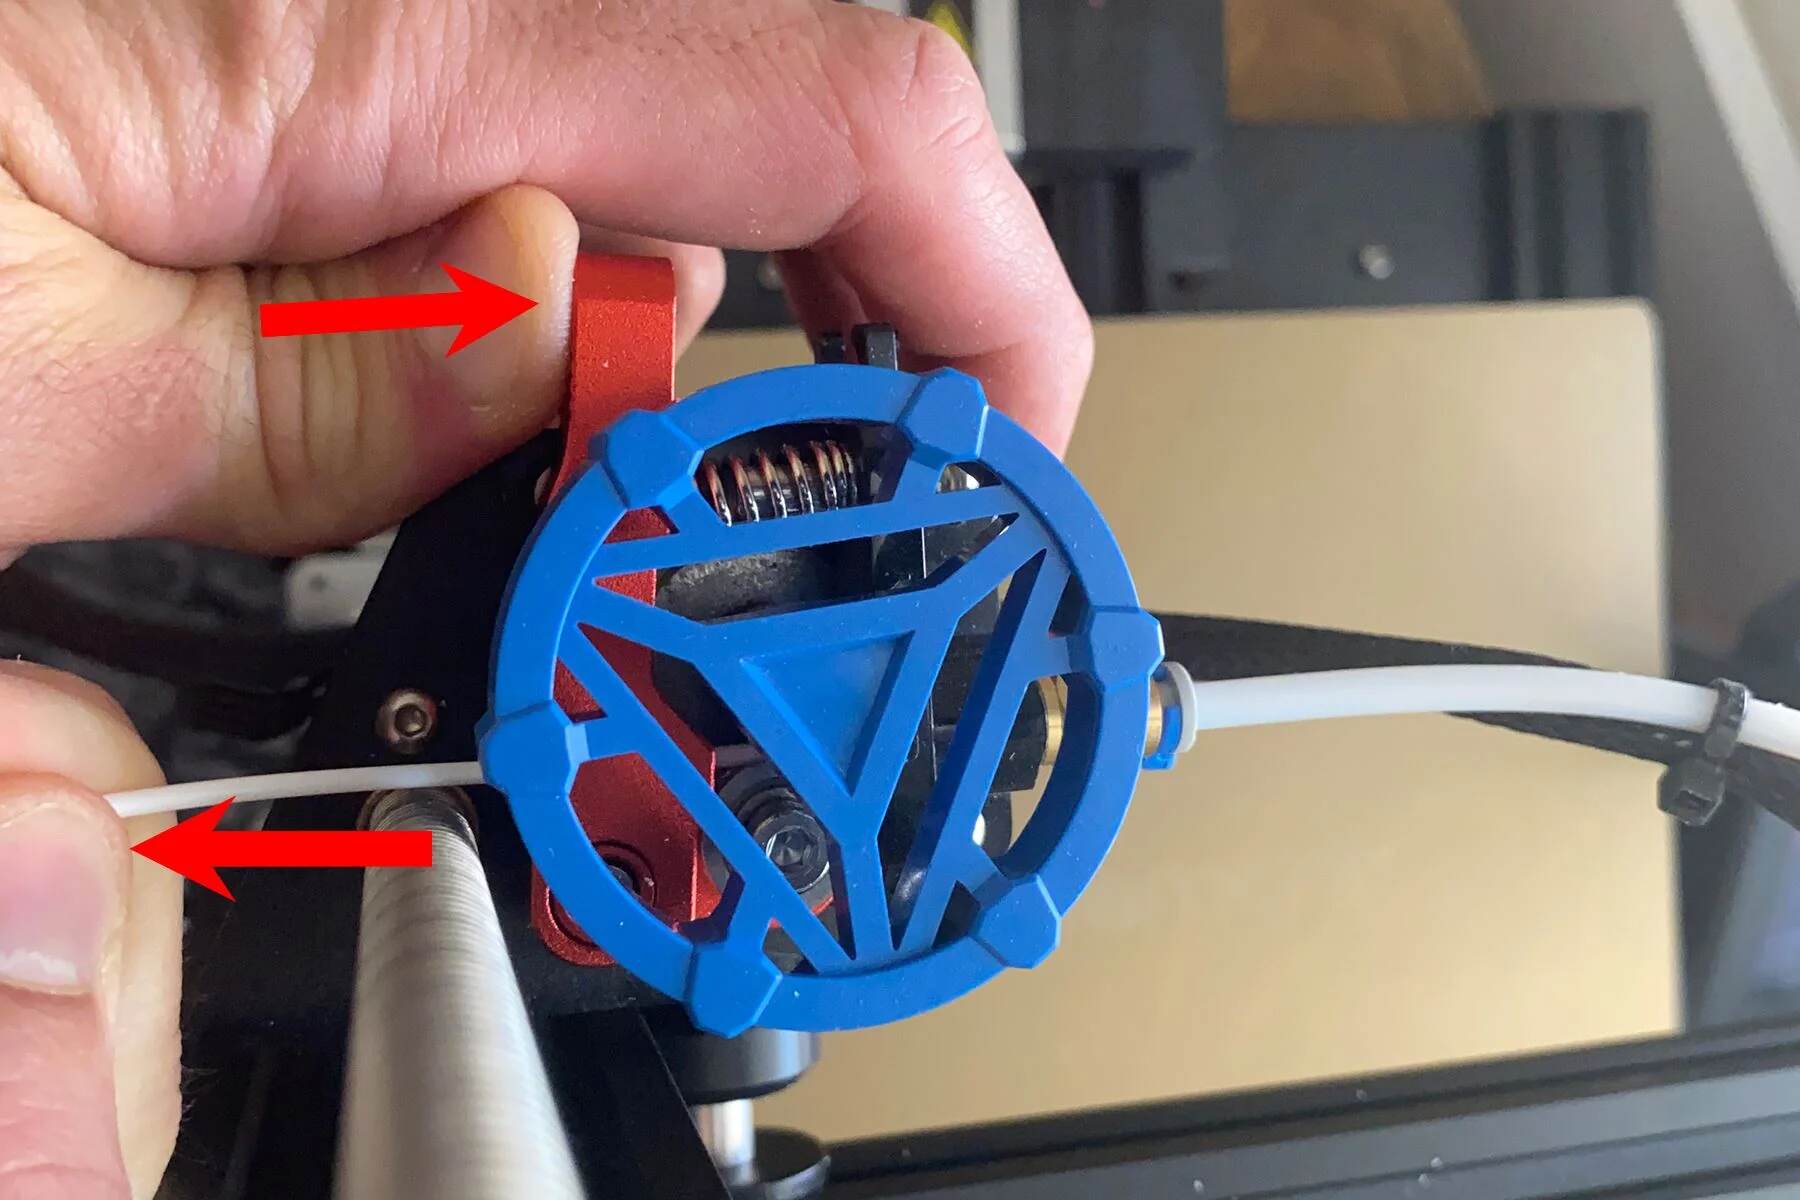
Next, locate the filament tension adjustment mechanism.
This is typically a small lever or screw near the extruder.
Adjust the tension to loosen the grip on the filament.
This will allow for easier removal.
Now its time to remove the old filament.
Hold onto the filament close to the extruder and gently pull it out.
Pull the filament out slowly and steadily to prevent any snapping or breakage.
As you remove the old filament, be sure to check for any signs of damage or wear.
Once the old filament is completely removed, inspect the extruder and nozzle for any remaining remnants.
First, locate the temperature options on your 3D printer.
This can usually be found in the printers control panel or on the printer software interface.
Once youve identified the temperature controls, grab the desired temperature for heating the printer.
The temperature will vary depending on the pop in of filament you are using.
Ensure that you set the temperature accurately to prevent any issues during the filament insertion process.
After you have set the temperature, give the printer some time to reach the desired heat level.
This may take a few minutes, depending on the printer model and the temperature configs.
Many printers have indicator lights or displays to show the current temperature.
Wait until the printer reaches the desired temperature before proceeding to the next step.
The nozzle can reach high temperatures and can cause burns or injuries.
Use caution and keep a safe distance from the nozzle area until it has cooled down.
Start by cutting the end of the new filament at a slight angle to create a pointed tip.
This will make it easier to feed the filament into the extruder and through the filament path.
If your printer has a filament guide tube, insert one end of the filament into the tube.
The tube helps guide the filament from the spool to the printers extruder.
ensure the filament is fully inserted into the tube and that it is aligned with the extruder opening.
Gently push the filament into the extruder until you feel resistance.
Once the filament is in position, tighten the tension adjustment mechanism near the extruder.
This will secure the filament in place and ensure a proper grip.
Next, navigate to the filament loading tweaks on your printers control panel or software interface.
Choose the appropriate filament loading option to begin the process of feeding the new filament into the printer.
As the printer starts the filament loading process, keep a close eye on the extruder.
Watch for the new filament to start extruding from the nozzle.
Once the new filament is extruding smoothly and consistently, you could stop the filament loading process.
You have successfully inserted the new filament into your 3D printer.
Start by preparing a small test print or selecting a test file from your printers software interface.
Before starting the test print, verify that the printers bed is leveled properly.
Proper bed leveling is crucial for good adhesion and print quality.
If needed, refer to your printers manual for instructions on how to level the bed.
Once the bed is leveled, initiate the test print with the new filament.
Observe the printer closely throughout the printing process.
Pay attention to the extrusion and ensure that the filament is being fed smoothly and consistently.
Check that there are no signs of filament interruption or clogging.
As the print progresses, monitor the layers and examine the quality of the printed object.
Look for any signs of under extrusion, over extrusion, or other defects.
These issues may indicate a problem with the filament or the printer tweaks.
If you notice any problems during the test print, stop the printing process and inspect the filament path.
Check for any obstructions or irregularities that may be causing the issue.
Clean or unclog the nozzle if necessary.
If the test print comes out successfully with no issues, congratulations!
You have successfully changed the filament on your 3D printer.
Youre now ready to start your next printing project with the new filament.
Remember to record the configs and adjustments you made during the testing process.
This will serve as a reference for future prints and help you achieve consistent results with the new filament.
When inserting the new filament, pay attention to proper alignment, tension, and feeding.
Test the new filament by performing a small print to ensure optimal performance and print quality.
Make any necessary adjustments along the way to achieve the best results.
