In this article, we will guide you through the steps to cancel a download on your Android equipment.
Whether you are using a smartphone or a tablet, the process is very similar.
So, lets dive in and find out how you’re free to take control of your downloads.
Look for an app named Downloads or one with a similar icon.
Once you find the Downloads app, tap on its icon to open it.
Alternatively, you may also be able to access your downloads directly from your devices notification panel.
Tapping on it will also take you to the Downloads app.
Once the Downloads app is open, you will see a list of all your downloaded files.
This includes any ongoing downloads as well as completed downloads.
Lets continue to the next section to find out how to find the download you want to cancel.
Scroll through the list of downloads to visually locate the file you wish to cancel.
The list typically shows the file name, size, and download progress.
If you recently initiated the download, it should appear near the top of the list.
Simply tap on the search bar and enter the name or a keyword related to the download.
The list will update in real-time, displaying files that match your search criteria.
Another helpful feature in the Downloads app is the ability to sort and filter your downloads.
Therefore, it is worth checking these folders to see if the file you are looking for is there.
In the next section, we will learn how to cancel the download once it has been identified.
Canceling a download is a straightforward process that can be completed with just a few taps.
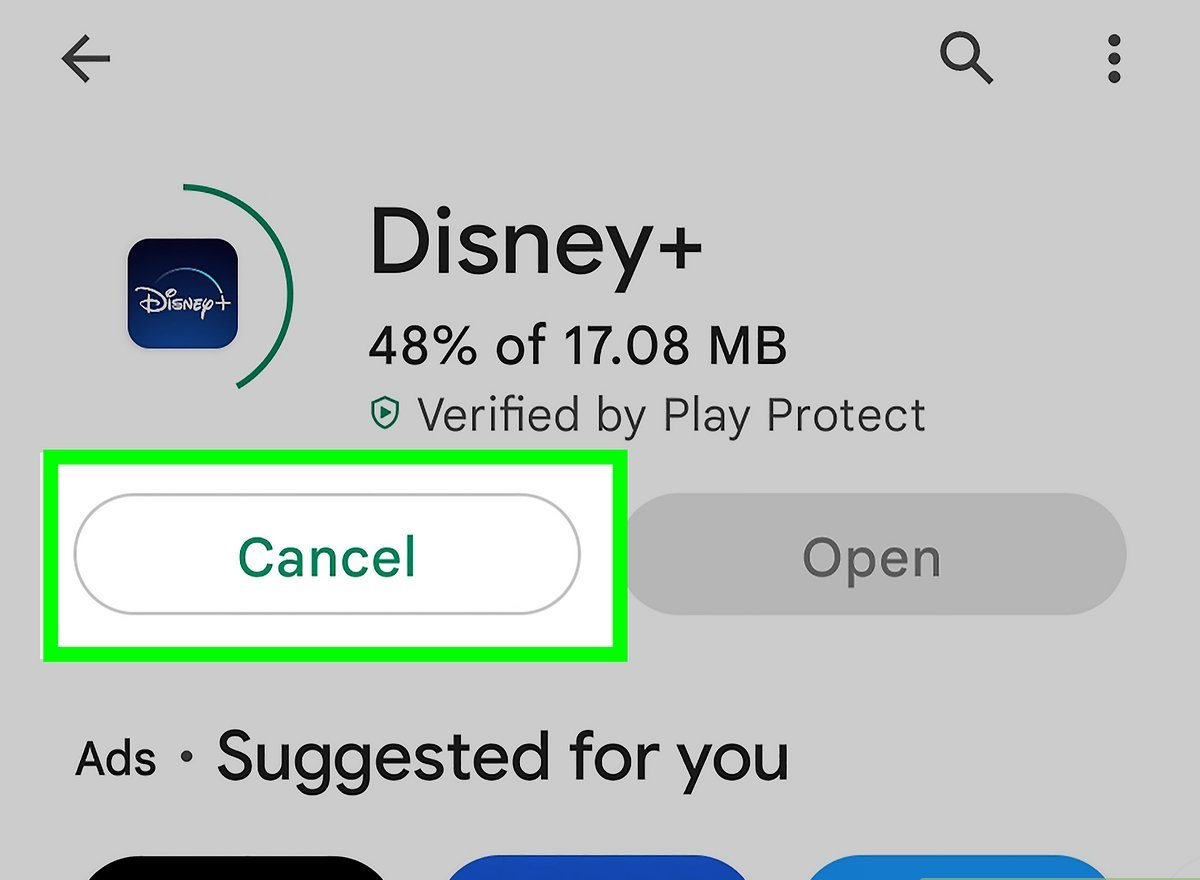
To cancel the download, locate the specific file entry in the Downloads app.
You may see an icon or button associated with the download, such as a pause or cancel symbol.
Tap on this icon to initiate the cancellation process.
After tapping on the cancel icon, a confirmation dialog may appear, asking you to confirm the cancellation.
This dialog is designed to prevent accidental cancellations, so verify you are certain before proceeding.
If you see the confirmation dialog, carefully read the message to ensure you are canceling the correct download.
Keep in mind that canceling a download will permanently stop the download process.
Therefore, ensure you truly want to cancel the download before confirming the cancellation.
Confirming the cancellation provides a final step of verification before the download is permanently halted.
This dialog box serves as a safeguard against accidental cancellations and prompts you to confirm your decision.
Take a moment to carefully review the information provided in the confirmation dialog.
This action confirms the cancellation of the download.
This will allow the download to resume without any interruption.
Confirming the cancellation is an important step in the process of canceling a download on your Android gear.
It ensures that you have a final opportunity to review your decision and prevents accidental cancellations.
Although this step is optional, it can help you reclaim storage space and keep your equipment organized.
Long press on the canceled download entry to select it.
Look for the option to Delete or an icon resembling a trash bin.
Tap on the Delete option or the trash bin icon to initiate the deletion process.
A confirmation dialog may appear, asking you to confirm the deletion of the file.
Therefore, verify that you no longer need or want the file before proceeding with the deletion.
We began by opening the Downloads app and then locating the specific download we wanted to cancel.
Next, we learned how to cancel the download by tapping on the appropriate icon or button.
A confirmation dialog provided an extra layer of assurance, ensuring that we were canceling the correct file.
By selecting the file and initiating the deletion process, we could permanently remove the unwanted file.
Remember, canceling downloads is just one part of effectively managing your Android machine.
