By canceling unnecessary downloads, you could optimize your devices performance and reduce clutter in your Downloads folder.
In the following sections, we will explore three different methods to cancel adownload on Mac.
Each method applies to different scenarios and provides you with the flexibility to cancel downloads at various stages.
It allows you to have control over individual downloads and saves you precious time and internet bandwidth.
However, it will stop the download process, preventing any further consumption of internet resources.
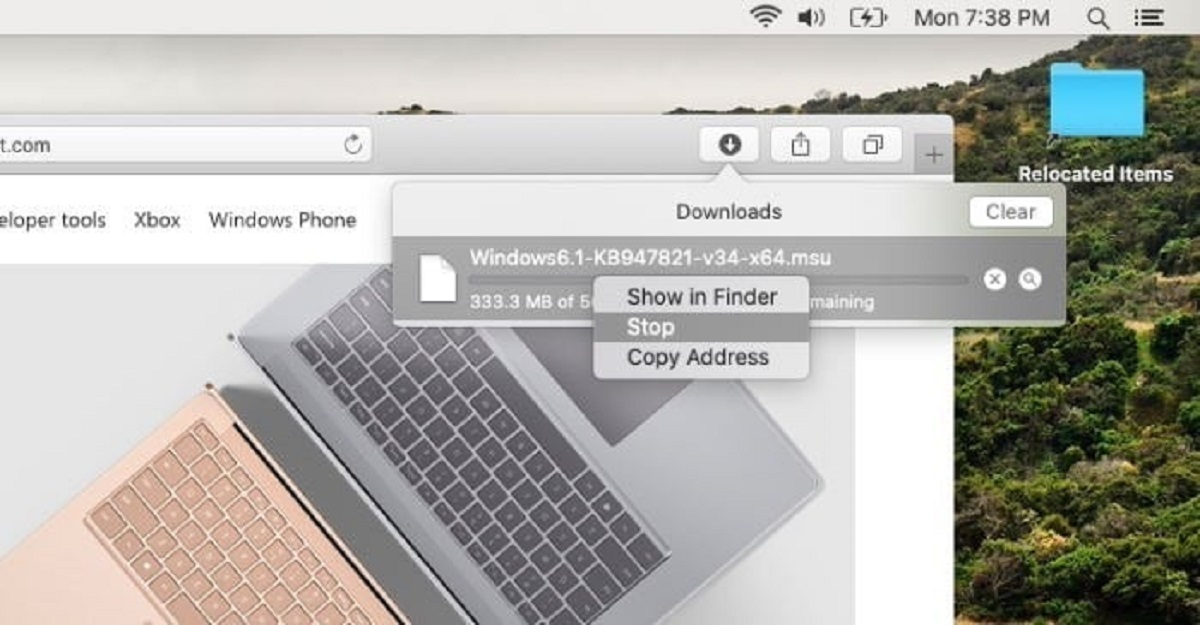
This method allows you to manage your downloads in a centralized location and easily cancel any unwanted files.
Additionally, this method provides the flexibility to choose which downloads you want to cancel from a detailed list.
It eliminates the need to navigate through numerous progress bars or search for specific files in different locations.
Keep in mind that canceling a download through the Downloads folder will permanently remove the file from your system.
If you realize that you still need the file later, you would have to download it again.
It can help you troubleshoot any issues related to downloads and ensure the smooth operation of your Mac.
You may need to manually delete the file if you want to reclaim the occupied space.
Its an ideal option for actively monitoring your downloads and saving time and bandwidth by canceling unnecessary files.
For advanced users, the Activity Monitor method provides a technical approach to cancel a download.
Each method offers its own benefits and can be chosen based on your preferences and the situation at hand.
Additionally, keep in mind that canceling a download does not automatically delete the partially downloaded file.
You may need to manually remove the file to free up storage space on your Mac.
