Introduction
Welcome to the exciting world of building your own wooden PC case!
Building awooden PC caseoffers numerous benefits.
In this guide, we will walk you through the step-by-step process of building a wooden PC case.
If youre new to woodworking, dont worry!
This guide is designed to be beginner-friendly, providing clear instructions and tips along the way.
Having everything on hand will ensure a smooth and uninterrupted process.
Consider researching and planning your design in advance to ensure you have all the necessary supplies.
This blueprint will guide you throughout the construction process and help you achieve the desired result.
Lets move on to the next step in building your wooden PC case: gathering the materials.
Ensuring that you have everything on hand before starting the construction will make the process smoother and more efficient.
This step will allow you to salvage the necessary components and transfer them to the new wooden case.
Now its time to move on to the next step, cutting the wooden panels.
By following these steps, youll have successfully cut the wooden panels for your new PC case.
These panels will serve as the foundation for assembling and housing your components.
With the panels ready, its time to move on to the next step: preparing the ventilation holes.
By following these steps, you will have successfully prepared the necessary ventilation holes in your wooden PC case.
Proper ventilation is essential for keeping your components cool and preventing heat-related issues that can affect performance and longevity.
This step will bring your design to life and create a solid foundation for installing your components.
The solid structure will provide the foundation for housing and showcasing your components in the next steps.
By following these steps, you will successfully plant the components into your custom wooden PC case.
Take your time and double-check every connection to ensure a smooth and successful installation process.
By following these steps, you will achieve a clean and well-organized wiring and cable management setup.
This step is crucial in ensuring that your newly built PC functions properly and meets your performance expectations.
Step 10: Finishing Touches
Congratulations on completing the construction and testing of your wooden PC case!
Now its time to add the finishing touches and put your personal stamp on your creation.
These final steps will enhance the aesthetics and functionality of your custom case.
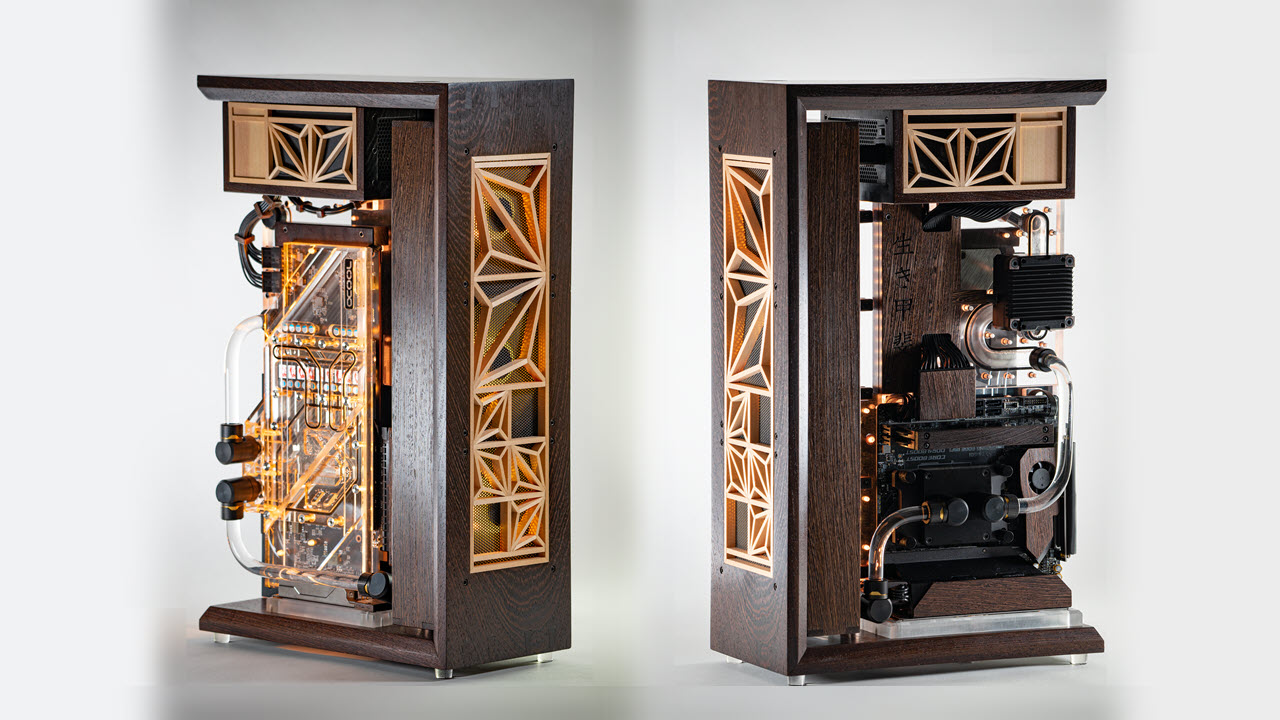
Its now time to showcase and enjoy your beautifully crafted, one-of-a-kind creation.
Be proud of the hard work you put into building it!
Conclusion
Congratulations on successfully completing the construction of your custom wooden PC case!
Building a wooden PC case is a rewarding journey that goes beyond the functionality of a traditional metal case.
Throughout this journey, you have gained valuable skills in woodworking, cable management, and hardware installation.
These skills will serve you well as you continue to explore the world of PC building and customization.
