First and foremost, check the specifications and model of your iMac to determine if it supports user-upgradable RAM.
Some older iMac models may have soldered RAM, which cannot be upgraded.
Once youve confirmed that your iMac is upgradable, youll need to gather the necessary tools.
The first step is to check the specifications and model of your iMac.
Determine if your iMac supports user-upgradable RAM or if it has soldered RAM that cannot be upgraded.
This information can typically be found in the product documentation or by visiting the manufacturers website.
Additionally, identify the maximum RAM capacity that your iMac can support.
This is an important factor as exceeding the maximum capacity may lead to compatibility issues and system instability.
When selecting the RAM modules, it is essential to choose ones that are compatible with your iMac.
Consider the capacity and specifications required by your iMac.
This information can be found in the product documentation or by checking the manufacturers website.
Using incompatible RAM modules may cause system instability and potentially void your warranty.
Additionally, it’s advisable to consider reputable vendors or authorized resellers when purchasing the RAM modules.
This ensures that you receive genuine and high-quality RAM modules for your iMac.
This preparation phase is crucial to ensure a smooth and successful upgrade without any complications or compatibility issues.
The first tool you will need is a soft cloth or microfiber cloth.
This will help protect your iMacs display from scratches or smudges during the upgrade process.
see to it the cloth is clean and free of any debris before using it.
In addition to the cloth, you will need a clean and well-lit workspace.
Clear any clutter and ensure there is enough room to comfortably work on your iMac.
Having a well-lit environment will also make it easier to see the components and perform the installation correctly.
A set of screwdrivers is another essential tool you will need.
The specific screwdriver sizes required may vary depending on your iMac model.
To determine the correct size, refer to the documentation or check the manufacturers website.
It is crucial to use the correct screwdriver size to avoid damaging the screws or iMacs enclosure.
Last but not least, you will need the new RAM modules that you have selected for the upgrade.
verify to have them on hand before starting the installation process.
Double-check that the RAM modules are compatible with your iMac in terms of capacity and specifications.
It will also reduce the risk of any accidental damage to your iMac or its components.
Start by shutting down your iMac and disconnecting all cables and peripherals connected to it.
This includes the power cable, USB devices, external hard drives, and any other accessories.
Disconnecting these will prevent any accidental damage or interference during the installation process.
This will provide a clean and safe workspace and protect your iMacs display from scratches or smudges.
Next, gently wipe the exterior of your iMac with the soft cloth to remove any dust or fingerprints.
Ensure that you are working in a static-free environment.
you’re free to do this by touching a grounded metal object or wearing an anti-static wristband.
This will further minimize the risk of static discharge damaging any internal components.
Step 4: Opening the iMac Enclosure
1.
Begin by laying your iMac face down on a soft cloth or towel to protect its screen from scratches.
confirm the surface is clean and free from any debris.
Locate the small tab or latch on the bottom edge or side of your iMacs enclosure.
This is usually located near the center or at one of the corners.
Gently press the tab or latch and hold it down firmly.
While doing so, carefully tilt the iMac towards you to expose the bottom panel.
Once the bottom panel is accessible, release the tab or latch and set it aside.
Slowly lift the bottom panel away from the iMacs enclosure.
It should come off easily, revealing the internal components.
Be cautious of any cables or connectors that may be attached to the bottom panel.
Carefully disconnect them, if necessary, by gently pulling the connectors apart.
It is important to handle your iMac with care throughout this process to avoid any damage.
Step 5: Locating the RAM Slots
1.
Look for the existing RAM modules that are already installed in your iMac.
They are typically located near the center or bottom of the iMac, depending on the model.
Take note of the number of slots that are currently occupied by the existing RAM modules.
This will help you determine how many additional RAM modules you’ve got the option to install.
Identify the empty RAM slots adjacent to the occupied ones.
These slots may be labeled with empty modules or small stickers indicating their location.
Carefully examine the slots to understand their orientation.
Each slot has a small retaining tab on either side that holds theRAM modulein place.
You will need to release these tabs to remove the existing RAM or implement the new modules.
Take a moment to observe and understand the layout of the RAM slots and their corresponding retaining tabs.
This will help you correctly load the new RAM and ensure a secure fit.
Step 6: Installing the Additional RAM Modules
1.
This will help prevent any static discharge that can damage the RAM or other components.
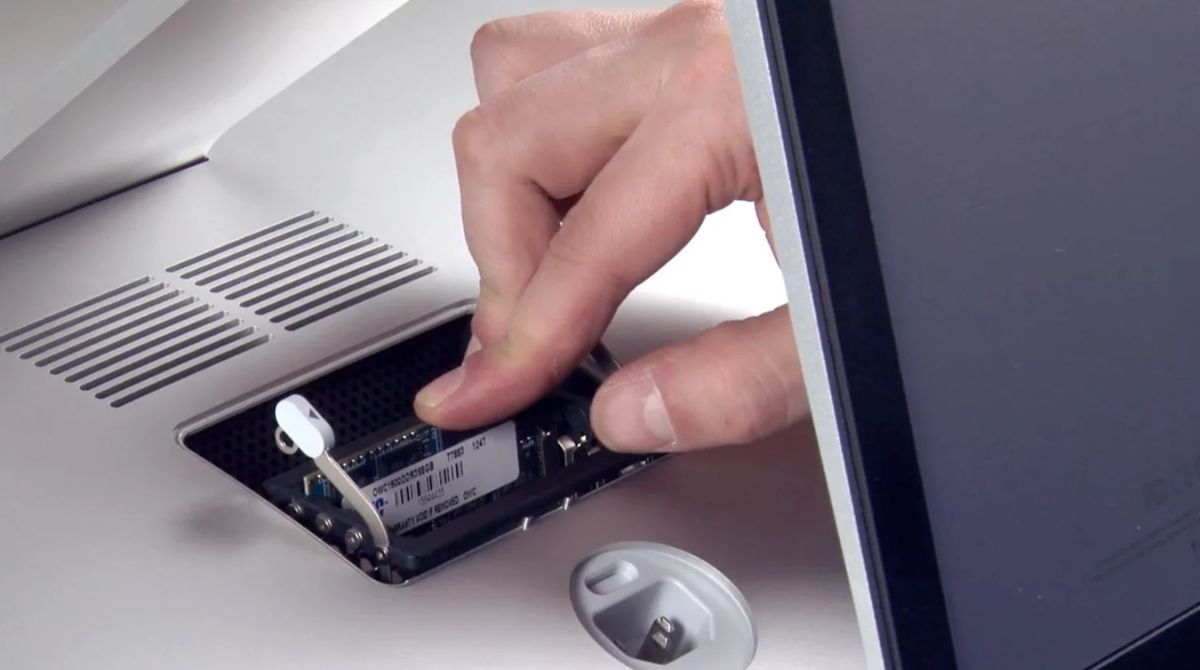
Take the new RAM module and align it with the empty slot.
check that the notch on the module matches the key on the slot for proper alignment.
Avoid touching the gold contacts on the module as this can cause damage or poor connection.
Once properly aligned, gently insert the module into the slot at a 45-degree angle.
Apply even pressure until it is fully inserted and the module is in a vertical position.
The retaining tabs on either side of the slot should automatically snap into place to secure the RAM module.
Ensure that the module is securely seated and that the retaining tabs are fully engaged.
Be aware of any specific installation guidelines mentioned in the iMacs documentation.
Once all the RAM modules are installed, visually inspect them to ensure they are properly seated and secured.
Double-check that the retaining tabs are fully engaged and holding the modules in place.
Ensure they are correctly plugged in and firmly connected.
By following these steps, you’re free to successfully plant the additional RAM modules in your iMac.
Double-check that everything is correctly aligned and seated before proceeding to the next step.
Step 7: Closing the iMac Enclosure
1.
Begin by carefully aligning the bottom panel back onto the iMacs enclosure.
Take note of any connectors that need to be guided through their respective openings in the enclosure.
Once aligned, use both hands to apply even pressure to the edges of the bottom panel.
Gradually work your way around the panel to ensure it is fully seated and snaps into place.
Check that all the retaining tabs on the bottom panel are securely fastened and holding it in place.
This will ensure the panel remains in position and provides a proper seal for the enclosure.
Give the bottom panel a light tug to confirm that it is securely attached.
If there is any movement or a loose fit, double-check the alignment and try reseating the panel.
Step 8: Turning On the iMac and Checking the RAM Upgrade
1.
Reconnect the power cable to your iMac and connect any other peripherals or accessories that you use regularly.
Press the power button to turn on your iMac.
Wait for it to boot up and reach the desktop or login screen.
Once your iMac is operational, go to the Apple menu and press About This Mac.
This will open a window displaying information about your iMacs hardware, including the newly installed RAM.
In the About This Mac window, choose the Memory tab.
Here, you will see details about the RAM, such as the total installed memory and its specifications.
Verify that the total installed memory matches the capacity of the RAM modules you installed.
It should reflect the increase in RAM that you expect from the upgrade.
Open several applications or perform tasks that would typically require a significant amount of memory.
Observe the overall performance of your iMac and check for any improvements in speed and responsiveness.
If everything seems to be working correctly and you are experiencing smoother performance, congratulations!
You have successfully upgraded the RAM in your iMac.
Enjoy your newly improved performance and the ability to handle more resource-intensive tasks effortlessly!
Throughout the process, it is crucial to ensure compatibility and gather the necessary tools.
Checking the specifications of your iMac and selecting compatible RAM modules will help avoid any issues during the installation.
Equally important is creating a safe and static-free environment and properly preparing your iMac for the upgrade.
Finally, power on your iMac and verify that the RAM upgrade was successful.
Check the system information to confirm the newly installed RAMs capacity and ensure that your iMac recognizes the upgrade.
Perform some tests to gauge the improved performance and responsiveness brought about by the increased memory.
Congratulations on successfully adding more RAM to your iMac!
