Before diving into the installation process, its essential to ensure you are well-prepared.
This includes gathering the necessary tools and backing up any important data.
This step will ensure your safety and protect the components from any potential damage.
Carefully follow the instructions provided by the manufacturer to get into the internal components of your PC.
These are typically slots where you might mount additional storage devices, such as hard drives or solid-state drives.
see to it there is a free bay that can accommodate your new hard drive.
Having the right tools at hand will save you time and make the task much easier.
Its also a good idea to ensure that your tools are in good condition.
Check your screwdriver to ensure the head is not worn or damaged.
Check the cables for any visible signs of damage or fraying.
If youre using an anti-static wrist strap, check that its functioning properly.
This step is essential to ensure your safety and prevent any damage to the components.
Why Should You Power Off and Unplug Your PC?
How to Power Off and Unplug Your PC?
By taking these precautionary steps, you are ensuring the safety of both yourself and your PC.
Opening the case will allow you to set up the new hard drive and make the necessary connections.
Heres how you’re able to bring up the PC case:
1.
Before proceeding, identify the jot down of case you have to understand how it opens.
Identify the Screws or Latches
Look for screws or latches that hold the PC case panels in place.
Most cases have thumb screws or regular screws at the back or side of the case.
Some cases may have latches or release buttons instead.
Turn the screws counterclockwise until they are loose and can be easily lifted.
If your case has latches, press or release them as directed by the manufacturer.
Most tower cases have a side panel that slides away from the front of the case.
Small form factor cases may have a top or back panel that lifts off.
Avoid applying excessive force or using tools that could inadvertently cause harm.
Drive bays are slots or compartments within the computer case designed to hold storage devices like hard drives.
Heres how you’ve got the option to locate them:
1.
Look for the area where the existing hard drives or other storage devices are installed.
Identify the Drive Bay Slots
Drive bays can come in different sizes and configurations, depending on the case.
They are often located towards the front or middle of the PC case.
Look for rectangular slots or trays designed to hold the hard drive.
Count the Number of Available Bays
Count how many empty drive bays are available for installing additional storage devices.
Keep in mind that some of these bays may already be occupied by existing drives.
You will need at least one free bay for your new hard drive.
Consider how easy or difficult it will be to mount the new hard drive and connect the necessary cables.
Most modern PC cases are designed to accommodate standard-sized 3.5-inch or 2.5-inch hard drives.
Confirm that the drive bays are suitable for the physical dimensions of your chosen hard drive.
This will help you proceed with the installation process more efficiently.
In the next step, we will guide you on choosing the right hard drive for your needs.
Selecting the right hard drive involves considering factors such as storage capacity, speed, and brand reputation.
Heres how you’ve got the option to choose the perfect hard drive:
1.
Determine Your Storage Needs
Assess your storage requirements and determine how much additional space you need.
Choose the key in that aligns with your priorities and budget.
Consider your current and future storage needs and select a capacity that will meet your requirements without unnecessary excess.
Stick to well-known brands that have a track record of producing quality drives.
Investing in a reputable and reliable brand will help ensure the longevity and reliability of your new hard drive.
Align the screw holes on the sides of the hard drive with the screw holes on the bay.
Ensure a secure fit without forcing the hard drive into place.
confirm the connection is secure.
Ensure a firm and secure connection.
Be cautious not to overtighten and damage the screws or hard drive.
Slide or attach them as directed by the case design, ensuring a snug fit.
Step 11: Power On and Configure the Hard Drive
Finally, plug in and power on your PC.
The new hard drive should be automatically recognized by the operating system.
By following these steps, you’re free to successfully install a new hard drive into your PC.
Remember to handle all components with care and pay close attention to the connections to ensure a seamless installation.
These are typically rectangular slots or trays designed to hold the hard drive.
Identify a drive bay that is free and suitable for your new hard drive.
Insert the Hard Drive
Gently slide the hard drive into the drive bay until it is fully inserted.
Secure the Hard Drive
Once the hard drive is inserted, use screws to secure it in place.
Be cautious not to overtighten the screws, as it may damage the hard drive or the drive bay.
If there is any movement, recheck the screws and check that they are properly tightened.
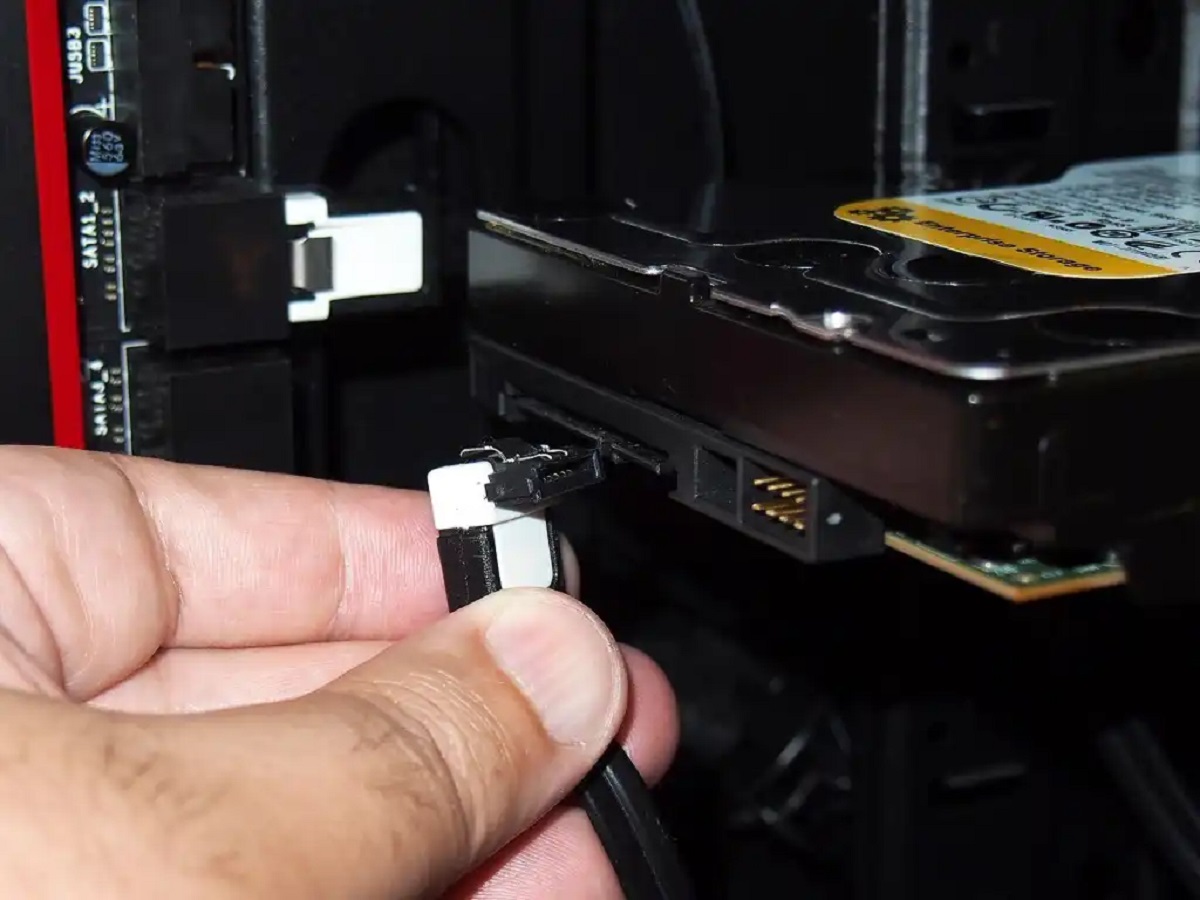
It is a thin, flat cable with a small L-shaped connector at each end.
It is a small rectangular-shaped connector with a group of metal prongs inside.
check that the connector is oriented correctly and fits snugly into the port.
These are usually positioned along the edge of the motherboard and are labeled as SATA1, SATA2, etc.
Choose an available port that is not already being used.
Align the L-shaped connector with the SATA port and insert it firmly, ensuring a secure and tight connection.
Use cable ties or clips to secure the cable if necessary.
SATA power cables have multiple flattened connectors designed specifically for SATA devices.
It is usually a rectangular-shaped port with several small pins or holes.
Ensure a secure and snug connection.
Use cable ties or clips to secure the power cable if necessary.
see to it to use separate SATA power cables and avoid overloading any single cable or power connector.
Align these holes with the corresponding holes on the sides of the hard drive.
Hold the screw with a screwdriver to guide it into place without applying excessive force.
Overtightening may damage the hard drive or strip the screw holes.
There should be no movement or rattling.
If you notice any instability, double-check the screws to ensure they are properly tightened.
Note:Some PC cases may use tool-free mechanisms or other methods to secure the hard drive without screws.
In such cases, follow the manufacturers instructions to properly secure the hard drive.
This step is important to prevent any damage or disruption during regular computer use.
Position the Panels
Carefully position the panels or covers back onto the PC case.
Ensure that they are aligned correctly and fit snugly.
Most cases have panels that slide into place or are secured with screws or latches.
Insert the screws and tighten them gently, but do not overtighten.
If your case has latches, ensure they are engaged properly to secure the panels.
Verify Panel Alignment
Double-check that the panels are aligned correctly and show no gaps or unevenness.
The case should be securely closed without any loose panels or protrusions.
Arrange the cables along designated cable management channels or secure them with cable ties if necessary.
Remove any fingerprints, smudges, or dust to keep the case looking clean and presentable.
A securely closed case also helps maintain proper airflow, which is crucial for the cooling of the system.
Wait for the computer to boot up and reach the desktop.
Format the Hard Drive
4.
Choose an available drive letter and click OK to assign it to the hard drive.
Confirm that the hard drive is accessible and ready for use.
Final Thoughts
Congratulations!
Preparing and gathering the necessary tools beforehand will save you time and ensure a smooth installation process.
By selecting a reliable and suitable drive, you’re free to ensure optimal performance and longevity.
Double-checking all connections and ensuring they are secure is vital to the functioning of the hard drive.
Formatting the hard drive and assigning a drive letter allow you to start using the new storage space efficiently.
Remember, adding a hard drive is just one way to expand your PCs storage.
