Introduction
Screen recording on a Mac is a powerful tool for capturing and sharing visual content.
This can be particularly frustrating for those who rely on Chrome for browsing, research, or web-based presentations.
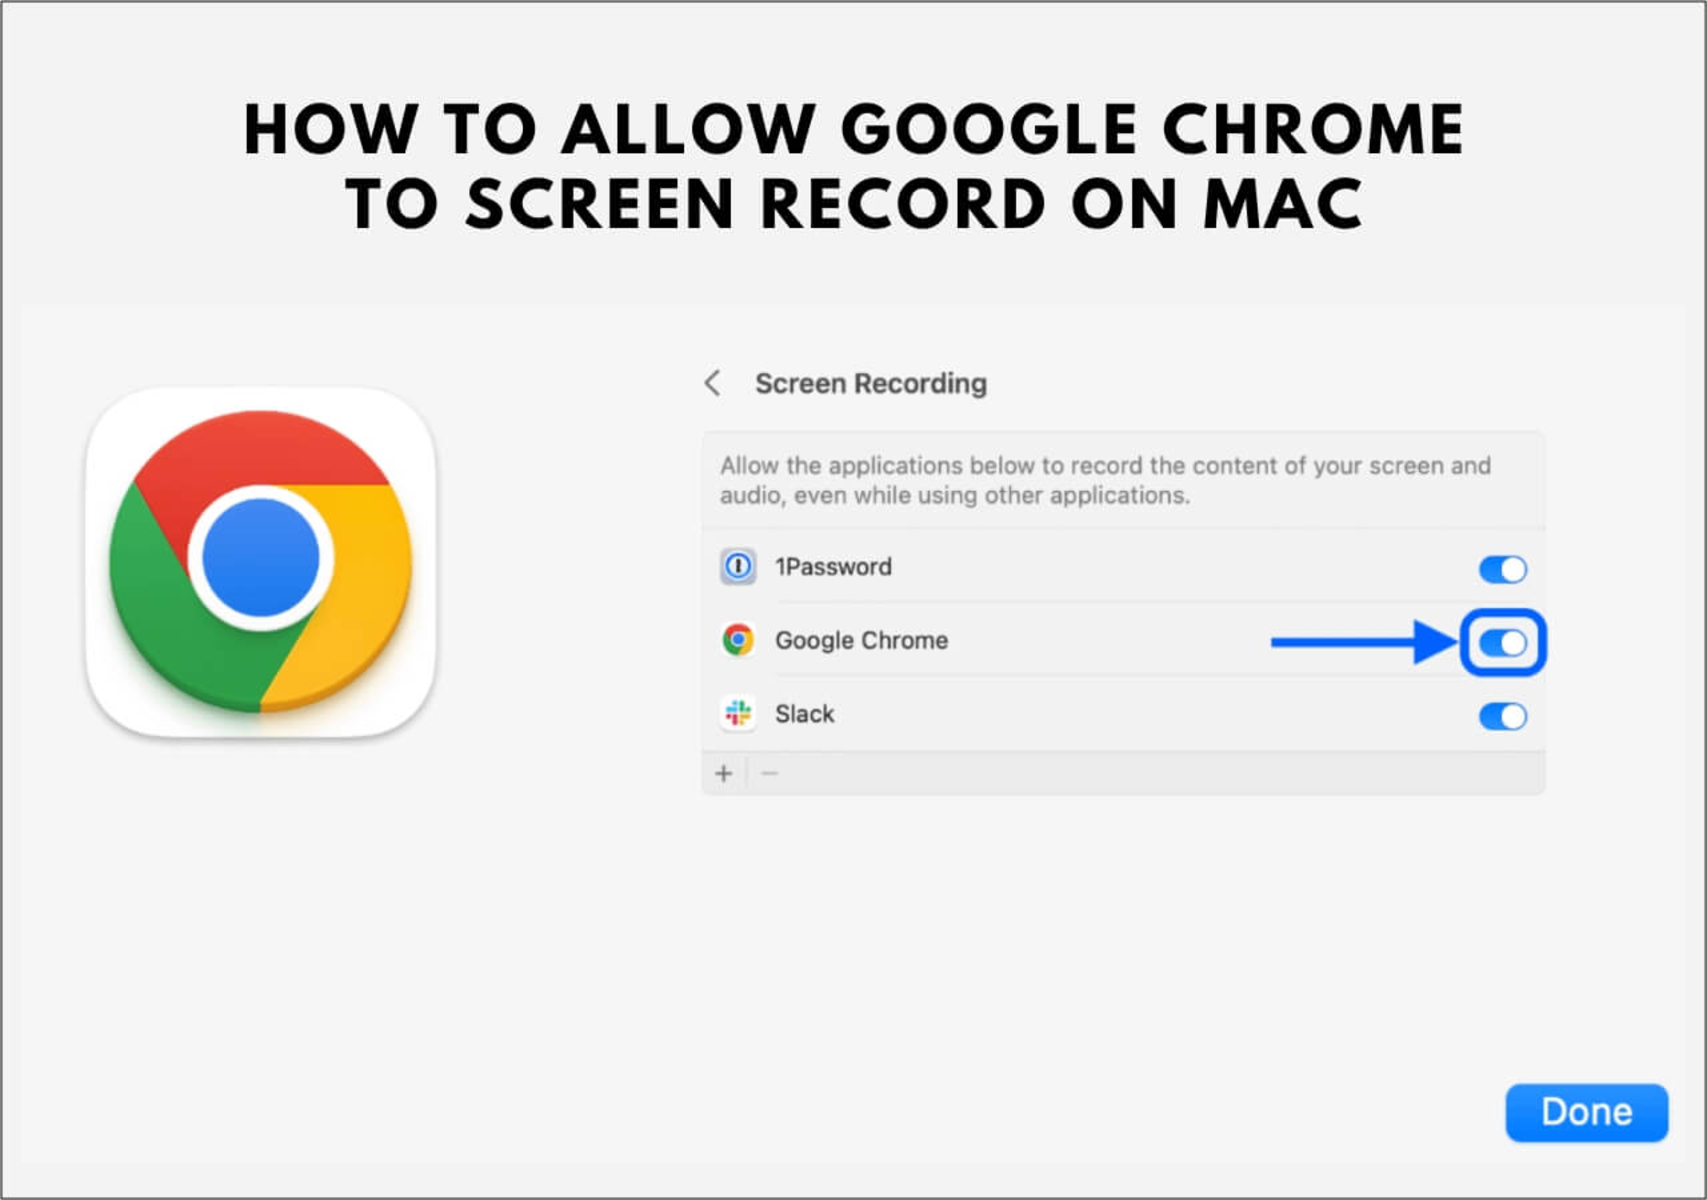
In this article, we will explore the process ofadding Google Chrome to your screen recording on a Mac.
Once you’ve located the QuickTime Player tool, opt for icon to launch the program.
From the dropdown menu, select “New Screen Recording.”
Within the recording window, you will notice a small white arrow next to the red record button.
Clicking on this arrow reveals a menu of recording options, allowing you to customize your screen recording preferences.
Before commencing the recording, it’s essential to consider your preferences for audio input.
This ensures that your recording captures clear and synchronized audio alongside the visual content.
Additionally, the recording quality can be adjusted to suit your specific needs.
This will prompt a recording toolbar to appear, allowing you to commence the screen recording.
select this arrow to reveal a menu of recording options.
From this menu, opt for option that allows you to choose the Google Chrome window for recording.
press the red record button to initiate the recording process.
choose the stop button, typically represented by a square icon, to halt the recording process.
This action signifies the completion of the screen recording and prompts QuickTime Player to finalize the recorded content.
choose the Save Location: Determine the preferred location for saving the recording on your Mac.
QuickTime Player will swiftly process the recording and generate the saved file according to your specified parameters.
