Introduction
Welcome to our guide on how much RAM Windows 10 Home 64-bit can support.
Windows 10 Home is the basic version of Microsofts flagship operating system, designed for home users.
It offers a range of features and functionalities to cater to everyday computing tasks.
Well also provide tips on optimizing RAM usage to maximize your computers performance.
What is RAM and why is it important?
Think of RAM as the computers short-term memory, where data is constantly retrieved and updated for quick processing.
RAM plays a vital role in the overall performance and responsiveness of your machine.
The CPU can quickly retrieve and process the data, enabling smooth and seamless operation.
As you open more applications or perform more tasks, the amount of RAM required increases.
Having enough RAM ensures that your rig can handle these demands without significant performance degradation.
Windows 10 Home 64-bit is limited to a maximum of 128 GB of RAM.
Another limitation to consider is the physical constraints of your computers hardware.
Additionally, its important to consider the limitations of your processor and system architecture.
As with any operating system, Windows 10 Home 64-bit has its limitations when it comes to RAM utilization.
Understanding these limitations can help you make informed decisions when upgrading or troubleshooting your computers memory requirements.
Its also important to consider the memory requirements of the specific software applications you intend to use.
However, its crucial to consider the cost and practicality of installing and utilizing such large amounts of RAM.
For most users, striking a balance between cost-effectiveness and meeting their computing needs is the ideal approach.
These factors can affect the systems ability to recognize and utilize the full capacity of the installed RAM modules.
The 64-bit version of Windows can address and utilize more RAM compared to the 32-bit version.
Its important to ensure that your BIOS controls are properly configured to support the installed RAM modules.
Testing the RAM modules individually or consulting with a professional can help identify any faulty modules or installation errors.
To get into the Task Manager, right-press the taskbar and select Task Manager from the context menu.
Once the Task Manager window opens, press the Performance tab.
The amount of RAM recognized by your system will be displayed under the Physical Memory section.
System Properties: Another way to check the recognized amount of RAM is through the System Properties window.
In the Control Panel, tap on the System or System and Security category, and then select System.
You will find information about your computers processor, installed memory, and system bang out in this window.
In the Command Prompt window, jot down the command wmic memorychip get Capacity and press Enter.
This will display the capacity of each individual RAM module installed in your rig.
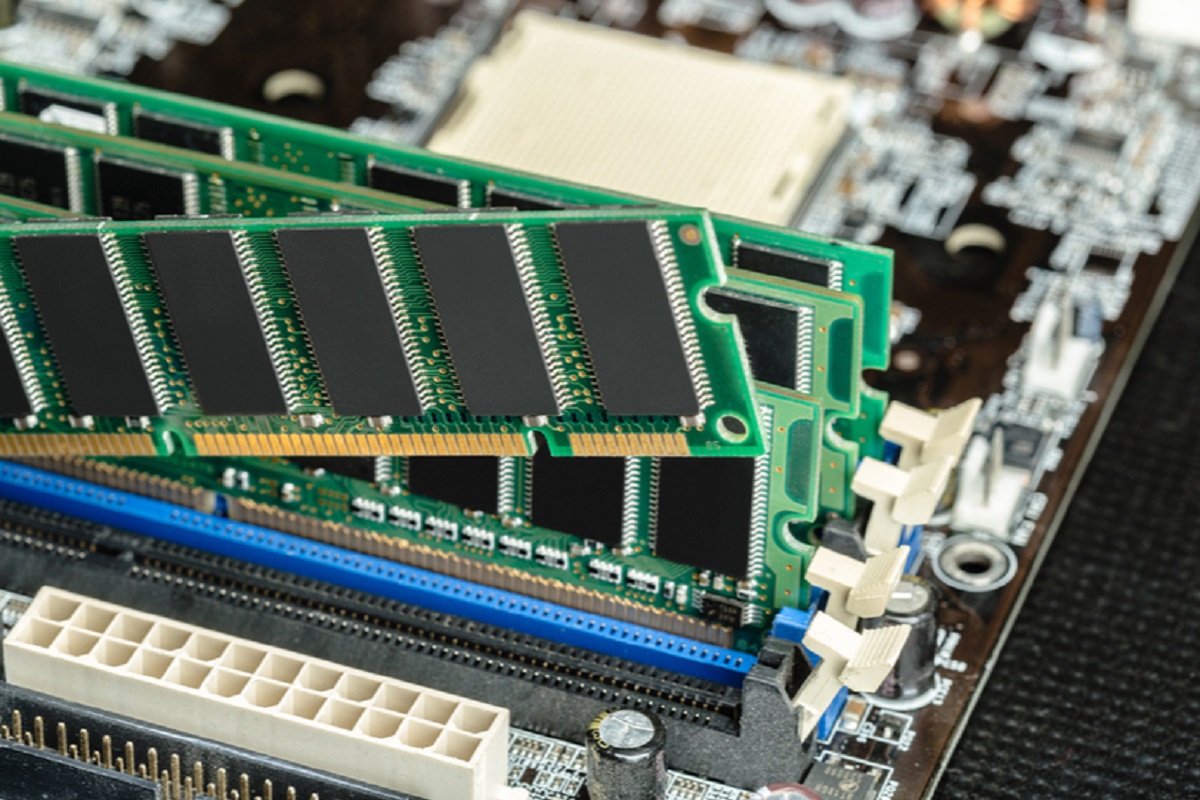
Here are the steps to upgrade your RAM:
- it’s possible for you to refer to your computers documentation or manufacturers website to find this information.
Additionally, you could use system information tools such as CPU-Z or Speccy to identify the current RAM specifications.
Ensure that the modules match the specifications required by your box, such as the speed and voltage requirements.
This will prevent any potential damage to the components during installation.
Refer to your computers documentation for instructions on opening the case.
Ensure that the notches on the RAM modules align with the keys on the slots.
Firmly press down until the modules are fully seated and the retention clips on the sides lock into place.
Ensure that all connections are secure before reconnecting the power source.
Power on your rig: Once the RAM upgrade is complete, power on your rig.
Windows 10 Home 64-bit should automatically recognize the new RAM modules and adjust the system tweaks accordingly.
Here are some tips for optimizing RAM usage on Windows 10 Home 64-bit:
1.
Close unnecessary programs and background processes: Be mindful of the number of applications and processes running simultaneously.
Close any programs that are not actively in use to free up memory for more critical tasks.
Use Task Manager to identify resource-intensive applications and consider closing or disabling them when not needed.
Review your startup programs and disable any that are not necessary.
This can help free up RAM and improve startup times.
Limit the number of open tabs and disable unnecessary extensions to conserve memory resources.
Consider reducing or disabling visual effects such as animated windows or transparency effects.
Adjusting visual options to a more modest level can help conserve RAM.
Run disk cleanup and optimize: Regularly perform disk cleanup to remove unnecessary files and optimize your computers storage.
This can help free up space on your hard drive, reducing the strain on RAM when accessing data.
Manufacturers often release driver updates that optimize compatibility and resource management, including RAM utilization.
Scan for malware and viruses: Malware and viruses can cause significant strain on system resources, including RAM.
Ensure that you have a reliable antivirus program installed and regularly scan your system for any potential threats.
SSDs offer faster data access times, reducing the reliance on RAM for storing and retrieving data.
Its important to ensure that your computers configuration aligns with the maximum supported RAM capacity to avoid compatibility issues.
In addition to upgrading RAM, optimizing the usage of your existing memory is essential.
