Introduction
Welcome to the delicious world of homemade ice cream!
Making ice cream at home allows you to customize the flavors, ingredients, and textures to your liking.
Before we dive into the details, lets take a moment to appreciate the joy of homemade ice cream.
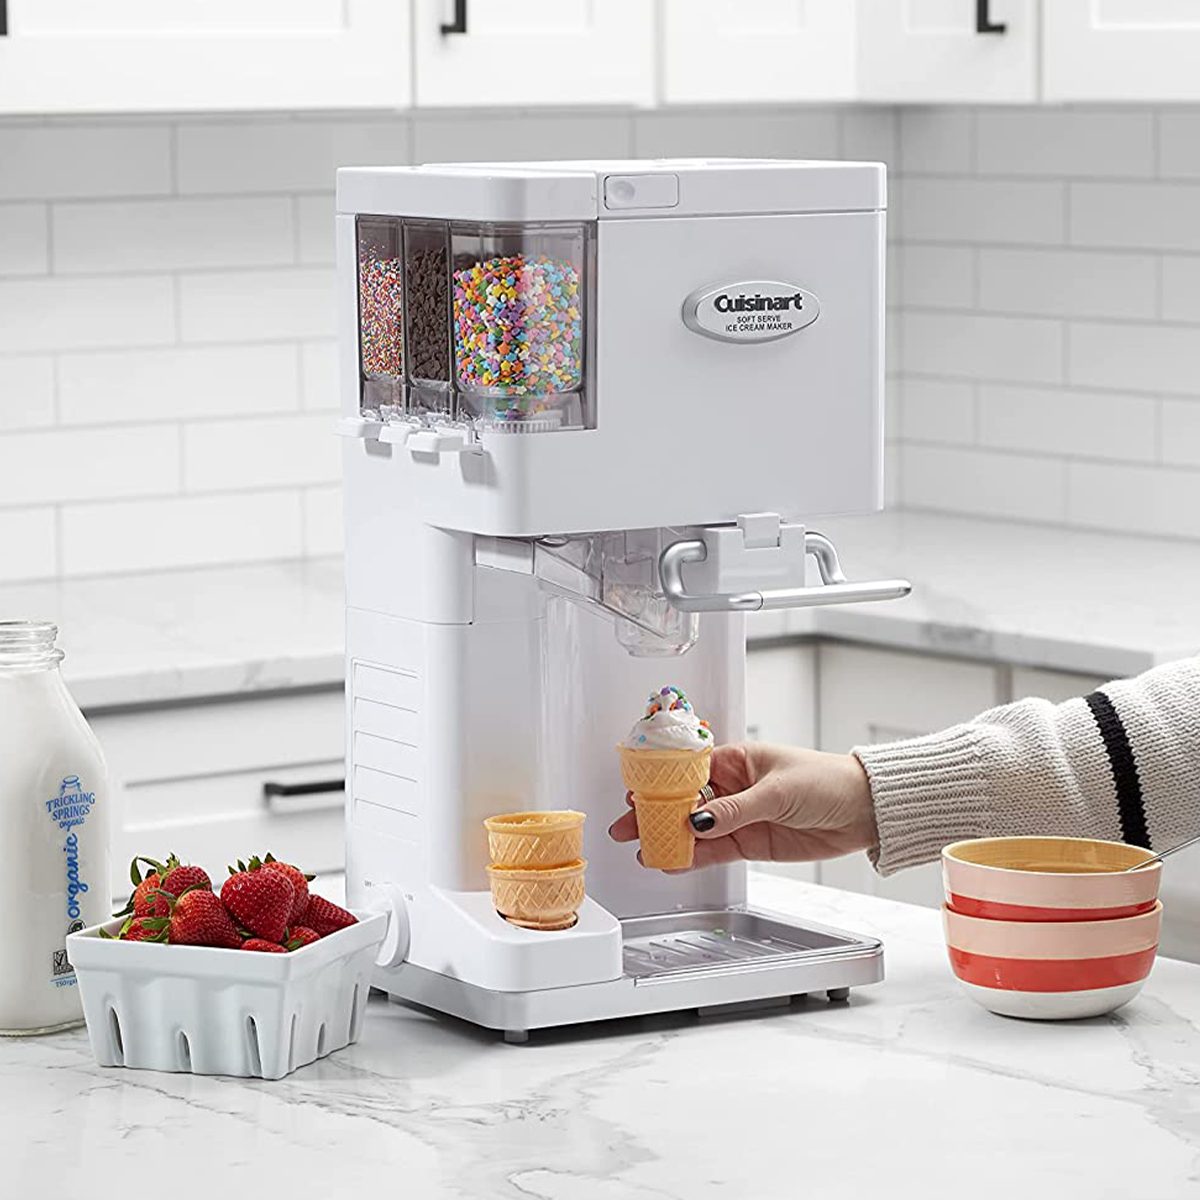
This machine consists of a motorized base, a removable freezer bowl, and a mixing paddle or dasher.
The freezer bowl is a crucial component of the Cuisinart ice cream maker.
Before making ice cream, it needs to be pre-frozen to ensure that the mixture freezes properly.
The mixing paddle or dasher is responsible for churning and incorporating air into the ice cream mixture.
It rotates slowly, creating a smooth and creamy texture as the mixture freezes.
The paddle is attached to the motorized base, which powers the churning process.
Lets take a closer look at these factors:
1.
It needs to be adequately frozen before use, typically around 0F (-18C).
Recipe and Ingredients:The specific recipe and ingredients you choose can impact the freezing time.
Additionally, adding solid mix-ins like fruit chunks or chocolate chips can also affect freezing time.
Mixture Temperature:The initial temperature of your ice cream mixture can affect freezing time.
Machine Capacity:The amount of ice cream mixture you put into the machine can impact the freezing time.
Overfilling the machine can impede the churning process and result in a longer freezing time.
Its important to follow the manufacturers guidelines regarding the maximum capacity of your specific Cuisinart ice cream maker.
Warmer room temperatures can slow down the freezing process, while colder environments can speed it up.
This bowl is responsible for freezing the ice cream mixture as the machine churns it.
The freezing bowl should be thoroughly frozen before use.
Most Cuisinart ice cream makers require the bowl to be frozen for at least 12 hours.
Its crucial to check the manufacturers instructions for your specific model, as freezing times may vary.
When freezing the bowl, ensure that it is placed in the coldest part of your freezer.
This will help maintain a consistent and low temperature throughout the bowl.
Before adding your ice cream mixture to the freezing bowl, its essential to give it a quick inspection.
Ensure that the bowl is completely frozen and free of any visible ice crystals.
Understanding the impact of each ingredient can help you make informed choices and achieve the perfect scoop.
Dairy Products:The main dairy component in most ice cream recipes is cream.
The fat content of the cream can affect how quickly the mixture freezes.
Lighter alternatives like milk or half-and-half may freeze faster but may produce a slightly less creamy texture.
Other sweeteners like honey or maple syrup may have different effects since they contain additional water or sugars.
Flavors and Extracts:Adding flavors and extracts is where you could get creative with your ice cream recipes.
However, keep in mind that larger mix-ins may slow down the freezing process.
Chopping them into smaller pieces or pre-freezing them before incorporating them into the mixture can help mitigate these effects.
Experimenting with different ingredients and ratios can lead to unique and delicious ice cream creations.
However, its essential to adjust the recipe accordingly and keep in mind the potential impact on freezing time.
Here are some key aspects to consider when choosing a recipe:
1.
These recipes often account for the machines specifications and can provide more accurate timings and ingredient ratios.
Freezing Time Estimates:Pay attention to any estimated freezing times mentioned in the recipe.
The proportions of these ingredients can impact the texture and freezing time of the ice cream.
Experimentation:Dont be afraid to experiment and customize the recipe to suit your taste preferences.
However, keep in mind that significant modifications to the recipe may affect the freezing time and overall outcome.
Regardless of the recipe you choose, follow the instructions carefully.
Taking these steps will help you achieve the best results and create ice cream that is truly melt-in-your-mouth delicious.
Prepping the Machine
1.
Pre-Freeze the Bowl:Place the assembled freezing bowl in the coldest part of your freezer.
Cold mixtures freeze faster and result in a smoother consistency.
If your recipe recommends chilling, follow those instructions for the best outcome.
Ensure that the mixing paddle is securely attached to the motorized base.
The exact churning time may vary depending on the recipe and machine model.
Be sure to monitor the progress and make any necessary adjustments as you go.
The churning time can vary depending on various factors.
Heres a closer look at this important stage:
1.
Recipe Guidelines:Start by following the recipe guidelines for the suggested churning time.
The recipes instructions will give you a baseline to work with, considering the specific ingredients and ratios used.
Keep an eye on its consistency and texture.
It should gradually thicken and become more solid as it freezes.
The churning time may need to be adjusted based on the visual cues you observe.
Different models may have different recommendations.
The manual may provide insights into the average churning time for various recipes and serve as a helpful reference.
Adjust the churning time accordingly to achieve the desired consistency.
Experiment and Personal Preferences:Feel free to experiment and adjust the churning time based on your personal preferences.
If you like your ice cream denser and firmer, you may choose to extend the churning time.
If you prefer a softer and lighter texture, you could reduce the churning time slightly.
Remember that finding the perfect churning time may require a bit of trial and error.
Keep in mind that the churning time is not set in stone and can vary depending on different factors.
The testing phase allows you to determine the ideal consistency and texture of your frozen treat.
Here are some ways to test for readiness when using your Cuisinart ice cream maker:
1.
Visual Inspection:Take a close look at the ice cream as it churns.
As it approaches readiness, it will thicken and firm up.
Youll notice that the mixture becomes creamier and less liquid-like.
Keep an eye on the surface and edges for any signs of firmness.
Consistency Check:Use a spoon or spatula to scoop out a small amount of the ice cream mixture.
Observe its consistency as you lift it.
If it holds its shape and has a smooth and creamy texture, it is likely ready for consumption.
If it appears too soft or runny, it may require more time in the machine.
If the trail doesnt hold or the mixture appears too liquidy, it may need more churning time.
Take a spoonful and savor the flavor and texture.
Adjust the sweetness or flavors as desired based on your taste preferences.
This will further enhance its texture and make it even more enjoyable.
Here are some tips to enhance your ice cream experience:
1.
Serving and Presentation:Scoop your ice cream into a serving dish or cone for a classic presentation.
Texture and Temperature:Allow your ice cream to soften at room temperature for a few minutes before serving.
This helps achieve a smoother, creamier texture.
However, be cautious not to let it melt entirely.
Finding the ideal balance is key.
Pairings and Combinations:Experiment with different flavor combinations and pairings to complement your homemade ice cream.
Sharing the Joy:Ice cream is best enjoyed with loved ones.
Sharing the joy of your creation with others will make the experience even more memorable.
Experiment and Customize:Dont be afraid to get creative with your ice cream flavors and mix-ins.
Explore new combinations, try different recipes, and adjust ingredients according to your preference.
The beauty of making homemade ice cream is the ability to customize it to suit your taste.
Take a moment to appreciate the effort and love you put into creating this treat.
Enjoy each spoonful and savor the rich flavors.
Remember that the joy of homemade ice cream extends beyond the first bite.
Embrace the process, get creative, and have fun experimenting with different flavors and techniques.
Your Cuisinart ice cream maker will be your trusty companion on this delicious journey of homemade icy delights.
Understanding the freezing bowls role and ensuring it is properly frozen sets the stage for successful ice cream creation.
Testing for readiness ensures that your ice cream has reached the desired level of creaminess and texture.
Finally, enjoying your homemade ice cream is a delightful experience.
