Before we dive into the setup process, its essential to gather the necessary equipment.
Proper placement of the speakers is crucial to achieve optimal sound quality.
This step is crucial for achieving optimal sound quality and immersive audio.
In the next section, we will guide you on how to position your speakers effectively.
Step 2: Positioning your surround sound system
1.
Ideally, it should be placed directly above or below your TV, at ear level when youre seated.
This positioning helps anchor the sound to the on-screen action, ensuring clear and accurate dialogue reproduction.
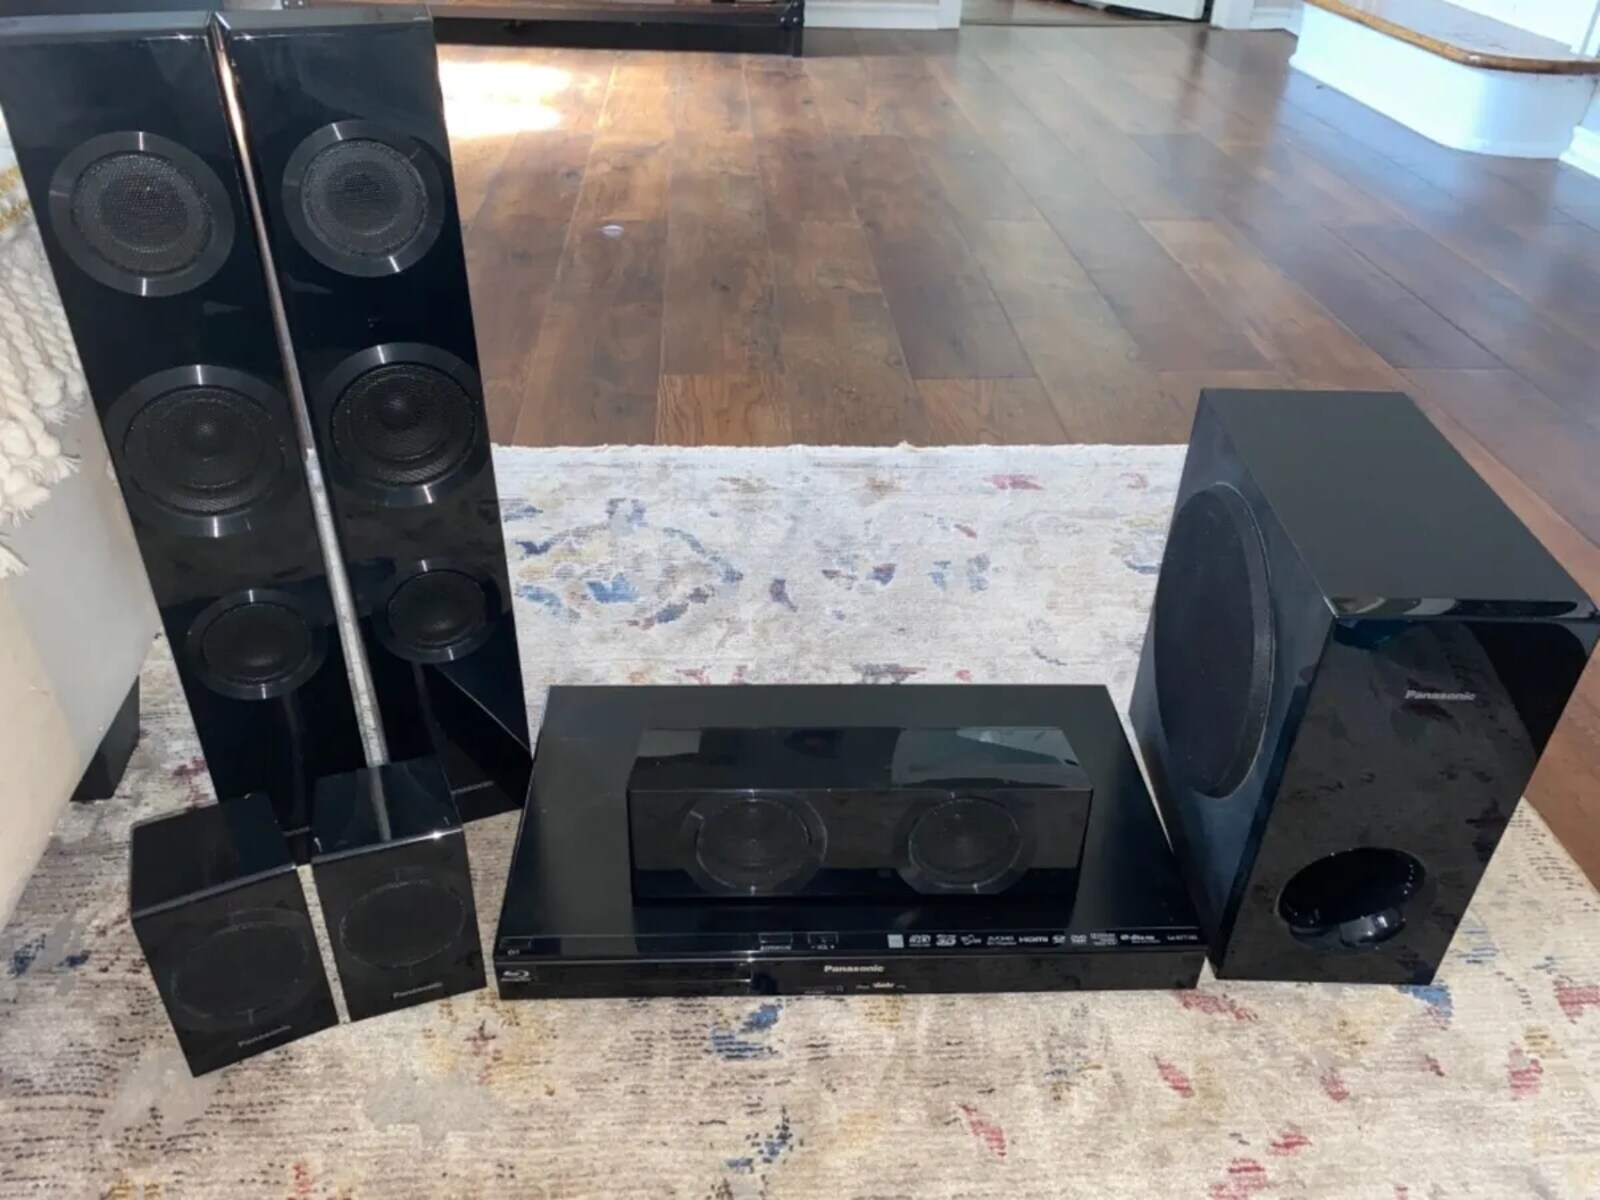
Front speakers:The front speakers create the left and right audio channels.
Place them on either side of your TV or display, facing towards the seating area.
Position them at an equal distance from the center speaker and angled slightly inward to create a focused soundstage.
This arrangement helps deliver a wide and spacious audio image.
Rear speakers:The rear speakers are responsible for producing ambient sounds and surround effects.
Ideally, place them behind your seating area, slightly above ear level.
Aim the speakers towards the seating position for an immersive surround sound experience.
Experiment with different positions in the room to find the spot that delivers the best bass response.
Common locations include beside or near the front speakers or in a corner of the room.
Adjust the subwoofer parameters on your receiver for optimal bass integration with the rest of the speakers.
ensure to follow the manufacturers instructions when using stands or mounts.
Remember, the key is to achieve a balanced and coherent soundstage, where the audio seamlessly surrounds you.
Step 3: Connect the speakers
1.
Identify the speaker outputs:Locate the speaker outputs on the back of your receiver.
confirm to match each speaker with its respective output.
Repeat this process for the other end of the wire, connecting it to the center speaker itself.
Connect the front speakers:Repeat the same process for the front left and right speakers.
Repeat this for the front right speaker.
Connect the subwoofer:Depending on your subwoofer, you may have different connection options.
Most subwoofers have a dedicated subwoofer output on the receiver.
Use an RCA cable or a specialized subwoofer cable to connect the subwoofer output to the subwoofers input.
If your subwoofer has speaker-level inputs, you might also connect it using speaker wire.
Step 4: Connect the receiver to your TV
1.
The most common audio outputs are HDMI, optical, and RCA.
The video output is usually anHDMI port.
Identify the corresponding inputs on your TV:Locate the audio and video inputs on your TV.
Connect the audio output from the receiver to the TV:
4.
Connect the video output from the receiver to the TV:
5.
Use the TV remote to go for the corresponding HDMI input or audio input for the receiver connection.
Step 5: Connect additional devices
1.
Identify the available input ports:Take note of the available input ports on your receiver.
Common input ports include HDMI, optical, and RCA.
Connect the machine to the receiver:
3.
Set the input source:Once the equipment is connected, opt for appropriate input source on your receiver.
Configure gadget audio controls:Depending on the gadget, you may need to adjust the audio output controls.
verify the audio is balanced and all speakers are producing sound.
If necessary, use the receivers parameters to adjust the volume levels and speaker configurations for optimal audio performance.
The exact location may vary depending on the model of your receiver.
Speaker configuration:In the audio controls menu, you will find options to configure the speaker setup.
pick the appropriate configuration that matches your speaker arrangement (e.g., 5.1, 7.1).
This setting ensures that the receiver knows how many speakers are connected and their respective positions.
Speaker levels and balance:Adjust the volume levels and balance of each speaker to ensure a well-balanced sound.
Most receivers have a test tone feature that emits a sound from each speaker individually.
This setting ensures that the receiver can properly decode and reproduce the audio format from your content source.
Equalizer prefs:Some receivers offer an equalizer or audio enhancement prefs.
Use these configs to fine-tune the audio output to your preference.
Adjust the bass, treble, and other sound parameters to suit your musical or movie viewing preferences.
This ensures compatibility and optimal audio transmission.
Step 7: Test and fine-tune your surround sound system
1.
Listen carefully to each speaker individually to ensure they are producing sound and are balanced with the other speakers.
Adjust the speaker levels and balance if necessary to achieve a harmonious soundstage.
Experiment with subtle changes in speaker placement to achieve the best sound imaging and balance.
Bass management:Pay attention to the performance of the subwoofer and its integration with the other speakers.
Fine-tuning the bass management ensures a well-rounded and immersive audio experience.
Listening environment:Consider the acoustics of your room and make any necessary adjustments.
Experiment with these adjustments to create an optimal listening environment.
Explore these different modes and choose the one that best complements the content youre enjoying.
This could include tweaking the equalizer options, adjusting speaker distances, or changing the audio balance.
Use your ears as a guide, and make adjustments that enhance your overall listening experience.
Remember to carefully position your speakers for optimal sound distribution and clarity.
Take the time to connect each speaker to the receiver, ensuring secure and proper wire connections.
Once your speakers are connected, link your receiver to the TV to synchronize audio and video output.
Lastly, testing and fine-tuning your surround sound system are essential steps to achieve the best sound quality possible.
