However, the general steps outlined in this article should apply to most Roku devices.
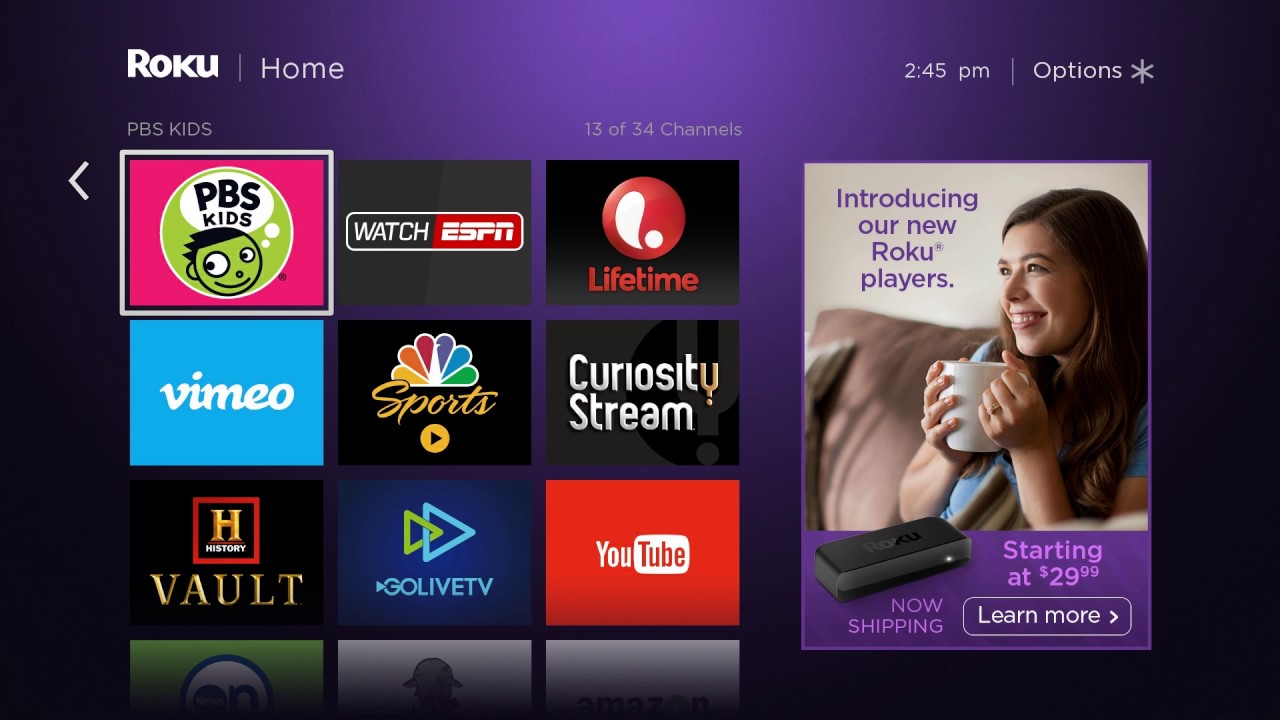
The home screen is where all your installed channels are displayed for easy access.
To enter the home screen, see to it your Roku unit is turned on and powered up.
Use your Roku remote to navigate to the home button, which is typically represented by a house-shaped icon.
Press the home button on your remote, and you will be instantly taken to the Roku home screen.
Here, you will see a grid of icons representing the channels that are currently installed on your machine.
Having trouble accessing the home screen?
Ensure that yourRoku equipment and remote are in proper working condition.
Check the batteries in your remote and confirm they are properly inserted.
This icon usually resembles a store or shopping bag to indicate where you could discover and add new channels.
Select and opt for Channel Store icon to enter the Channel Store.
This action will redirect you to a new screen where you could explore a wide range of available channels.
Using your Roku remote, navigate through the Channel Store by moving the cursor or highlighter on the screen.
you could often search by channel name, category, or even keywords related to the content.
Take a moment to review the channel details to confirm that you have selected the correct channel for removal.
Ensure that you are not accidentally selecting a channel that you still want to keep on your Roku rig.
Once you are confident in your choice, move on to the next step to initiate the removal process.
Any personalized prefs, preferences, or saved content associated with that channel will also be removed.
Double-check the channel name and check that it matches the channel you intended to remove.
This helps prevent accidentally deleting the wrong channel.
After confirming the removal, your Roku gear will initiate the process of uninstalling the channel.
Once the removal process is complete, your Roku equipment will automatically navigate back to the home screen.
On the home screen, youll typically see the remaining channels that are still installed on your equipment.
Look for the icon or tile representing the deleted channel.
If the channel is no longer displayed, it means that the removal was successful.
If, after refreshing the home screen, the channel you removed still appears, do not worry.
Give your Roku gear a few minutes and try refreshing the home screen again.
You have successfully removed a channel from your Roku machine.
Now, continue to the next step to learn an alternative method for removing channels via the Roku website.
This step signifies the successful removal of the unwanted channel from your Roku equipment.
To ensure that the removal is complete, its essential to kickstart your Roku rig.
Restarting your Roku rig is a simple process.
Locate the power button on your equipment or unplug the power cord for a few seconds.
The removed channel should no longer appear on the home screen or in the list of installed channels.
Double-check that you followed each step accurately to ensure a successful removal.
By completing this step, you have fully removed the unwanted channel from your Roku gadget.
Enjoy a streamlined, tailored streaming experience with your favorite channels!
Now, you have learned an alternative method for removing channels via the Roku website.
In this article, we discussed the step-by-step process of removing a channel from your Roku gear.
Take the time to double-check your choices and review the channel details before proceeding with the removal.
Enjoy a clutter-free home screen and a personalized selection of channels, tailored to your tastes and interests.
