As technology advances, smartphones and tablets come equipped with onboard storage to store various types of media.
Its important to note that not all devices support external storage via an SD card.
This process ensures that your files are securely transferred and readily available on the new storage medium.
Lets dive into the process and learn how to efficiently move your pictures to an SD card!
Heres how you’ve got the option to check:
1.
Start by searching for the specifications of your rig.
This information can usually be found on the manufacturers website or in the user manual.
Look specifically for details about external storage or SD card compatibility.
They will be able to provide you with accurate information about whether your unit supports an SD card.
Another way to determine SD card compatibility is by checking the physical components of your gear.
Look for a slot or tray that is designed to accommodate an SD card.
This may be located on the side, back, or beneath the battery cover of your unit.
If your machine has a removable back cover, open it to locate the battery.
Some devices have the SD card slot placed adjacent to the battery.
In such cases, youll need to utilize the slot properly to enable external storage functionality.
Step 2: Inserting the SD card into your rig
1.
Power off your rig.
Locate the SD card slot on your gadget.
The slot is typically found on the side, back, or beneath the battery cover of your unit.
Once the slot is accessible, gently insert the SD card into the appropriate slot.
Pay attention to the correct orientation of the card.
Push the card gently until it fits securely into the slot.
Take care not to apply excessive force, as it may damage the card or the slot.
In such cases, follow the instructions provided by the manufacturer to pick the SD card option.
Once the SD card is properly inserted, replace the back cover if applicable and power on your gadget.
Your unit should now recognize the SD card as external storage.
We will cover this in the next step.
The steps for enabling the SD card may vary depending on the equipment and operating system.
Here are some general guidelines:
- fire up the configs menu on your equipment.
Look for the Storage or gear storage option in the parameters menu.
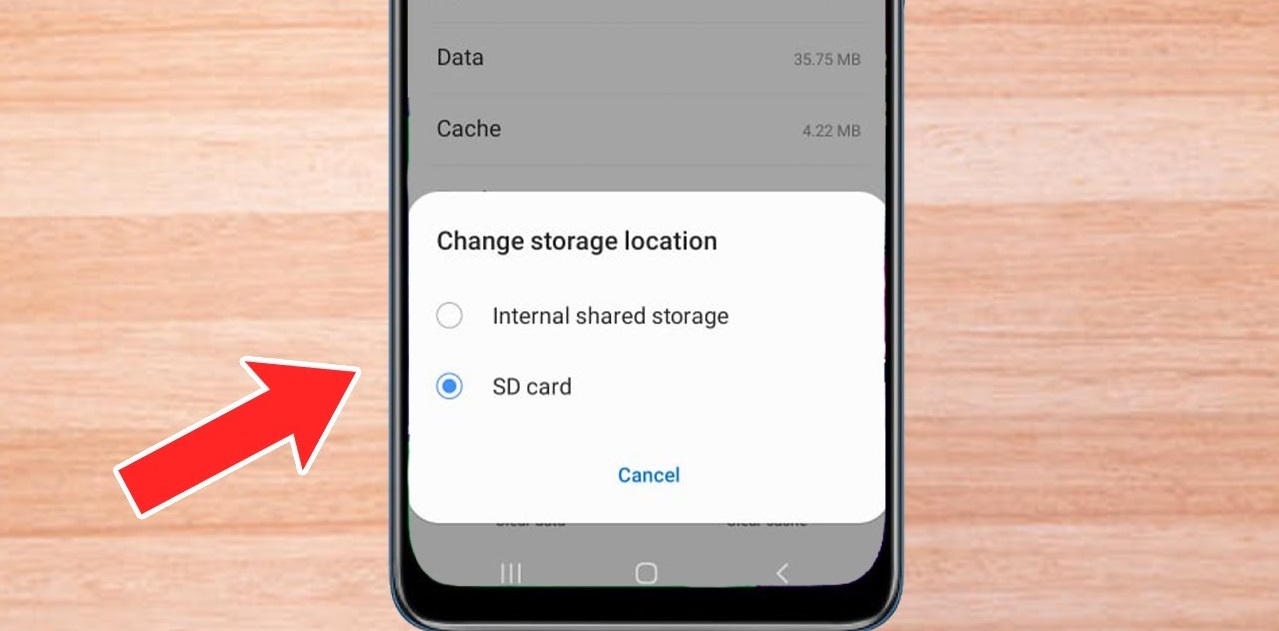
Within the storage options, you should see an option related to the SD card.
It may be labeled as SD card, External storage, or something similar.
Tap on the SD card option to access its tweaks.
Here, you may find an option to Mount or Format the SD card.
Once the formatting process is complete, you may need to manually initiate the SD card as external storage.
Look for a toggle switch or an option that allows you to unlock the SD card.
We will cover this process in the next step.
This app allows you to navigate through the internal storage and SD card.
Navigate to the location where your pictures are currently stored.
- pick the pictures you want to move to the SD card.
Once the desired pictures are selected, look for an option to Move or Cut the pictures.
This option is usually represented by an icon with scissors or an arrow pointing to the right.
Depending on the number and size of the pictures, the transfer process may take some time.
Avoid interrupting the process or closing the file manager app until the transfer is complete.
They should now be stored on the SD card rather than the devices internal storage.
Lets move on to the next step to ensure that the pictures have been successfully transferred.
This is the default app for viewing and managing pictures.
Navigate to the location where your pictures are stored.
Scroll through the pictures and find out if the transferred photos are visible.
This helps ensure the integrity and completeness of the transferred photos.
Repeat this process for multiple albums or folders if you have organized your pictures in different locations.
Consider creating a backup of your pictures on a computer or using cloud storage services to ensure their safety.
Step 6: Safely unmounting the SD card
- pop pop the controls menu on your rig.
Within the storage tweaks, you should find the option related to the SD card.
It may be labeled as SD card, External storage, or something similar.
Tap on the SD card option to access its controls.
Look for an option toUnmount or Eject the SD card.
This option is typically represented by an icon with a downward arrow or a similar symbol.
Once you tap on the Unmount or Eject option, your unit will prepare the SD card for removal.
Gently remove the SD card from the slot or tray.
This helps prevent potential data corruption or loss.
Remember to regularly back up your pictures, especially when you make significant changes to storage locations.
Keep in mind that the specific steps may vary slightly depending on your unit and operating system.
Enjoy the extra storage space and organized file management that the SD card brings!
