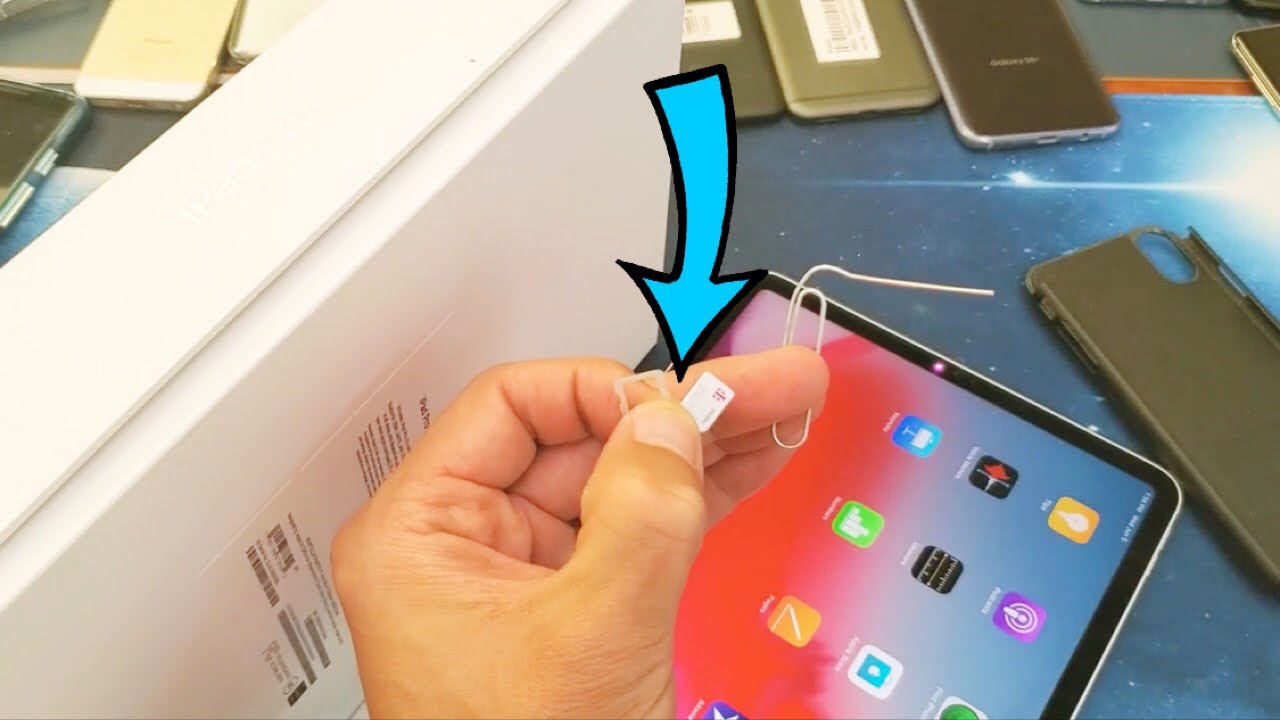
Look for a small tray with a pinhole next to it, typically near the volume buttons.
Insert the eject tool or unfolded paperclip into the pinhole next to the tray, applying gentle pressure.
This will release the tray, allowing you to carefully pull it out from the machine.
These models rely solely on Wi-Fi connectivity and do not support cellular data or calls.
While newer models typically use nano-SIM cards, older models may be compatible with micro-SIM cards.
The SIM card should slide in easily, with minimal resistance.
Take care to align the tray properly to avoid any misalignment or potential damage.
This step ensures that you have full access to the machine’s prefs and connectivity options.
dive into the configs Menu: Navigate to the configs app on your iPad’s home screen.
The configs app features a gear icon and is typically located among the other app icons.
Tap on the parameters app to dive into the equipment’s parameters and configuration options.
Select Wi-Fi: Within the configs menu, locate and tap on the “Wi-Fi” option.
This action will prompt your iPad to scan for available Wi-Fi networks in the vicinity.
The Wi-Fi menu displays a list of detected networks, including both public and private Wi-Fi connections.
Once the correct password is entered, your iPad will establish a connection to the selected Wi-Fi web link.
Finally, navigating the on-screen prompts to activate your SIM card encapsulated the culmination of the activation process.
